Overview
A 6‑inch round cake is perfect for intimate gatherings. This guide shows how to slice it into equal wedges, ensuring each bite contains a balanced crumb and frosting. By marking a 1‑inch radius from the center, you create 12 standard servings or 6 generous ones. Perfect for parties or solo treats.!!!
Tools Needed
Essential tools: a sharp serrated knife, optional cake leveler, measuring tape or ruler, and a clean cutting board. Keep knife clean to avoid sticking. A leveler smooths tops, while a tape ensures precise 1‑inch wedges. These basics guarantee even slices. Use a ruler for precise cuts. and sharp knife

Sharp Serrated Knife
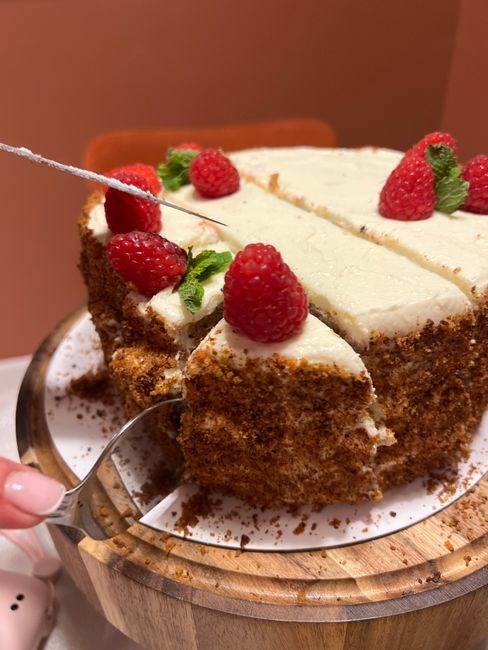
When slicing a 6‑inch cake, the knife’s edge is your most trusted ally. A serrated blade cuts through the cake’s crumb and frosting without crushing the delicate layers. The saw‑tooth design grips the frosting, preventing slippage, while the sharp points cleanly separate the wedges. For best results, choose a knife with a 6‑inch blade length; this matches the cake’s diameter and allows for smooth, even cuts. Keep the blade clean and dry before use: a damp or dull edge can cause the cake to stick, resulting in uneven portions. After each cut, wipe the blade with a damp cloth to remove crumbs, ensuring the next slice is as crisp as the first. A high‑quality serrated knife also reduces the risk of tearing the frosting, preserving the cake’s aesthetic appeal. When you’re ready to serve, the knife’s sharpness guarantees that each wedge is crisp on the outside and soft on the inside, delivering a perfect bite every time. Use the knife in a single, steady motion from the center outward, and let the serrations do the work—no need to force the blade through the cake. This technique not only saves time but also ensures that every slice is uniform, making your 6‑inch cake look as good as it tastes.
Safety is paramount: keep fingers clear of the blade’s path, avoid sudden jerks, and never cut with a knife that feels loose or dull. A serrated knife ensures clean, even slicesand protects the cake from damage
Additionally, storing the knife properly—placing the blade in a protective sheath or wrapped in a soft cloth—prevents rust and dulling while regular honing on a whetstone restores the serrations’ bite, ensuring that every slice remains crisp, precise, and visually appealing which is essential for both amateur bakers and chefs now. today
Cake Leveler (optional)

A cake leveler is a specialized tool that ensures your 6‑inch cake is perfectly flat on top and sides before cutting. This uniformity is crucial for clean, even slices, especially when the cake has a domed or uneven surface from baking. The leveler typically features a long, straight blade with a handle, and some models include a rotating wheel or a built‑in ruler for precise measurements. To use it, place the cake on a stable surface, align the leveler’s blade with the cake’s highest point, and gently slide the blade down until the top is even. This process removes excess height and creates a level plane, making subsequent wedge cuts precise and more accurate. Many levelers feature a built‑in depth gauge, allowing bakers to set the desired height before slicing, which is especially useful for multi‑layer cakes where each layer must be level before frosting. After leveling, let the cake rest for a few minutes to settle, preventing the wedges from breaking apart during cutting. Clean the blade with warm water and mild soap after each use, then dry thoroughly to avoid rust. Store the leveler in a dry, ventilated area to keep the blade sharp. For home bakers, a simple wooden leveler can suffice, but professional kitchens often prefer a metal model for durability and precision. Using a leveler not only improves the cake’s appearance but also ensures that every bite is consistent in texture and flavor, making your 6‑inch cake a standout centerpiece at any gathering. When the cake is fully leveled, the wedges will have identical thickness, which means each bite will melt evenly in your mouth, and the frosting will stay intact, preventing a messy presentation. A well‑leveled cake also makes it easier to stack multiple tiers, as each layer sits flush, preventing wobble transport.
Measuring Tape or Ruler
Accurate measurements are the backbone of a flawless 6‑inch cake cut. A flexible measuring tape or a sturdy ruler allows you to mark precise wedge boundaries, ensuring each slice contains an equal amount of batter and frosting. Start by placing the cake on a flat surface, then align the tape’s zero mark with the center of the cake. Measure out 1‑inch increments from the center toward the edge; each mark represents a wedge’s width. For a 6‑inch diameter, you’ll have twelve 1‑inch wedges or six 2‑inch wedges, depending on your serving preference. Use a fine‑pointed marker or a piece of masking tape to trace the marks onto the cake’s surface. This visual guide keeps your cuts straight and prevents uneven portions that could lead to wasted cake or uneven frosting distribution. When cutting, keep the knife perpendicular to the cake’s surface and follow the marked lines carefully. If you prefer a more precise approach, a digital ruler with a built‑in laser can project the measurement onto the cake, eliminating the need for physical marks. Always double‑check your measurements before slicing, especially if the cake has a slight dome or uneven top; a leveler can help flatten the surface, but the tape or ruler still provides the exact wedge width. By using a measuring tool, you guarantee consistency in portion size, making the cake look professional and ensuring every guest receives an equal share. This method also simplifies the process for larger batches, as you can replicate the same measurements on multiple cakes, maintaining uniformity across servings. Remember, the key to a successful cut lies in precision; a reliable measuring tape or ruler is your best ally in achieving that. By mastering this technique, you can confidently serve perfectly portioned cakes at any event, impressing guests with both taste and presentation. Practice with a mock cake to refine your skill before the real occasion.
Cutting Technique
Locate the cake’s center with a toothpick. From that point, slice straight to the edge, forming wedges. Keep the knife perpendicular to avoid uneven thickness. Repeat until the cake is divided into equal portions, each wedge containing balanced crumb and frosting for perfect slice.
Marking the Cake Surface
Before slicing, mark the cake to guarantee even portions. Locate the exact center with a toothpick or a small knife; a faint indentation shows where all wedges radiate. Measure 1‑inch increments from the center to the edge with a ruler or measuring tape. For a 6‑inch cake, 12 equal wedges result, each spanning 30° of the circle. To visualize divisions, place a small piece of parchment over the cake and trace 12 radial lines at 30‑degree intervals, or draw 12 straight lines from the center to the rim using a sharp serrated knife for a light score. If you prefer precision, set a circular cutter to a 1‑inch radius, outline the first wedge, rotate 30°, and repeat until the circle is marked. For generous 2‑inch wedges, adjust spacing to 6 lines, each 60° apart. A cake leveler can flatten the top before marking, keeping lines straight and the cake stable during cutting. Let the frosting set slightly so the lines are visible but not deep enough to cut through the cake. This preparatory step guarantees each slice contains the same amount of crumb and frosting, making serving effortless and visually appealing. Remember to keep markings subtle; a faint line guides the knife, and a sharp serrated knife cuts cleanly along the scored path. Use a brush to wipe crumbs from the knife between cuts, keeping each wedge pristine and frosting intact and the cake stays firm for a flawless finish. By following these precise markings, you’ll achieve perfectly uniform wedges that showcase the cake’s texture and flavor, delighting guests with every bite today!
Cutting Wedges from the Center Outward
Begin by placing the marked 6‑inch cake on a stable, flat surface. Hold a sharp serrated knife firmly, aligning its blade with the first radial line. Gently press the knife into the frosting, allowing the blade to follow the scored path. Keep the angle consistent—about 45° to the cake surface—to avoid tearing the crumb. Rock the knife back and forth, letting the serrations slice through the cake without forcing. As you move toward the edge, maintain a steady rhythm; a smooth, even cut yields clean wedges. When you reach the outer rim, lift the knife slightly to separate the slice from the cake. Repeat this motion for each of the 12 wedges, rotating the cake 30° after every cut. If you prefer larger servings, adjust your marks to 6 lines, each 60° apart, and cut only six wedges. For a more precise cut, use a cake leveler to flatten the top before scoring, ensuring the knife travels through a uniform thickness. After each wedge, wipe the knife with a clean cloth to keep frosting from sticking, which helps preserve the shape of subsequent slices. Finally, arrange the wedges on a platter or cake stand, frosting side up, to showcase the even portions and the cake’s delicate crumb structure.
Use a gentle rocking motion to keep the knife from slipping, and pause briefly between cuts to let the cake settle. If the frosting is too soft, chill the cake for a few minutes before slicing. For a decorative touch, dust each wedge with powdered sugar or drizzle a thin glaze for a glossy finish. Enjoy the perfect bite and share
Using a Circular Cutter for Even Portions

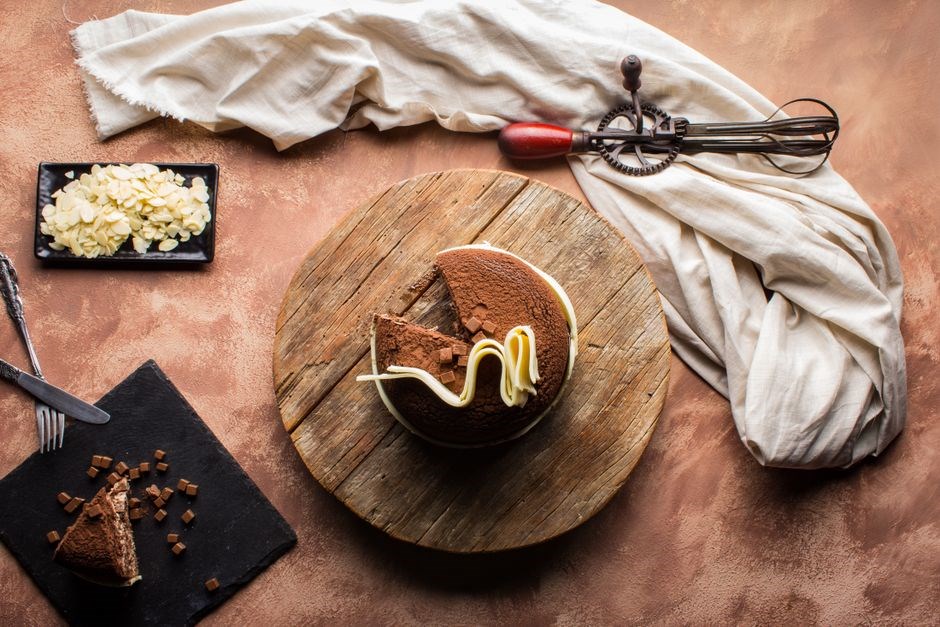
When slicing a 6‑inch cake, a circular cutter can produce perfectly uniform wedges. Place the cutter on the cake’s center, aligning its edge with the first marked line. Press gently, allowing the cutter’s rim to glide through the frosting and crumb. The cutter’s diameter should match the desired wedge width—typically 1‑inch for standard servings. After the first cut, rotate the cake 30° and repeat. For larger portions, use a 2‑inch cutter and rotate 60° between cuts, yielding six generous wedges. The cutter’s smooth edge eliminates the need to rock a knife, reducing the risk of uneven slices. Keep the cake cool to prevent frosting from melting; a chilled surface ensures the cutter’s rim stays true to the cake’s shape. After cutting, lift the cutter carefully to avoid tearing the crumb. If the cake has a thick frosting layer, trim the top with a knife before using the cutter to avoid excess frosting on the wedges. Store unused wedges in an airtight container to maintain moisture. A circular cutter also makes it easier to present the cake on a stand, as each wedge is symmetrical and visually appealing. For a decorative touch, dust the wedges with powdered sugar or drizzle a glaze before serving. This method guarantees consistent portion sizes and a professional look for any gathering. Whether you’re hosting a birthday, a bridal shower, or simply treating yourself, this method ensures every slice looks as good as it tastes, making your 6‑inch cake the centerpiece of any celebration. Serve with cocoa dust for extra flair!!!
Portion Sizing for a 6‑inch Cake
With a 6‑inch cake, you can cut 12 standard 1‑inch wedges or 6 generous 2‑inch wedges. Measure from the center to the edge, mark 30° intervals for 12 pieces, or 60° for 6. This ensures equal portions, balanced crumb, and consistent frosting on every slice. Ideal for small gatherings, each slice feels right
Standard 1‑inch Wedge Servings (12 portions)
For a 6‑inch round cake, the most common way to serve guests is to cut the cake into 12 equal wedges, each roughly 1‑inch wide at the outer edge. Begin by placing a small, sharp knife or a cake leveler at the center of the cake. From that point, measure a 1‑inch radius outward toward the rim. Mark the cake surface lightly with a knife or a piece of parchment paper to indicate the boundary of each wedge. Once the marks are in place, use a steady, gentle sawing motion to cut from the center to the edge, following the lines. The result is a set of 12 wedges that are uniform in size, ensuring that every bite contains a balanced amount of cake and frosting. This method is ideal for small gatherings, family celebrations, or when you want to offer a modest portion to each guest. By keeping the wedge width at 1 inch, you maintain a consistent texture and flavor profile across all servings. Additionally, cutting the cake in this manner allows for easy presentation on a cake stand or a simple platter, making it both practical and visually appealing. Remember to use a fresh, sharp knife to avoid crushing the delicate crumb, and consider chilling the cake slightly before cutting to reduce sticking and preserve the integrity of the frosting. These small steps help ensure that each slice is as delightful as the last. When serving, arrange the wedges in a circular pattern, ensuring that the frosting faces upward for an attractive display. If you prefer a more formal presentation, you can place a small decorative topper on each wedge or drizzle a complementary glaze over the top. Finally, store any leftovers in an airtight container, covering the surface with parchment to keep the frosting from drying out. This simple yet effective approach guarantees that every guest receives a perfectly portioned slice that showcases the cake’s flavor and design. For those who enjoy a sweeter experience, you can sprinkle a light dusting of powdered sugar over the top of each wedge before serving, adding a subtle crunch and visual appeal. Alternatively, a drizzle of chocolate or caramel sauce can enhance the flavor profile, turning each slice into a mini dessert. When cutting, keep the knife at a slight angle to ensure clean cuts and avoid crushing the frosting. A small, serrated knife works best for this purpose. If you’re cutting a cake that has been frosted with buttercream, consider chilling it for 15–20 minutes before slicing to firm up the frosting, making the cuts smoother. These practical tips help maintain the cake’s aesthetic and texture, ensuring a memorable experience for all attendees. Remember to serve each wedge promptly to preserve the cake’s moist crumb and ensure every guest enjoys the full flavor experience now quick.
Generous 2‑inch Wedge Servings (6 portions)

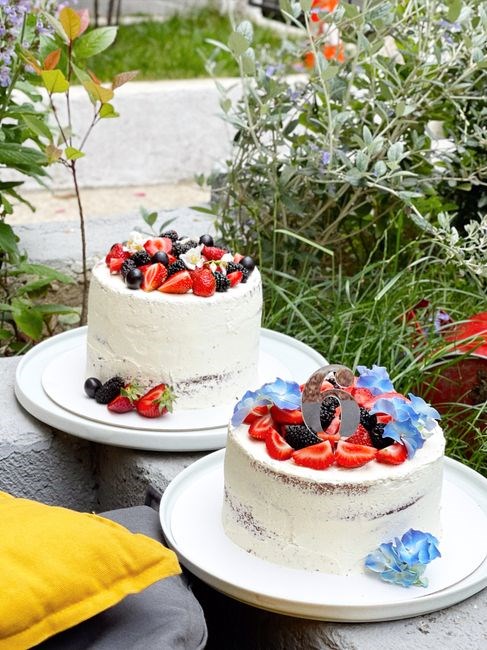
To create six generous wedges from a 6‑inch round cake, start by marking a 2‑inch radius from the center to the edge. Use a sharp knife or a cake leveler to draw a line at each 2‑inch interval, ensuring the cuts are straight and even. Once the marks are in place, slice from the center to the rim along the lines, gently rocking the knife to keep the crumb intact. Each wedge will be about 2 inches wide at the outer edge, providing a hearty portion that showcases both cake and frosting. This method is ideal for guests who prefer larger bites or for special occasions where a more substantial serving is desired. For a polished presentation, arrange the wedges on a cake stand or a decorative platter, frosting side up, and add a small garnish such as a fresh berry or a dusting of powdered sugar. If the cake has a delicate frosting, chill it for 10–15 minutes before cutting to firm the surface and reduce sticking. When serving, offer a small plate or napkin to keep the frosting from dripping. Store leftovers in an airtight container, covering the top with parchment paper to maintain moisture. This simple technique ensures each slice is uniform, visually appealing, and deliciously satisfying. If you prefer a lighter bite, trim the frosting to the outer rim before cutting, allowing the cake crumb to shine through. For a festive touch, drizzle a thin line of colored ganache over each wedge after slicing. Keep the cake chilled until serving to preserve freshness, especially in warm weather. and enjoy.ok!
Serving & Storage Tips
Serve wedges on a cake stand, frosting side up. Keep cake chilled until serving. Store in airtight container, cover top with parchment. For leftovers, re‑freeze frosting. Add fresh berries for garnish. Keep at 35°F to maintain freshness. Keep chilled until ready to serve!
Plating Wedges on a Cake Stand
When the cake is cut into wedges, the presentation can elevate the whole experience. Begin by selecting a stand that complements the cake’s color and style—metallic or wooden, tall or low, and place it on a clean, flat surface. Arrange the wedges in a circular pattern, frosting side up, so each slice is visible. For a 6‑inch cake, a 12‑inch stand works well, allowing space between wedges for a balanced look. If you prefer a more formal display, use a tiered stand; place the larger wedges on the bottom tier and the smaller ones on the top tier. This not only showcases the cake’s layers but also creates a visual hierarchy that guides the eye. To keep the wedges from sliding, lightly dust the stand’s surface with powdered sugar or a small amount of flour; this gives the wedges a subtle grip without affecting the cake’s flavor. When plating, use a small, clean plate for each wedge to avoid cross‑contamination and to keep the presentation tidy. If you’re serving guests, consider adding a small garnish—such as a sprig of mint, a dusting of cocoa powder, or a few edible flowers—next to each wedge. This adds color and a touch of elegance. Finally, keep the plated wedges covered with a clean cloth or a light plastic wrap to protect them from dust and to maintain moisture. When guests are ready to serve, lift the stand carefully, allowing each wedge to fall gracefully onto its plate. This approach ensures that every slice is presented beautifully, enhancing both the visual appeal and the tasting experience. Enjoy the celebration with joy.!!