
Lawn Mower Maintenance Checklist PDF: A Comprehensive Guide
Maintaining a pristine lawn demands consistent effort, and a detailed PDF checklist ensures your mower’s longevity and peak performance throughout every mowing season, effortlessly․
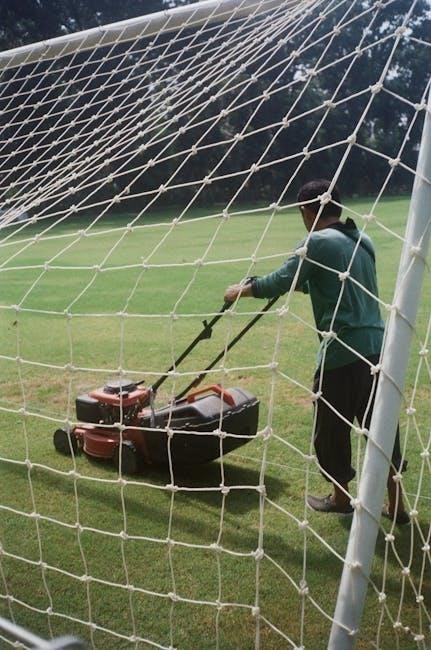
Lawn mower maintenance is often overlooked, yet it’s the cornerstone of a healthy, beautifully manicured lawn and a long-lasting machine․ Regular upkeep isn’t merely about aesthetics; it directly impacts the mower’s efficiency, reduces the risk of costly repairs, and extends its overall lifespan․ A well-maintained mower delivers a cleaner cut, promoting healthier grass growth, while minimizing strain on the engine․
This guide provides a comprehensive overview of essential lawn mower maintenance tasks, structured around a seasonal schedule․ We’ll delve into everything from pre-season preparation to winterization, ensuring your mower is always ready to tackle the demands of lawn care․ Utilizing a lawn mower maintenance checklist PDF will streamline this process, offering a convenient and organized approach to keeping your equipment in top condition․ Consistent attention to detail will yield remarkable results․
Why a Maintenance Checklist is Crucial
Employing a lawn mower maintenance checklist isn’t simply a good practice—it’s essential for maximizing your investment and ensuring optimal performance․ A checklist provides a systematic approach, preventing you from overlooking critical tasks like blade sharpening, oil changes, or air filter replacements․ This proactive strategy minimizes the likelihood of unexpected breakdowns during peak mowing season, saving you time and money on repairs․
Furthermore, a PDF checklist offers portability and convenience, allowing you to easily reference maintenance schedules while in the garage or shed․ It fosters consistency, ensuring each task is completed thoroughly and at the appropriate interval․ Regular maintenance also contributes to the mower’s safety, reducing the risk of accidents caused by faulty equipment․ Ultimately, a checklist empowers you to maintain control over your mower’s health and longevity․
Pre-Season Maintenance (March)
March marks the ideal time to prepare your lawn mower for the growing season, focusing on blade sharpening and initial adjustments for optimal cutting performance․
Sharpening Mower Blades
Sharp mower blades are paramount for a healthy, clean cut, preventing grass tear and disease․ Dull blades inflict stress on the lawn, leading to brown tips and increased vulnerability․ Begin by disconnecting the spark plug for safety – a crucial first step! Remove the blade, securely mounting it in a vise․ Utilize a metal file or a blade sharpening tool, maintaining the original bevel angle․
Ensure balanced sharpening on both sides of the blade․ After sharpening, meticulously check the blade for balance; an imbalanced blade causes excessive vibration and potential damage․ Reinstall the blade, tightening the bolt to the manufacturer’s specified torque․ Regularly sharpening, particularly in March as pre-season prep, ensures efficient mowing and a beautifully maintained lawn throughout the season․ Consider professional sharpening if you lack confidence or tools․
Checking and Adjusting Cutting Height
Proper cutting height is vital for lawn health, influencing grass vigor and preventing scalping․ Most mowers feature adjustable cutting heights, typically controlled by levers or spacers on each wheel․ Before the first use, and periodically throughout the season, verify the wheels are set to the desired height – often starting higher than anticipated․
Ensure all wheels are adjusted to the same height for an even cut․ A general rule is to never remove more than one-third of the grass blade length at a time․ Adjust the height based on grass type and desired lawn appearance․ Regularly inspect the adjustment mechanism for smooth operation and secure locking․ Correct height promotes deeper root growth and a resilient, attractive lawn․
Inspecting and Tightening Bolts & Fasteners
Regularly inspecting and tightening bolts and fasteners is crucial for safe and efficient lawn mower operation․ Vibrations from use can loosen these components over time, potentially leading to instability or even component failure․ Before each mowing session, or at least monthly, systematically check all visible bolts, screws, and nuts․
Pay close attention to those securing the engine, blade adapter, wheels, and handle․ Use the correct size wrench or socket to avoid stripping the fasteners․ Tighten them securely, but avoid over-tightening, which can cause damage․ A pre-use inspection checklist should include this step, ensuring a safe mowing experience and preventing costly repairs down the line․

Monthly Maintenance Tasks (April ⎼ September)
Consistent upkeep during peak mowing season—April through September—is vital; monthly tasks include blade checks, filter cleaning, spark plug reviews, and oil level monitoring․
Monthly Blade Inspection & Sharpening (As Needed)
Regular blade inspection is paramount for a healthy lawn and efficient mowing․ Each month, carefully examine the blades for nicks, dullness, or bends – always disconnecting the spark plug first for safety․ Dull blades tear grass instead of cutting cleanly, leading to brown tips and increased susceptibility to disease․
Sharpening frequency depends on your lawn’s conditions; sandy soil or frequent encounters with debris necessitate more frequent sharpening․ A properly sharpened blade delivers a crisp, clean cut, promoting healthier grass growth․ You can sharpen blades yourself with a metal file or grinding wheel, or opt for professional sharpening services․ Remember to balance the blade after sharpening to prevent vibration and uneven cutting․ A balanced blade extends the life of your mower and ensures a superior cut quality․
Air Filter Cleaning/Replacement
Maintaining a clean air filter is crucial for optimal engine performance and longevity; A clogged air filter restricts airflow, reducing power and increasing fuel consumption․ Inspect the air filter monthly, and clean or replace it as needed․ Foam filters can typically be washed with soap and water, allowed to dry completely, and then lightly oiled before reinstallation․
Paper filters, however, should be replaced entirely when dirty․ The frequency of replacement depends on mowing conditions; dusty environments require more frequent changes․ Refer to your owner’s manual for the correct filter type and replacement instructions․ A clean air filter ensures the engine receives adequate air for efficient combustion, preventing damage and maximizing performance throughout the mowing season․ Don’t underestimate this simple, yet vital, maintenance step!

Spark Plug Inspection
Regular spark plug inspection is vital for ensuring reliable engine starting and efficient combustion․ Inspect the spark plug monthly for signs of wear, fouling, or damage․ A properly functioning spark plug delivers the necessary spark to ignite the air-fuel mixture․ Look for carbon buildup, oil residue, or a cracked porcelain insulator․
If the spark plug appears worn or fouled, replace it with a new one of the correct type, as specified in your owner’s manual․ Gapping the spark plug correctly is also essential for optimal performance․ A worn or improperly gapped spark plug can cause starting difficulties, reduced power, and increased fuel consumption․ Replacing a spark plug is a relatively inexpensive and straightforward maintenance task that can significantly improve your mower’s performance․
Oil Level Check & Top-Up
Consistent oil level checks are paramount for engine health, preventing premature wear and ensuring smooth operation․ Before each use, and especially as part of your monthly maintenance, verify the oil level using the dipstick․ Ensure the mower is on a level surface for an accurate reading․ Add oil as needed, using the type specified in your owner’s manual – typically a SAE 30 or 10W-30 oil․
Low oil levels can lead to increased friction, overheating, and ultimately, engine failure․ Overfilling can also be detrimental, potentially causing oil to enter the carburetor․ Regularly topping up the oil maintains proper lubrication, extending the life of your lawn mower engine and guaranteeing optimal cutting performance throughout the season․

Mid-Season Maintenance (June/July)
During peak mowing season, focus on intensive checks like underdeck cleaning, belt inspections, and wheel adjustments to maintain optimal performance and safety․
Underdeck Cleaning – Removing Grass Clippings
Accumulated grass clippings under the mower deck significantly impact cutting quality and can contribute to rust and corrosion․ Regularly removing these clippings is paramount for maintaining a healthy lawn and extending the life of your mower․ Begin by disconnecting the spark plug for safety – a crucial first step! Then, carefully tilt the mower, ensuring fuel doesn’t leak․
Use a scraper or putty knife to dislodge the caked-on grass․ A garden hose with a nozzle can then be used to thoroughly wash away remaining debris, being careful not to spray water directly into the engine or electrical components․ Allow the deck to dry completely before resuming operation․ Consistent underdeck cleaning prevents build-up, ensuring efficient cutting and reducing strain on the engine․ Ignoring this task can lead to uneven cuts and potential mechanical issues, ultimately diminishing your lawn’s appearance and your mower’s performance․
Belt Inspection (Drive & Blade)
Drive and blade belts are critical components transferring power, and regular inspection is vital for safe and efficient operation․ Disconnect the spark plug before commencing any belt-related maintenance! Visually examine the belts for cracks, fraying, glazing, or excessive wear․ A cracked or frayed belt must be replaced immediately to prevent sudden failure during operation․
Check belt tension; it should be firm but not overly tight․ Too loose, and the belt will slip, reducing cutting power․ Too tight, and it can strain the engine and accelerate wear․ Consult your mower’s manual for specific tensioning instructions․ If the belt appears worn or damaged, replacement is recommended․ Proper belt maintenance ensures smooth operation, prevents costly repairs, and safeguards against potential hazards associated with a broken belt during mowing․ Ignoring belt health compromises performance and safety․
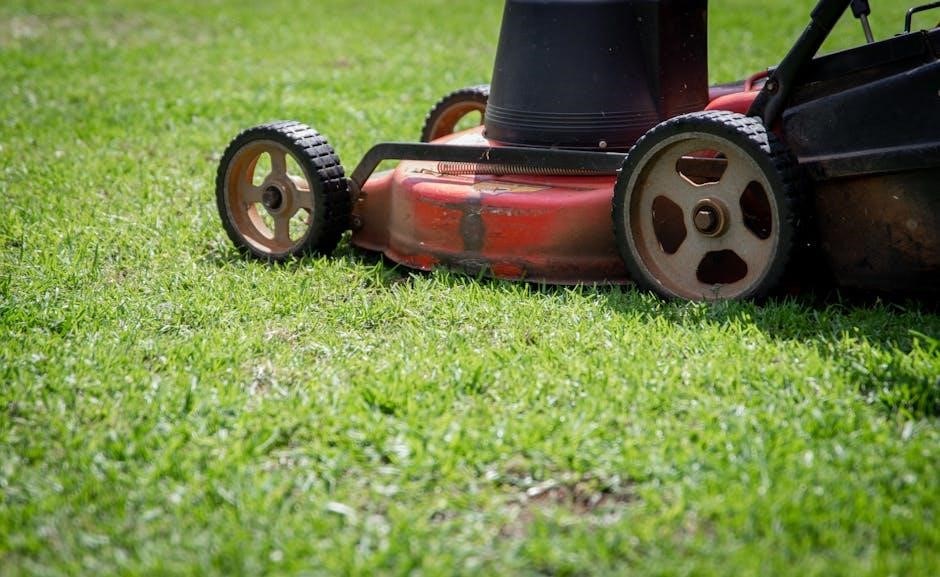
Wheel Inspection & Adjustment
Regular wheel inspection is crucial for a smooth, even cut and prevents scalping․ Begin by checking each wheel for secure attachment; tighten any loose bolts or nuts; Inspect the tires for wear, damage, or proper inflation – underinflated tires lead to uneven cutting and increased strain on the engine․ Examine the wheel bearings for play or roughness; any wobble indicates potential bearing failure requiring replacement․
Adjust wheel height to achieve the desired cutting height and ensure all wheels are set to the same level․ Uneven wheel heights result in an uneven cut․ Remember that, when shipped, wheels are often set low; adjust before the first use! Proper wheel adjustment contributes to a professional-looking lawn, extends mower life, and enhances overall mowing efficiency․ Don’t overlook this simple yet impactful maintenance step․

Pre-Winterization (October/November)
Preparing your mower for winter storage—stabilizing fuel, removing the battery, and thoroughly cleaning—safeguards against damage and ensures a swift start next season․
Fuel System Stabilization
As winter approaches, gasoline left in the mower’s fuel system can degrade, forming gum and varnish deposits that clog the carburetor and hinder starting next spring․ To prevent this, fuel stabilization is crucial․
Add a fuel stabilizer, readily available at hardware stores, to the gasoline in the tank according to the product’s instructions․ Run the engine for a few minutes to circulate the stabilized fuel throughout the fuel lines and carburetor․ This ensures complete protection․
Alternatively, if you prefer, you can completely drain the fuel tank․ However, this requires careful handling of gasoline and may not remove all fuel from the carburetor․ Stabilizing is generally the recommended method for most homeowners․ Always follow safety precautions when working with fuel!
Battery Removal & Storage
For lawn mowers equipped with electric start, removing the battery before winter storage is essential to prevent corrosion and potential discharge․ Disconnect the battery cables, starting with the negative terminal, to avoid short circuits․
Clean the battery terminals with a wire brush or a specialized battery terminal cleaner to remove any corrosion buildup․ This ensures a good connection when you reinstall the battery in the spring․
Store the battery in a cool, dry place that doesn’t freeze․ Ideally, maintain a partial charge throughout the winter by using a battery tender or trickle charger․ This prevents sulfation and extends the battery’s lifespan․ Avoid storing the battery directly on a concrete floor․
Complete Cleaning & Inspection
Before long-term storage, a thorough cleaning is paramount․ Remove all grass clippings and debris from the mower deck, engine, and cooling fins․ Use a scraper and a brush, avoiding high-pressure water which can damage components․
Inspect all parts for wear and tear, including belts, hoses, and tires․ Check for loose bolts and fasteners, tightening them as needed․ Examine the mower housing for any cracks or damage․
Lubricate moving parts, such as wheel axles and pivot points, with a suitable lubricant․ This prevents corrosion and ensures smooth operation when you start the mower again in the spring․ Document any needed repairs or replacements for your spring maintenance checklist․

Detailed Component Checks
Proactive inspection of key components—engine oil, spark plugs, and air filters—is crucial for optimal performance and extending your lawn mower’s reliable lifespan․
Engine Oil Change Procedure
Regular oil changes are paramount for a healthy lawn mower engine, ensuring smooth operation and preventing premature wear․ Begin by warming the engine briefly, then disconnect the spark plug for safety․ Locate the oil drain plug, typically underneath the mower, and position a suitable oil drain pan․ Carefully remove the plug, allowing the old oil to drain completely․
Once drained, replace the plug and tighten securely․ Next, locate the oil fill cap and remove it․ Using a funnel, slowly pour in the recommended amount of fresh oil, specified in your mower’s manual – typically around 15-20 ounces; Avoid overfilling․ Replace the oil fill cap and wipe away any spills․ Properly dispose of the used oil at a designated recycling center․ Consistent oil changes, usually annually or after 25-50 hours of use, will significantly extend your mower’s life․
Spark Plug Replacement Guide
A faulty spark plug can cause starting difficulties and reduced engine performance․ Always disconnect the spark plug wire before beginning, prioritizing safety․ Using a spark plug socket wrench, carefully remove the old spark plug․ Inspect the old plug – carbon buildup indicates potential fuel mixture issues․ Check your mower’s manual for the correct spark plug replacement; using the wrong one can damage the engine․
Gap the new spark plug to the manufacturer’s specifications using a spark plug gapping tool․ This ensures optimal ignition․ Carefully thread the new spark plug into the engine by hand to avoid cross-threading, then tighten it with the wrench to the recommended torque․ Reconnect the spark plug wire securely․ Replacing the spark plug annually, or when experiencing starting problems, maintains efficient combustion and extends engine life․
Air Filter Maintenance – Cleaning vs․ Replacing
A clean air filter is vital for engine health, preventing debris from entering and causing damage․ Paper filters, commonly found in many mowers, should generally be replaced annually, or more frequently in dusty conditions․ Attempting to clean a paper filter can damage it, reducing its effectiveness․ Foam filters, however, can often be cleaned․
Remove the filter and tap it gently to dislodge loose dirt․ Wash foam filters with mild soap and water, ensuring they are completely dry before reinstalling․ Never use gasoline or solvents to clean filters․ Regularly checking the air filter – monthly during peak season – ensures optimal airflow․ A clogged filter restricts air, leading to reduced power and increased fuel consumption․ Prioritize filter maintenance for a smoothly running mower․

Safety Considerations
Prioritize safety by disconnecting the spark plug before any maintenance, and always wear protective gloves and eye protection during all inspection procedures․
Disconnecting the Spark Plug Before Maintenance
Before commencing any maintenance task on your lawn mower, disconnecting the spark plug is paramount for safety․ This simple step prevents accidental starting during repairs, safeguarding you from potential injuries․ Locate the spark plug, typically near the engine, and carefully detach the wire connected to it․
Ensure the wire is pulled firmly and securely away from the plug․ Some mowers may have a specific spark plug boot release; consult your owner’s manual if unsure․ Once disconnected, secure the wire away from the plug to prevent accidental reconnection․ This precaution eliminates the risk of the engine engaging unexpectedly while you’re working on blades, belts, or other components․
Remember to reconnect the spark plug wire firmly after completing all maintenance procedures before attempting to start the mower․ Always double-check this step to ensure a safe operation․
Wearing Protective Gear (Gloves, Eye Protection)
Prioritizing personal safety during lawn mower maintenance is non-negotiable․ Always wear appropriate protective gear to shield yourself from potential hazards․ Heavy-duty work gloves are essential, protecting your hands from sharp blades, hot engine parts, and abrasive surfaces․ Eye protection, such as safety glasses or goggles, is crucial to prevent debris, grass clippings, and chemicals from entering your eyes․
Consider wearing long sleeves and pants to minimize skin exposure․ Closed-toe shoes are also vital, offering foot protection․ If working with chemicals like fuel stabilizers or cleaners, a respirator might be necessary, depending on ventilation․
Remember, even seemingly minor maintenance tasks can pose risks․ Investing in and consistently using protective gear demonstrates a commitment to your well-being and ensures a safer maintenance experience․

Resources & PDF Downloads
Access printable checklists and manufacturer schedules online, streamlining your lawn mower maintenance; readily available PDF resources ensure optimal performance and longevity․
Finding a Printable Lawn Mower Maintenance Checklist PDF
Locating a comprehensive, printable lawn mower maintenance checklist PDF is surprisingly straightforward in today’s digital landscape․ Numerous websites offer free downloadable versions, catering to various mower types and brands․ A quick online search using keywords like “lawn mower maintenance checklist PDF,” “printable mower maintenance schedule,” or “[mower brand] maintenance checklist” will yield a wealth of options․
Consider checking the manufacturer’s website for your specific mower model; they often provide detailed PDF guides tailored to their equipment․ Reputable home improvement stores and landscaping companies frequently host downloadable checklists as well․ When selecting a checklist, ensure it covers essential maintenance tasks such as blade sharpening, oil changes, air filter cleaning, and spark plug inspections․ Prioritize checklists that are clearly organized, easy to understand, and include space for recording maintenance dates – this will help you stay on top of your mower’s upkeep and extend its lifespan considerably․
Manufacturer-Specific Maintenance Schedules
Utilizing manufacturer-specific maintenance schedules is paramount for optimal lawn mower performance and longevity․ Generic checklists offer a good starting point, but each brand and model possesses unique requirements dictated by engine type, features, and design․ These schedules, often available as downloadable PDFs on the manufacturer’s website, detail precise intervals for tasks like oil changes, filter replacements, and spark plug servicing․
Adhering to these guidelines ensures you’re using the correct lubricants, filters, and parts, preventing potential damage and voiding warranties․ Schedules typically differentiate between normal and severe usage conditions, adjusting maintenance frequency accordingly․ Remember to consult your owner’s manual for specific recommendations and always prioritize the manufacturer’s instructions over generalized advice․ Following these tailored schedules guarantees a well-maintained mower and a beautifully manicured lawn for years to come․