Walker Bag Patterns: A Comprehensive Guide (Free PDF Options)
Discover a wealth of free walker bag patterns in PDF format! Many resourceful websites, like Instructables, offer detailed guides and downloadable patterns.
These patterns empower you to create functional and stylish accessories for walkers, enhancing independence and convenience for users.
What is a Walker Bag and Why Use One?
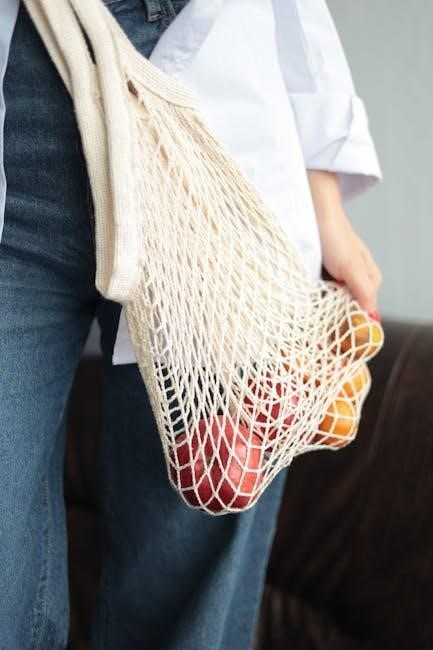
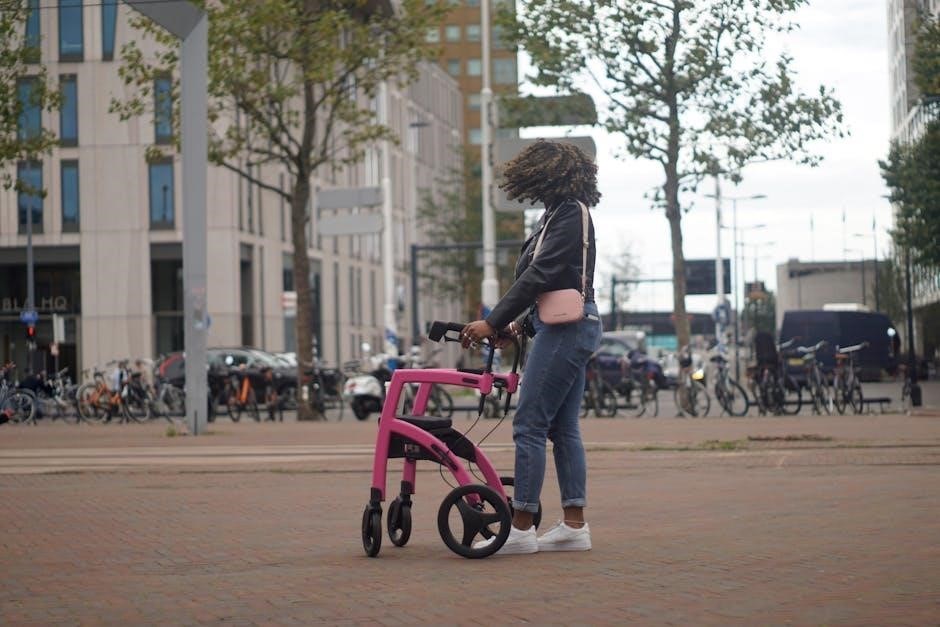
A walker bag is a specially designed accessory that attaches to a walking aid – typically a rollator or walker – providing a convenient carrying solution for personal items. These bags offer a secure and accessible space for essentials like wallets, keys, phones, medications, water bottles, and even small shopping items. They eliminate the need to juggle belongings while navigating with a mobility aid, significantly improving safety and independence.
Traditionally, individuals relying on walkers often resorted to makeshift solutions like plastic bags or awkwardly carried purses. However, these methods are often unstable, uncomfortable, and lack security. A dedicated walker bag addresses these issues by providing a purpose-built, stable, and often padded storage option.
The increasing availability of free walker bag patterns (PDF downloads), as found on platforms like Instructables, empowers users and their caregivers to create customized solutions. These patterns cater to various walker styles and individual needs, offering a cost-effective alternative to purchasing pre-made bags. Ultimately, a walker bag enhances the quality of life for those using mobility aids, promoting greater freedom and self-sufficiency.
Benefits of Using a Walker Bag
Utilizing a walker bag offers a multitude of advantages for individuals who rely on walkers for mobility. Primarily, it provides hands-free convenience, allowing users to maintain balance and stability without struggling to carry personal belongings. This is particularly crucial for seniors or those with limited strength or dexterity.
Enhanced safety is another significant benefit. By securely storing items within the bag, the risk of dropping them and potentially tripping or falling is minimized. Furthermore, having essentials readily accessible – like medications or a phone – can be vital in emergency situations.
The availability of free walker bag patterns (PDF downloads) expands these benefits by enabling customization. Users can select patterns that suit their specific walker model and storage needs. Creating a bag yourself can also be a rewarding and therapeutic activity. Beyond practicality, a well-chosen or handmade walker bag can add a touch of personal style and dignity, fostering a sense of independence and well-being. It’s a simple addition with a profound impact on daily life.
Types of Walker Bags Available
The market, and the world of free walker bag patterns (PDF downloads), offers a diverse range of bag styles to accommodate varying needs and preferences. Front-mounted bags are popular for easy access to frequently used items, attaching directly to the walker’s front frame. Side-mounted bags provide more storage space without obstructing the user’s view, often featuring multiple compartments.
Universal fit bags are designed to be compatible with most standard walkers, while others are specifically tailored for certain models. Some patterns yield insulated bags, ideal for carrying medications or beverages, and waterproof options protect contents from the elements.
Beyond these core types, you’ll find bags with specialized features like zippered closures for security, adjustable straps for a customized fit, and even decorative elements for a personalized touch. The availability of free patterns allows for experimentation and the creation of unique designs. Ultimately, the best type of walker bag depends on the individual’s lifestyle, mobility requirements, and desired level of convenience.
Materials Commonly Used in Walker Bag Construction
When utilizing a free walker bag pattern (PDF), material selection is crucial for durability and functionality. Durable cotton canvas is a popular choice, offering a balance of strength and affordability. Denim, repurposed from old jeans, provides excellent resilience and a classic look. For water resistance, consider oilcloth or laminated cotton, protecting contents from light rain.
Polyester fabrics are lightweight and easy to clean, making them suitable for everyday use. Reinforcements often incorporate heavy-duty interfacing to add structure and prevent sagging. Straps and handles benefit from nylon webbing, known for its exceptional strength.
Beyond the main fabric, consider waterproof lining for added protection, and zippers or Velcro closures for secure storage. The choice of materials impacts the bag’s weight, appearance, and longevity. Utilizing readily available and recycled materials can also make your project more sustainable and cost-effective, especially when working with free patterns.
Finding Free Walker Bag Patterns (PDF Downloads)
Locating free walker bag patterns (PDF downloads) requires exploring online resources dedicated to sewing and crafting. Instructables is a fantastic starting point, frequently hosting user-submitted projects with downloadable instructions. Websites like Pinterest act as visual discovery engines, linking to numerous free patterns hosted on blogs and personal websites.
A targeted Google search using keywords like “free walker bag pattern PDF,” “walker bag sewing pattern,” or “DIY walker bag” yields a wealth of results. Pattern websites often offer a selection of free patterns to attract users, while online sewing communities and forums are excellent places to ask for recommendations.

Remember to carefully review the pattern’s skill level and required materials before downloading. Checking user comments and project photos can provide valuable insights into the pattern’s clarity and accuracy. Always scan downloaded files for safety before opening them.
Popular Free Walker Bag Patterns – Detailed Overview
Several free walker bag patterns (PDF downloads) consistently gain popularity among sewing enthusiasts. The SewUseful Walker Bag, featured on Instructables, stands out for its professional finish and practical design. This pattern focuses on creating a durable and aesthetically pleasing bag, often observed as a solution for seniors needing convenient storage while using walkers.
Many patterns emphasize simple construction, utilizing basic sewing skills and readily available materials. Common features include adjustable straps for secure attachment, multiple pockets for organization, and reinforced seams for durability. Variations exist, ranging from basic tote-style bags to more complex designs with zippered closures and padded interiors.
PDF patterns typically include detailed instructions, pattern pieces, and photographs to guide the sewist through each step. Look for patterns with clear diagrams and well-written explanations to ensure a successful project. User reviews often highlight patterns that are particularly easy to follow or offer unique design elements.

SewUseful Walker Bag: A Step-by-Step Guide
The SewUseful Walker Bag, available as a free PDF pattern on Instructables, begins with gathering your materials: fabric (durable cotton or canvas recommended), interfacing, webbing for straps, and basic sewing supplies. Step one involves cutting out the pattern pieces accurately, ensuring clean edges for a professional finish.
Step two focuses on assembling the bag’s body, typically involving sewing the side and bottom pieces together. Step three incorporates interfacing to provide structure and stability. Step four details attaching the straps, ensuring they are securely fastened to withstand weight.
Steps five through seven cover creating and attaching pockets – internal and external – for organization. Step eight involves reinforcing stress points, like strap attachments, with extra stitching. Finally, step nine details the finishing touches, such as neatening seams and adding any desired embellishments. The Instructables guide provides clear photos for each stage, making it accessible for various skill levels.
Pattern Adjustments for Different Walker Sizes
When utilizing a free walker bag pattern PDF, adjustments are often crucial to accommodate varying walker dimensions. Width adjustments are typically the most common; measure the width of your walker’s front supports and modify the pattern’s bag width accordingly, adding seam allowances.
Height adjustments may be needed if your walker has unusually tall or short supports. Carefully assess the available space and adjust the pattern’s height, ensuring the bag doesn’t interfere with movement. Depth adjustments are less frequent but important if you require a shallower or deeper bag.
To scale the pattern, consider using a grid method or a digital pattern editing software. Always test the adjusted pattern with scrap fabric before cutting into your final material. Remember to maintain proportional adjustments to avoid distorting the bag’s shape. Prioritize a secure and comfortable fit, ensuring the bag doesn’t impede the walker’s functionality or the user’s safety.
Essential Sewing Tools for Walker Bag Projects
Embarking on a free walker bag pattern PDF project requires a focused toolkit. A reliable sewing machine is paramount, ideally with adjustable stitch lengths and widths for varied fabric weights. Sharp fabric scissors are crucial for precise cutting, while a rotary cutter and mat enhance accuracy, especially with thicker materials.
Measuring tools – a ruler, measuring tape, and seam gauge – ensure accurate pattern adjustments and seam allowances. Pins are essential for holding fabric layers together, and a seam ripper proves invaluable for correcting mistakes. Consider using clips instead of pins for vinyl or laminated fabrics.
Hand-sewing needles are useful for detail work and reinforcing stress points. A sturdy thimble protects your fingers during hand-sewing. Don’t forget marking tools like fabric chalk or a disappearing ink pen for transferring pattern markings. Finally, a good iron and ironing board are vital for achieving professional-looking seams and a crisp finish.

Fabric Selection: Durability and Style Considerations
Choosing the right fabric is key when utilizing a free walker bag pattern PDF. Durability is paramount; walkers encounter daily use and varying weather conditions. Canvas, denim, and duck cloth offer excellent resistance to wear and tear. Cordura, a nylon fabric, is exceptionally strong and water-resistant, ideal for outdoor use.
For a softer aesthetic, consider quilted cotton or heavier-weight cotton blends. However, these may require additional reinforcement. Vinyl or laminated cotton provides water resistance but can be trickier to sew. Consider the walker user’s style preferences – prints, colors, and textures can personalize the bag.

Think about the bag’s intended use. A bag for groceries needs robust fabric, while one for personal items might prioritize aesthetics. Lining the bag with a contrasting fabric adds a polished look and extra durability. Always pre-wash fabrics to prevent shrinkage after construction.
Reinforcing Key Stress Points in Walker Bag Construction
When working with a free walker bag pattern PDF, reinforcing stress points is crucial for longevity. Walkers experience significant strain, and a well-constructed bag must withstand this. Focus on areas where the bag attaches to the walker frame – these require robust stitching and potentially webbing straps.
Double-stitch all seams, especially those bearing weight. Consider using a heavier-duty thread, like upholstery thread, for added strength. Reinforce corners with triangular fabric patches or bar tacks. The bottom of the bag, prone to abrasion, benefits from extra layers of fabric or a durable lining.
If your pattern includes handles, ensure they are securely attached with multiple rows of stitching and reinforced with interfacing. Boxed corners provide greater stability and distribute weight more evenly. Adding rivets at key connection points offers exceptional durability. Regularly inspect reinforced areas for wear and tear, and repair promptly.
Adding Pockets and Compartments for Organization
Utilizing a free walker bag pattern PDF doesn’t limit customization! Enhance functionality by incorporating pockets and compartments. Consider the user’s needs – what items will they frequently carry? External pockets are ideal for quick access to tissues, hand sanitizer, or a phone.
Internal compartments, secured with dividers, can organize medications, keys, or wallets. Zippered pockets offer security for valuables. Mesh pockets provide visibility for contents. Vary pocket sizes to accommodate different items. Think about adding a dedicated water bottle holder for convenience.
When attaching pockets, reinforce the seams to prevent tearing under weight. Use interfacing to provide structure and prevent stretching. Consider the placement of pockets to maintain balance and avoid interfering with the walker’s movement. A well-organized walker bag promotes independence and peace of mind for the user.
Attaching the Bag Securely to the Walker
A free walker bag pattern PDF is only useful if the bag attaches safely and reliably! Avoid simply tying the bag to the walker, as this is unstable and potentially dangerous. The most common method involves using straps – either pre-made or created from sturdy fabric.
Reinforced webbing straps are ideal, offering durability and strength. Consider adjustable straps to accommodate different walker frame sizes. Secure the straps to the walker frame using buckles, Velcro, or even sturdy snaps. Ensure the attachment points are strong and won’t easily detach during use.
Distribute the weight evenly across the attachment points to prevent tipping. Regularly inspect the straps and attachment hardware for wear and tear. A secure attachment is paramount for user safety and confidence. Double-check all connections before each use, ensuring the bag remains firmly in place.
Walker Bag Safety Considerations
When utilizing a free walker bag pattern PDF, safety must be the top priority. Overloading the bag can significantly affect the walker’s stability, increasing the risk of falls. Always adhere to the walker’s maximum weight capacity, factoring in the bag’s contents.
Ensure the bag doesn’t interfere with the walker’s wheels or movement. Avoid designs that dangle or obstruct the user’s path. Regularly inspect the bag and its attachments for any signs of wear or damage. Loose straps or weakened seams can create hazards.
Consider visibility – bright colors or reflective materials can enhance the user’s safety, especially in low-light conditions. Avoid placing heavy items high in the bag, as this raises the center of gravity. Prioritize a secure attachment method, as discussed previously, to prevent the bag from detaching unexpectedly. A well-designed and safely attached bag enhances mobility, not compromises it.
DIY vs. Purchasing a Pre-Made Walker Bag
Choosing between a DIY walker bag, utilizing a free walker bag pattern PDF, and a pre-made option depends on your skills, time, and budget. DIY offers complete customization – fabric choice, pocket placement, and size adjustments are all within your control. It’s a rewarding project for those comfortable with sewing, potentially saving money.
However, pre-made bags offer convenience and often feature professionally finished details. They’re ideal for those lacking sewing experience or needing an immediate solution. While potentially more expensive upfront, they guarantee quality and durability.
Consider the complexity of the pattern. A simple free PDF might be a good starting point for beginners, while intricate designs require more expertise. Factor in the cost of materials for DIY – fabric, interfacing, hardware – which can add up. Ultimately, assess your needs and capabilities to determine the best option; Both routes provide a functional solution for carrying essentials while using a walker;
Care and Maintenance of Your Walker Bag
Proper care extends the life of your walker bag, whether crafted from a free walker bag pattern PDF or purchased pre-made. Regular cleaning is crucial; most fabrics can be spot-cleaned with mild soap and water. For deeper cleaning, check the fabric’s care label – some materials may be machine washable, while others require hand washing.
Inspect seams and attachment points frequently, especially if the bag carries heavy items. Reinforce any loose stitching promptly to prevent tears. Pay attention to the walker attachment method; ensure straps or Velcro remain secure. Avoid overfilling the bag, as excessive weight strains seams and attachments.
When not in use, store the bag in a dry place to prevent mildew. For bags made from delicate fabrics, consider using a protective spray. Consistent maintenance, even with a simple bag created from a free PDF, ensures its longevity and continued functionality.
Troubleshooting Common Walker Bag Sewing Issues
Even with a detailed free walker bag pattern PDF, sewing challenges can arise. A frequent issue is fabric slippage – using pins and a walking foot on your sewing machine helps immensely. If seams pucker, adjust your stitch length or try a lighter presser foot pressure. Difficulty attaching the bag securely to the walker often stems from inaccurate measurements; double-check the pattern and walker dimensions.
Another common problem is weak stress points. Reinforce these areas (handle attachments, strap connections) with extra stitching or interfacing. If your fabric frays easily, finish seams with a zigzag stitch or serger. When working with thicker materials, ensure your needle is appropriately sized to prevent skipped stitches.
Don’t be discouraged by initial setbacks! Many online sewing communities offer support and solutions. Remember, even experienced sewers encounter problems – utilizing resources and patience will lead to a successfully constructed walker bag from your free PDF pattern.
Resources for Further Walker Bag Inspiration & Patterns
Beyond readily available free walker bag pattern PDFs, a vibrant online community awaits! Websites like Instructables consistently feature user-submitted projects, offering diverse designs and construction techniques. Pinterest serves as a visual treasure trove, brimming with walker bag ideas and links to various pattern sources.
Etsy, while often featuring paid patterns, can inspire customization and provide insights into professional designs. Facebook groups dedicated to sewing and adaptive crafting are excellent platforms to ask questions, share progress, and discover new resources. Don’t overlook YouTube tutorials – visual learners will benefit from step-by-step demonstrations.
For more complex designs or specialized features, consider exploring pattern marketplaces like LoveCrafts or Ravelry. Remember to always check pattern reviews before starting a project. Utilizing these resources will expand your skills and help you create the perfect, personalized walker bag using a free PDF as a starting point!