Blog

orion grid connect camera manual

Welcome to the Orion Grid Connect Camera Manual‚ your comprehensive guide to understanding and utilizing this advanced smart security solution. Designed for both home and outdoor use‚ this camera integrates seamlessly with the Grid Connect app‚ offering remote monitoring‚ motion detection‚ and night vision. This manual covers everything from initial setup to advanced features‚ ensuring you maximize your camera’s performance and security capabilities.

1.1 Overview of the Orion Grid Connect Camera

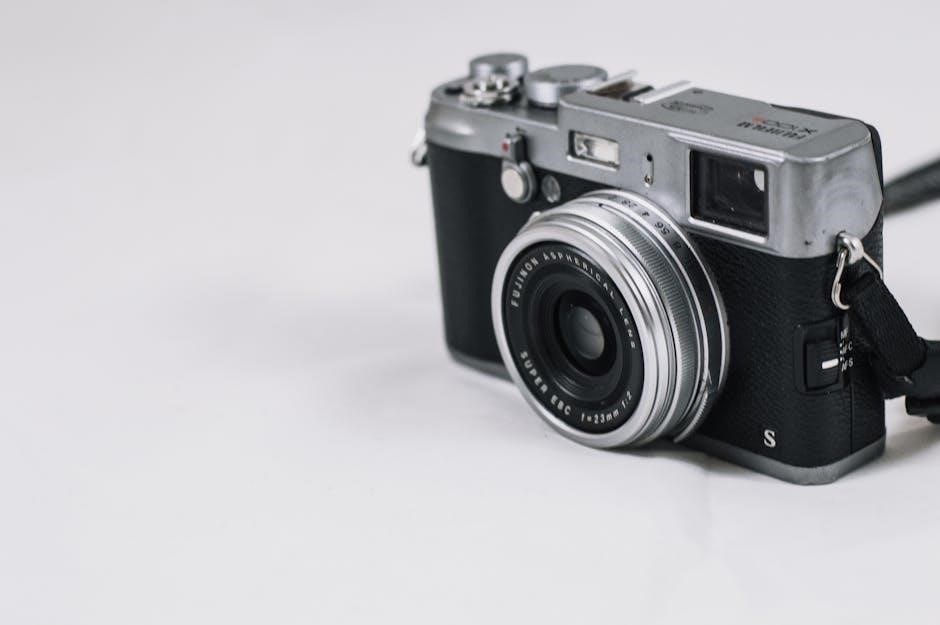
The Orion Grid Connect Camera is a cutting-edge smart security solution designed for home and outdoor use. It offers high-resolution video‚ motion detection‚ night vision‚ and weatherproofing. With a 4MP resolution and 105-degree wide-angle lens‚ it captures clear footage in various lighting conditions. Its IP65 rating ensures durability in outdoor environments. The camera integrates seamlessly with the Grid Connect app for remote monitoring‚ real-time alerts‚ and video streaming.

1.2 Importance of the Manual for Users

This manual is essential for users to fully understand and utilize the Orion Grid Connect Camera. It provides step-by-step guidance for installation‚ operation‚ and troubleshooting‚ ensuring a smooth experience. Whether you’re a first-time user or aiming to optimize advanced features‚ this guide offers valuable insights to maximize your camera’s performance and enhance your home or office security setup effectively.

Installation and Setup

Begin by unpacking the Orion Grid Connect Camera and ensuring all components are included. Connect the camera to power‚ select a suitable location‚ and mount it securely. Ensure your device is connected to a stable Wi-Fi network. Download and install the Grid Connect app‚ then follow in-app instructions to complete the setup process successfully.

2.1 Hardware Requirements and Components

To set up your Orion Grid Connect Camera‚ ensure you have the following components: the camera unit‚ power adapter‚ USB cable‚ mounting stand‚ screws‚ and wall plugs. The camera is compatible with both iOS and Android devices through the Grid Connect app. Verify all hardware is included and in good condition before proceeding with installation.

2.2 Step-by-Step Installation Process

Begin by unboxing and inventorying all components. Mount the camera in your desired location using the provided screws and wall plugs. Connect the power adapter to the camera and plug it into a nearby outlet. Turn on the camera and ensure the LED indicator lights up. Download and install the Grid Connect app to proceed with pairing and setup.

2.3 Network Configuration and Connectivity

To configure network settings‚ open the Grid Connect app and select your camera from the list of available devices. Ensure your smartphone is connected to the same Wi-Fi network as the camera. Enter your Wi-Fi password when prompted to establish a connection. The camera’s LED will flash or change color to confirm successful pairing. If issues arise‚ restart the camera and retry the connection process.

Pairing the Camera with the Grid Connect App

Download and install the Grid Connect app‚ then create an account or log in. Launch the app‚ select “Add Device‚” and follow on-screen instructions to pair your camera.

3.1 Downloading and Installing the App

Download the free Grid Connect app from the Apple App Store or Google Play Store. Once downloaded‚ install the app on your smartphone or tablet. Open the app‚ create an account or log in if you already have one. The app allows remote monitoring‚ motion detection‚ and camera control‚ ensuring seamless integration with your Orion Grid Connect Camera.

3.2 Creating an Account and Initial Setup

Launch the Grid Connect app and select “Create Account” to begin. Enter your email address and choose a secure password. Verify your account via the confirmation email sent to your inbox. Once logged in‚ the app will guide you through the initial setup process‚ enabling you to add your Orion Grid Connect Camera and start monitoring securely.

3.3 Pairing the Camera with the App

To pair your Orion Grid Connect Camera with the app‚ ensure the camera is powered on and connected to your Wi-Fi network. Open the Grid Connect app‚ log in‚ and navigate to the “Add Device” section. Select your camera model from the list. The app will guide you through entering your Wi-Fi password and completing the pairing process. Ensure your phone and camera are on the same network for a seamless connection.

Operating the Camera

Mastering the Orion Grid Connect Camera is straightforward. Use the Grid Connect app to access live feeds‚ adjust settings‚ and monitor your space remotely. The camera offers features like pan-tilt control‚ motion tracking‚ and two-way audio‚ ensuring comprehensive security coverage; Customize settings to enhance performance and ensure your property is always monitored‚ no matter where you are.

4.1 Basic Camera Controls and Features

The Orion Grid Connect Camera offers intuitive controls through the Grid Connect app. Access live feeds‚ adjust camera angles‚ and enable motion tracking. Features include night vision‚ two-way audio‚ and customizable alerts. The camera’s wide-angle lens ensures comprehensive coverage‚ while its weatherproof design guarantees reliability outdoors. Users can easily monitor and control the camera remotely‚ enhancing home or office security with essential tools for surveillance and peace of mind.

4.2 Remote Monitoring via the Grid Connect App

Remotely monitor your surroundings with the Grid Connect app‚ ensuring constant vigilance. Access live feeds‚ receive motion alerts‚ and engage in two-way audio communication. The app allows you to stream video in real-time‚ enabling you to stay informed and responsive‚ no matter your location. Compatible with both iOS and Android‚ the app provides a seamless and secure way to oversee your camera’s functionality and ensure your space remains protected.

4.3 Adjusting Camera Settings for Optimal Performance

Customize your camera settings to enhance functionality. Adjust motion detection sensitivity‚ video quality‚ and night vision settings for clearer images in low-light conditions. Tailor alert notifications to reduce false alarms and ensure you only receive critical updates. These adjustments ensure the camera performs optimally‚ providing reliable security coverage while minimizing unnecessary notifications‚ so you can focus on what truly matters.

Advanced Features of the Orion Grid Connect Camera

The camera offers advanced features like motion detection‚ night vision‚ and weatherproofing‚ ensuring enhanced security and reliability in various environments and lighting conditions.

5.1 Motion Detection and Alerts

The Orion Grid Connect Camera features advanced motion detection‚ sending real-time alerts to your smartphone via the Grid Connect app. Customizable detection zones allow you to focus on specific areas‚ reducing false alerts. Alerts include notifications and video clips‚ enabling quick response to potential security threats. Adjust sensitivity settings to tailor detection to your environment.

5.2 Night Vision and Low-Light Performance

The Orion Grid Connect Camera excels in low-light conditions with its infrared night vision technology‚ providing clear video even in complete darkness. The camera automatically switches to night vision mode‚ ensuring 24/7 surveillance. Its advanced sensors and IR LEDs capture sharp images‚ while the Grid Connect app allows you to adjust settings for optimal performance in varying lighting environments‚ ensuring reliable security coverage.

5.3 Weatherproofing and Outdoor Use

The Orion Grid Connect Camera is designed for outdoor reliability‚ featuring an IP65 weatherproof rating that withstands rain‚ dust‚ and extreme temperatures. Its durable construction ensures optimal performance in various climates‚ making it ideal for securing outdoor spaces. Whether mounted in your yard‚ garage‚ or shed‚ this camera delivers consistent surveillance‚ providing peace of mind for your outdoor security needs.

Troubleshooting Common Issues

This section addresses common issues like connectivity problems‚ motion detection errors‚ and video quality concerns. Follow troubleshooting steps here to resolve issues quickly and effectively.

6.1 Resolving Connectivity Problems

Ensure your Orion Grid Connect Camera is connected to a stable Wi-Fi network. Restart the camera and router if issues persist. Check your network settings in the Grid Connect app and ensure the camera is paired correctly. If problems continue‚ refer to the app’s troubleshooting guide or reset the camera to its factory settings and re-pair it through the app.

6.2 Fixing Motion Detection Errors

If your Orion Grid Connect Camera experiences motion detection issues‚ start by adjusting the sensitivity settings in the Grid Connect app to optimize detection accuracy. Ensure the camera is positioned correctly and free from obstructions. Check for firmware updates and restart both the camera and router to stabilize connectivity. Resetting the camera to factory settings and re-pairing it with the app can also resolve software-related glitches. If problems persist‚ contact technical support for further assistance.

6.3 Addressing Video Quality Concerns

To resolve video quality issues with your Orion Grid Connect Camera‚ ensure the lens is clean and free from obstructions. Adjust the camera’s position for better lighting and reduce glare. Check your internet connection and ensure bandwidth is sufficient. Restart the camera and router to refresh the connection. If issues persist‚ update the camera’s firmware or reset it to factory settings. Contact support for further assistance if needed.

Security and Privacy Considerations

Ensure your Orion Grid Connect Camera is secure by using strong passwords and enabling two-factor authentication. Regularly update firmware and use encrypted connections to protect data. Always review privacy settings in the Grid Connect app to control access and ensure compliance with security best practices for your smart home devices.

7.1 Ensuring Camera Security Against Hacking

To safeguard your Orion Grid Connect Camera against hacking‚ enable two-factor authentication and use strong‚ unique passwords. Regularly update firmware to patch vulnerabilities and ensure encrypted connections. Monitor for unauthorized access via the Grid Connect app and disable unnecessary features. Additionally‚ change default Wi-Fi passwords and limit network access to trusted devices for enhanced security.

7.2 Managing Privacy Settings in the App

Access privacy settings in the Grid Connect app to customize data sharing and device permissions. Enable encryption for video feeds and choose which data points to share. Review app permissions regularly and revoke unnecessary access. Use two-factor authentication for added security and ensure only trusted devices can access your Orion Grid Connect Camera feed.

7.3 Data Storage and Protection

The Orion Grid Connect Camera ensures your data is secure with encrypted video feeds and storage options. Locally stored footage is protected‚ while cloud storage offers additional backup. Regularly review and update your storage settings via the app to ensure privacy and security. Always use strong passwords and enable two-factor authentication for enhanced protection of your stored data.

Maintenance and Updates

Regularly clean the camera lens and check for firmware updates via the Grid Connect app to ensure optimal performance and security. Physical inspections are recommended to maintain functionality and longevity.

8.1 Regular Maintenance Tips for the Camera

Regular maintenance ensures your Orion Grid Connect Camera operates at peak performance. Clean the lens with a microfiber cloth to avoid dust or smudges. Check for firmware updates via the app and install them promptly. Inspect cables and connections for damage or wear. Clear debris from the camera’s exterior to maintain image quality. Schedule bi-monthly checks to ensure optimal functionality and longevity.

8.2 Updating Firmware and Software

To ensure your Orion Grid Connect Camera remains secure and functions optimally‚ regularly update its firmware and software. Open the Grid Connect app‚ navigate to the camera settings‚ and check for updates. Download and install the latest version‚ ensuring a stable internet connection during the process. Updates often include security patches‚ feature enhancements‚ and performance improvements. Always follow on-screen instructions carefully to complete the update successfully.

8.3 Cleaning and Physical Care of the Camera

Regularly clean the Orion Grid Connect Camera to maintain its performance. Use a soft‚ dry cloth to wipe the lens and exterior‚ avoiding harsh chemicals. For stubborn dirt‚ dampen the cloth slightly but ensure no moisture enters the camera. Check for dust or debris in the housing and gently remove it. Store the camera in a dry‚ cool place when not in use to prevent damage and ensure longevity.

Advanced Settings and Customization

Customize your Orion Grid Connect Camera with advanced settings to enhance functionality. Adjust motion detection zones‚ video quality‚ and integrate with smart home systems for tailored security solutions.

9.1 Customizing Motion Detection Zones

Enhance your security setup by customizing motion detection zones for the Orion Grid Connect Camera. Use the Grid Connect app to define specific areas of focus‚ reducing false alerts. Log in‚ navigate to settings‚ and adjust the detection grid to prioritize critical zones. This feature ensures accurate alerts and improved monitoring efficiency‚ tailored to your security needs. Test and refine zones for optimal performance.

9.2 Adjusting Video Quality and Streaming Settings

To adjust the video quality and streaming settings for the Orion Grid Connect Camera‚ follow these steps:

Open the Grid Connect App: Launch the app on your smartphone and log in to your account.

Access Camera Settings: Tap on the camera you wish to configure‚ then navigate to the “Camera Settings” or a similar section.

Adjust Video Quality:
⎻ Resolution: Choose a higher resolution for clearer video‚ but be aware it consumes more bandwidth.
⎻ Bitrate: Select a higher bitrate for better quality‚ considering your internet connection and data usage preferences.

Configure Streaming Settings:
⎻ Recording Mode: Opt for motion-based recording to conserve storage‚ ensuring motion detection is properly configured.
⎻ Video Compression: Enable compression to reduce file size‚ balancing storage needs with potential quality loss.

Frame Rate: Set a higher frame rate for smoother video capture‚ especially for fast-moving objects‚ while mindful of bandwidth and storage usage.

Night Vision Settings: Adjust low-light settings for optimal performance‚ such as infrared or brightness adjustments.

Test and Optimize: After making changes‚ monitor the live feed to assess video quality and motion detection functionality. Adjust settings as needed for performance and resource balance.

Consider Presets: Look for default settings or recommended configurations in the app for an optimal balance between quality and bandwidth.

By following these steps‚ you can customize the video and streaming settings to meet your specific security and connectivity needs.

9.3 Integrating with Smart Home Systems

The Orion Grid Connect Camera seamlessly integrates with popular smart home systems like Amazon Alexa and Google Home. This allows voice control and automated scenes. Users can link their camera to other smart devices‚ enhancing home security and convenience. For example‚ motion detection can trigger lights or alerts. This integration ensures a unified smart home experience‚ offering enhanced control and peace of mind.

Frequently Asked Questions (FAQs)

Got questions? Find answers to common queries about the Orion Grid Connect Camera‚ including app downloads‚ connectivity issues‚ and motion detection setup. Visit our support page for more;

10.1 Common User Queries and Solutions

Q: How do I download the Grid Connect app?
A: Download it from the Apple App Store (iOS) or Google Play Store (Android).


Q: Why isn’t motion detection working?
A: Ensure motion settings are enabled and sensitivity is adjusted via the app.


Q: Can the camera work in the dark?
A: Yes‚ it features night vision for low-light conditions.


Q: Why is the camera offline?
A: Check Wi-Fi connectivity‚ restart the camera‚ and ensure stable internet.


Q: How do I improve video quality?
A: Adjust settings in the app or ensure a strong network connection.

10.2 Technical Support and Resources

For assistance‚ visit the official Orion Grid Connect website or contact their customer support team. Extensive resources‚ including manuals and troubleshooting guides‚ are available online. The Grid Connect app also offers in-app support features. Ensure to consult these resources for resolving technical issues or optimizing your camera’s performance.

human anatomy and physiology laboratory manual main version

Welcome to the Human Anatomy and Physiology Laboratory Manual, Main Version, a comprehensive guide designed for healthcare students. This manual offers hands-on exercises, detailed artwork, and digital tools to enhance learning.

Overview of the Manual’s Purpose and Structure

The Human Anatomy and Physiology Laboratory Manual, Main Version, is structured to support a two-semester A&P course. It combines hands-on activities with digital resources, offering a comprehensive learning experience. The manual is divided into sections, including pre-lab, lab, and post-lab assignments, ensuring a logical progression of skills. Designed for healthcare students, it integrates with Mastering A&P, providing videos, flashcards, and interactive tools. Available in Main, Cat, and Fetal Pig versions, it adapts to various teaching needs while maintaining a focus on practical application and understanding of anatomical structures and physiological processes.

Target Audience and Healthcare Program Integration

The Human Anatomy and Physiology Laboratory Manual, Main Version, is primarily designed for students in healthcare programs, including nursing, pre-med, and allied health fields. It aligns with two-semester A&P courses, offering practical exercises and digital tools to reinforce classroom learning. The manual supports diverse learning needs, catering to both traditional and non-traditional students. Its integration with Mastering A&P and customizable options makes it adaptable to various healthcare curricula, ensuring a strong foundation in anatomical and physiological principles essential for clinical practice.

Key Features of the Laboratory Manual

The laboratory manual offers hands-on learning, diverse experiments, and integrates with Mastering A&P. It includes customizable options and digital tools to enhance student engagement and understanding.

Hands-On Learning and Experiment Diversity

The manual emphasizes hands-on learning through diverse experiments, ensuring students actively explore anatomical structures and physiological processes. Each exercise is designed to deepen understanding, from dissections to functional studies. The inclusion of over 100 detailed photos and 50 lab videos enhances visual learning. Pre-lab, lab, and post-lab activities guide students through preparation, experimentation, and reflection. This approach fosters critical thinking and practical skills, making complex concepts accessible. The variety of exercises caters to different learning styles, ensuring a comprehensive and engaging experience for healthcare students.

Integration with Mastering A&P and Digital Tools

The manual seamlessly integrates with Mastering A&P, offering pre-lab videos, interactive art labeling, and clinical application questions. Digital tools like Practice Anatomy Lab 3.1 and Dynamic Study Modules enhance engagement. Customizable flashcards and assessment questions align with lab activities, making study more efficient. This integration supports personalized learning, reinforcing key concepts and skills. Instructors can assign homework through the Mastering A&P platform, ensuring a cohesive learning experience that complements the lab manual’s hands-on approach.

Customizable Options for Different Courses

The Human Anatomy and Physiology Laboratory Manual, Main Version offers flexibility to suit various course needs. Instructors can customize content through Pearson Collections, creating tailored learning experiences. The manual is available in three versions—Main, Cat, and Fetal Pig—each aligned with specific coursework. This adaptability ensures the manual can accompany any A&P textbook, providing a consistent yet customizable resource for diverse student populations and teaching approaches. This flexibility makes it an ideal choice for programs requiring specialized or generalized anatomical studies.

Lab Exercises and Activities

The Human Anatomy and Physiology Laboratory Manual, Main Version provides diverse, hands-on exercises to explore the human body’s structure and function. Activities include pre-lab preparation, lab experiments, and post-lab reviews, supported by videos and digital tools to enhance engagement and understanding of anatomical concepts.

Pre-Lab, Lab, and Post-Lab Assignments

The Human Anatomy and Physiology Laboratory Manual, Main Version includes structured assignments to guide students through a comprehensive learning process. Pre-lab activities prepare students with background information, reducing lab time and ensuring readiness. Lab exercises are hands-on, focusing on anatomical exploration, dissections, and physiological experiments. Post-lab assignments reinforce learning through analysis, review questions, and reflection. These phases integrate seamlessly, promoting deeper understanding and retention of key concepts, while digital tools like videos and interactive models enhance engagement and practical application.

Dissection Labs and Supplemental Online Resources

The Human Anatomy and Physiology Laboratory Manual, Main Version offers detailed dissection labs for hands-on exploration of anatomical structures. These exercises are accompanied by clear instructions and correlating artwork, ensuring a comprehensive understanding. Supplemental online resources include 3D models, videos, and virtual simulations, providing additional learning opportunities. Instructors can customize content to meet specific course needs, while students benefit from interactive tools that enhance engagement and reinforce complex physiological and anatomical concepts. These resources collectively enrich the learning experience, both in and out of the lab setting.

Artwork and Visual Aids

The manual features renowned Marieb/Hoehn artwork, providing detailed, accurate illustrations of human anatomy. High-quality photos and videos enhance understanding of complex physiological processes, while 3D models offer interactive learning opportunities.

Marieb/Hoehn Artwork and Anatomical Models

The Marieb/Hoehn artwork is a cornerstone of the laboratory manual, offering precise and detailed illustrations that align with the main textbook. These visuals are designed to clarify complex anatomical structures, ensuring students grasp essential concepts. The manual also includes anatomical models and digital tools, such as 3D models, to provide interactive and immersive learning experiences. This combination enhances understanding of human anatomy, making it easier for students to visualize and study physiological processes effectively.

Photos and Videos to Enhance Understanding

The laboratory manual incorporates over 100 specially-commissioned photos of anatomical models and more than 50 robust lab videos to enhance student understanding. These visuals provide detailed views of anatomical structures and physiological processes, making complex concepts more accessible. The photos and videos are closely tied to the Marieb/Hoehn artwork, ensuring consistency and reinforcing key concepts. This multimedia approach helps students visualize and engage with the material, preparing them for hands-on activities and real-world applications in healthcare settings. These resources are integral to the manual’s comprehensive learning experience.

Companion Versions

The Human Anatomy and Physiology Laboratory Manual is available in three versions: Main, Cat, and Fetal Pig, each tailored to specific learning needs and courses. All versions align with the Marieb/Hoehn art program and can accompany any A&P textbook, ensuring flexibility for instructors and students. This adaptability makes the manual a versatile resource for diverse educational settings.

Main, Cat, and Fetal Pig Versions

The Human Anatomy and Physiology Laboratory Manual is available in three distinct versions to cater to various educational needs: the Main Version, Cat Version, and Fetal Pig Version. Each version provides 63 laboratory exercises, plus three supplemental online labs and six dissection labs specific to the version. This flexibility allows instructors to choose the most suitable materials for their courses, ensuring a tailored learning experience. The Main Version focuses on human anatomy, while the Cat and Fetal Pig versions offer comparative and developmental anatomy perspectives. All versions align with the Marieb/Hoehn art program and can accompany any A&P textbook, making them versatile tools for anatomy and physiology education.

Compatibility with Any A&P Textbook

The Human Anatomy and Physiology Laboratory Manual, Main Version, is designed to complement any A&P textbook, offering flexibility for instructors. Its content, including exercises and artwork, aligns with the Marieb/Hoehn art program but does not require a specific textbook. This compatibility makes it a versatile resource for diverse educational settings. Additionally, the manual integrates seamlessly with digital tools like Mastering A&P, enhancing its utility for both students and educators. This adaptability ensures it remains a valuable tool across various A&P courses and programs.

Editions and Updates

The Human Anatomy and Physiology Laboratory Manual, Main Version, is available in its 12th edition, featuring updated content, enhanced visuals, and improved digital integration for optimal learning experiences.

12th Edition Highlights and Improvements

The 12th edition of the Human Anatomy and Physiology Laboratory Manual, Main Version, introduces enhanced features such as new full-color figures, updated clinical application questions, and improved integration with Mastering A&P. Pre-lab video coaching activities, expanded bone and muscle dissection videos, and customizable flashcards via Practice Anatomy Lab 3.1 are included. The edition also offers revamped critical thinking exercises and correlations with the Marieb/Hoehn textbook, ensuring a seamless learning experience. These updates aim to deepen student understanding and engagement in anatomy and physiology concepts.

ISBN and Availability Information

The Human Anatomy and Physiology Laboratory Manual, Main Version, 12th Edition, is available with ISBN-13: 9780134806358. It can be purchased as a standalone text or bundled with Mastering A&P. The manual is sold through major retailers like Amazon and Pearson, with options to rent or buy. Digital versions, including eText, are also accessible. Check with your instructor for package options or visit the Pearson website for more details on pricing and availability.

Authors and Their Contributions

Meet Elaine N. Marieb and Lori A. Smith, renowned experts in anatomy and physiology. Their collaborative work ensures the manual is both comprehensive and accessible for students and instructors.

Elaine N. Marieb’s Expertise and Legacy

Dr. Elaine N. Marieb, a distinguished anatomist and educator, brought unparalleled expertise to the field of human anatomy and physiology. Holding a Ph.D. in zoology and a Master’s in gerontology, she uniquely bridged scientific and clinical perspectives. Her teaching career at Holyoke Community College inspired her to create accessible resources for healthcare students. Dr. Marieb co-authored the Human Anatomy & Physiology Laboratory Manual, infusing it with clarity and precision. Her philanthropic efforts, including the Elaine Nicpon Marieb Foundation, continue to support science education and student opportunities, ensuring her legacy endures in advancing A&P education.

Lori A. Smith’s Background and Teaching Approach

Dr. Lori A. Smith, a dedicated educator and biochemist, brings extensive experience to anatomy and physiology education. With a Ph.D. in Biochemistry from UC Davis, she transitioned from medical diagnostics to teaching, focusing on pre-nursing and mortuary science students. Her approach emphasizes practical application and engagement, co-authoring resources like PhysioEx to enhance student learning. Recognized as Instructor of the Year, Dr. Smith is committed to fostering student success and clarity in complex subjects, making her a valued contributor to the Human Anatomy & Physiology Laboratory Manual.

The Human Anatomy and Physiology Laboratory Manual, Main Version, is a comprehensive, hands-on resource that effectively integrates with digital tools like Mastering A&P, making it invaluable for students and instructors alike.

The Manual’s Impact on A&P Education

The Human Anatomy and Physiology Laboratory Manual, Main Version, has revolutionized A&P education by providing a hands-on, interactive approach to learning. Its integration with Mastering A&P and digital tools enhances student engagement and understanding. The manual’s diverse exercises, detailed artwork, and customizable options cater to various healthcare programs, making it a versatile resource. By combining traditional lab activities with modern technology, it sets a new standard for A&P education, ensuring students gain practical skills and a deeper comprehension of human anatomy and physiology.

Final Thoughts on Its Value for Students and Instructors

The Human Anatomy and Physiology Laboratory Manual, Main Version, is an indispensable resource for both students and instructors. It provides a comprehensive, hands-on learning experience, combining traditional lab exercises with modern digital tools. Students benefit from interactive activities, such as PAL 3.1, while instructors appreciate its customizable options and alignment with any A&P textbook. The manual’s clear structure and engaging content make it a valuable asset for healthcare education, ensuring students gain a deep understanding of human anatomy and physiology. Its legacy, supported by authors like Elaine N. Marieb and Lori A. Smith, solidifies its reputation as a trusted educational tool.

apocalypse survival guide pdf

The Apocalypse Survival Guide PDF provides essential strategies for surviving apocalyptic events, ensuring preparedness, and building resilience to thrive in any post-apocalyptic scenario safely․

Importance of Preparedness

Preparedness is crucial for surviving apocalyptic events, as it ensures you have the necessary resources and strategies to face unforeseen challenges․ Stockpiling supplies, creating a survival plan, and staying informed can significantly enhance your chances of survival․ Being proactive reduces panic and fear, allowing for clearer decision-making during crises․ A well-prepared individual is better equipped to adapt and thrive in post-apocalyptic scenarios, making preparedness a cornerstone of survival․

Overview of the Apocalypse Survival Guide PDF

The Apocalypse Survival Guide PDF offers a comprehensive roadmap for navigating catastrophic events, detailing strategies for survival, resource management, and rebuilding society․ It covers diverse scenarios, from nuclear disasters to zombie apocalypses, providing actionable tips on shelter construction, food storage, and self-defense․ This guide equips readers with practical knowledge to stay safe, adapt to chaos, and thrive in post-apocalyptic environments, ensuring long-term resilience and recovery․

Understanding the Apocalypse

Understanding the apocalypse involves grasping its potential forms, from nuclear wars to environmental disasters, and preparing for the unpredictable nature of catastrophic events that threaten humanity’s survival․

Types of Apocalyptic Scenarios

The Apocalypse Survival Guide PDF outlines various catastrophic scenarios, including zombie outbreaks, economic collapse, and pandemics․ Each scenario demands unique strategies, emphasizing the importance of understanding and preparing for diverse threats to ensure survival in unpredictable and chaotic environments․

Nuclear War Survival Tactics

The Apocalypse Survival Guide PDF details critical strategies for surviving nuclear war, such as finding or building fallout shelters, protecting against radiation, and managing essential supplies․ It emphasizes the importance of staying informed, creating a communication plan, and understanding radiation risks to increase chances of survival in a nuclear apocalypse scenario․

Zombie Apocalypse Strategies

The Apocalypse Survival Guide PDF outlines effective strategies for surviving a zombie apocalypse, including stockpiling supplies, securing shelter, and forming alliances․ It emphasizes the importance of staying mobile, avoiding densely populated areas, and using tools or weapons for self-defense․ Practical tips on finding safe zones, rationing resources, and adapting to evolving threats ensure long-term survival in a zombie-dominated world․

Environmental Disaster Preparedness

The Apocalypse Survival Guide PDF highlights strategies for preparing against environmental disasters, such as earthquakes, floods, and climate crises․ It emphasizes stockpiling supplies, securing safe shelters, and mastering navigation techniques․ Tips on purifying water, managing waste, and using renewable energy ensure sustainability․ Building community alliances and staying informed about weather patterns are also crucial for enduring ecological challenges and rebuilding society effectively․

Essential Supplies for Survival

The Apocalypse Survival Guide PDF outlines vital supplies, including food, water, first aid kits, and tools, to sustain life and withstand harsh post-apocalyptic conditions effectively․

Water Purification Methods

Effective water purification is crucial for survival․ Methods include boiling, filtration, and chemical treatment․ Boiling kills pathogens, while filters remove contaminants․ Chemicals like chlorine ensure safe drinking water․ These techniques, detailed in the Apocalypse Survival Guide PDF, are essential for preventing waterborne illnesses and ensuring hydration in post-apocalyptic scenarios․

Food Storage and Rationing

Proper food storage and rationing are vital for long-term survival; Stockpile non-perishable items like canned goods, dried fruits, and nuts․ Use airtight containers to preserve freshness․ Ration food carefully to ensure supplies last, avoiding waste․ Plan meals to balance nutrition and calorie intake․ Rotate stock to prevent expiration, ensuring a sustainable food supply during uncertain times․

First Aid and Medical Kits

A well-stocked first aid kit is crucial for treating injuries and preventing infections․ Include bandages, antiseptics, painkillers, and any personal medications․ A first aid manual is essential for guidance․ Store supplies in a waterproof container and ensure all items are within their expiration dates․ Regularly check and replenish the kit to maintain readiness for emergencies․

Tools and Equipment for Survival

Essential tools include a multi-tool, shovel, axe, and sturdy rope for shelter construction and resource gathering․ A portable water filter ensures safe drinking water․ Flashlights, extra batteries, and a compass aid navigation․ Firearms or pepper spray provide self-defense options․ Include a portable power source, like a solar generator, to charge critical devices․ These tools enhance versatility and adaptability in survival scenarios․

Safe Shelters and Bunkers

Building underground bunkers with steel-reinforced walls and secure entrances ensures safety․ Use materials like concrete and sandbags for durability․ Include air filtration systems and storage for supplies to sustain long-term survival․

Building a Underground Shelter

Constructing an underground shelter requires careful planning․ Choose a site with stable soil, avoiding flood zones․ Dig a deep pit, then build walls using steel-reinforced concrete․ Install a sturdy ceiling with layers of insulation and protection against radiation or fallout․ Add an air filtration system, lighting, and storage for supplies․ Ensure the entrance is camouflaged and secure to prevent unauthorized access․ Proper ventilation and drainage systems are essential for long-term survival․

Securing Your Shelter

Securing your shelter is crucial for protection․ Reinforce doors and walls with metal or concrete․ Install surveillance cameras and alarm systems to detect intruders․ Use strong locks and barricades to prevent unauthorized entry․ Create hidden escape routes and emergency exits․ Fortify windows with metal bars or bulletproof glass․ Ensure all entry points are sealed and guarded to maintain safety and prevent breaches in a post-apocalyptic environment․

Self-Defense and Combat

Mastering self-defense and combat is vital for survival in unpredictable post-apocalyptic scenarios․ Learn effective techniques, weapon handling, and tactical strategies to protect yourself and your group․

Weapons Training and Safety

Proper weapons training and safety protocols are critical in apocalyptic scenarios to avoid accidents and ensure effective defense․ Understand firearm mechanics, handling techniques, and storage methods to minimize risks․ Regular practice and adherence to safety guidelines are essential for responsible weapon use, ensuring survival without compromising group security or attracting unnecessary threats․ Stay vigilant and informed to handle weapons confidently and safely․

Tactical Gear and Armor

Tactical gear and armor are vital for protection in apocalyptic scenarios․ Invest in durable helmets, body armor, and reinforced clothing made from materials like Kevlar․ Layering armor enhances protection against various threats․ Opt for lightweight, breathable designs to maintain mobility․ Tactical vests with compartments can store essentials like ammo, first aid kits, and tools․ Night vision gear and ballistic eyewear further enhance survival capabilities and situational awareness․

Forming Alliances and Communities

Forming alliances and communities is crucial for long-term survival in apocalyptic scenarios․ Collaborating with others enhances resource sharing, skill diversity, and collective security․ Building trust through clear communication and shared goals strengthens bonds․ Establishing roles and responsibilities ensures efficiency, fostering a resilient and adaptable group․ Strong communities can rebuild society, providing emotional and practical support in challenging times․

Communication and Navigation

Reliable communication tools and navigation techniques are vital for survival․ Using radios, maps, and landmarks ensures connectivity and direction, even without GPS, keeping you informed and safe․

Using Radios and Communication Devices

Reliable communication is crucial during an apocalypse․ Radios and devices like two-way radios or satellite phones enable staying informed and connected․ Choose devices with long battery life and secure frequencies․ Always carry spare batteries and test equipment regularly․ Establish communication protocols to maintain order and safety․ Prioritize clear, concise messaging to avoid confusion․ This ensures effective coordination and survival in challenging scenarios․

Navigation Techniques Without GPS

Mastering navigation without GPS is vital for apocalypse survival․ Use celestial navigation with the sun and stars, such as the North Star, to determine direction․ Natural landmarks like rivers and mountain ranges can guide you․ Learn to read contour lines on topographic maps and use a compass or create one with a magnetized needle․ These skills ensure you can traverse unfamiliar territories safely and effectively, even without modern technology․

Mental and Physical Health

Maintaining mental and physical health is crucial for survival․ Manage stress, stay hydrated, and maintain a balanced diet to ensure resilience during apocalyptic challenges․

Psychological Impact of Apocalypse

The apocalypse can cause severe emotional and mental challenges, including anxiety, grief, and trauma․ Survivors often face the loss of loved ones, societal collapse, and constant fear, leading to long-term psychological distress․ Maintaining mental health is crucial, as the stress of survival can exacerbate conditions like PTSD․ Finding purpose, building communities, and practicing mindfulness are vital coping strategies to navigate the emotional toll of such events․

Maintaining Physical Fitness

Maintaining physical fitness is crucial for survival in post-apocalyptic scenarios․ Regular exercise, strength training, and cardiovascular workouts improve endurance, enabling you to escape danger, carry supplies, and perform physically demanding tasks․ A structured fitness routine, even with limited resources, ensures you stay agile and resilient, increasing your chances of survival and adaptability in challenging environments․

Rebuilding Society

Rebuilding society after an apocalypse requires cooperation, leadership, and sustainable systems․ Establishing governance, restoring infrastructure, and fostering community ensures a resilient and thriving post-apocalyptic future․

Setting Up Community Structures

Establishing clear leadership roles and decision-making processes is crucial for rebuilding society․ Implementing fair resource distribution, social guidelines, and dispute resolution mechanisms ensures stability․ Community structures should prioritize collaboration, fostering trust and cooperation among members․ This foundation supports long-term sustainability, enabling communities to adapt and grow in a post-apocalyptic world effectively․

Restoring Infrastructure

Restoring infrastructure involves assessing damage to critical systems like power, water, and communication․ Prioritize rebuilding essential services, utilizing salvaged materials and sustainable practices․ Community efforts should focus on creating reliable energy sources, safe water supply, and functional transportation networks․ This ensures a foundation for long-term recovery, enabling communities to rebuild and sustain themselves effectively in a post-apocalyptic environment․

Legal and Ethical Considerations

Navigating legal frameworks and ethical dilemmas post-apocalypse requires balancing survival with moral principles․ Understanding new governance structures and societal norms ensures responsible decision-making during crises․

Martial Law and New World Order

In a post-apocalyptic scenario, martial law may be imposed, leading to a new world order with authoritarian governance․ Survivors must navigate these shifts in power, understanding the legal frameworks and societal restructuring․ Adapting to new rules and hierarchies while maintaining ethical standards becomes crucial for survival and rebuilding trust in a fractured world․

Ethical Dilemmas in Survival

Ethical dilemmas in survival situations challenge individuals to balance moral principles with the need to stay alive․ Difficult choices, such as rationing resources or protecting others, can lead to feelings of guilt and trauma․ Survivors must weigh personal survival against the greater good, often facing decisions that test their humanity and ethical boundaries in extreme circumstances․

Staying Informed

Staying informed is crucial for survival, requiring access to reliable sources, communication tools, and real-time updates to navigate challenges and make informed decisions effectively․

Gathering Intelligence

Gathering intelligence is vital for survival, involving the collection of accurate and timely information about your environment, potential threats, and resources․ This can be done through scouting missions, radio communications, and monitoring satellite feeds․ A systematic approach ensures comprehensive data collection, aiding in decision-making and strategic planning․ Staying informed about nearby dangers, resource locations, and weather patterns is crucial for long-term survival and adaptability in a post-apocalyptic world․

Verifying Information Sources

Verifying information sources is critical to ensure accuracy and reliability in survival planning․ Cross-referencing data from multiple trusted sources, such as official reports, expert opinions, and credible news outlets, helps avoid misinformation․ Using advanced search techniques and understanding user intent can refine results, providing actionable insights tailored to your survival needs and strategies․

Final Tips for Survival

Stockpile essential supplies, form alliances, and stay informed․ Adaptability and mental resilience are key․ Prioritize shelter, water, and food while maintaining a strategic mindset․ Continuous learning and preparedness ensure long-term survival in any apocalyptic scenario․

Encouragement to Take Action

Taking immediate action is crucial for surviving any apocalyptic event․ Start by creating a survival plan and gathering essential supplies․ Empower yourself with knowledge and confidence to face challenges head-on․ Building a support network and staying informed will enhance your chances of survival․ Don’t wait—prepare now and ensure your safety in any scenario․ Your survival depends on it, so act today․

avent manual breast pump manual

Overview of the Philips Avent Manual Breast Pump

The Philips Avent Manual Breast Pump is a portable, gentle, and efficient solution for expressing milk. Designed with Natural Motion technology, it mimics a baby’s suckling for natural comfort. Compact, BPA-free, and easy to use, it’s perfect for discreet pumping on the go.

1.1 Key Features of the Philips Avent Manual Breast Pump

The Philips Avent Manual Breast Pump features Natural Motion Technology, mimicking a baby’s suckling for natural comfort. It includes a soft silicone cushion for a secure fit, a BPA-free design, and an ergonomic handle for easy control. The pump is portable, compact, and lightweight, making it ideal for discreet use on the go. It also comes with a 4oz bottle and sealing discs for convenient milk storage.

1.2 Benefits of Using the Philips Avent Manual Breast Pump

Using the Philips Avent Manual Breast Pump offers several benefits, including gentle and pain-free expression, portability for discreet use anywhere, and ease of cleaning. Its Natural Motion Technology promotes quick milk flow, while the soft silicone cushion ensures a comfortable fit. The pump is also BPA-free, ensuring safety for both mother and baby, and its compact design makes it easy to store and transport, ideal for busy mothers on the go.

How to Use the Philips Avent Manual Breast Pump

The Philips Avent Manual Breast Pump is easy to use, offering a portable and comfortable way to express milk. Its Natural Motion Technology ensures a gentle, natural flow, while its compact design allows for discreet pumping anywhere. The BPA-free construction and soft silicone cushion provide safety and comfort for mothers.

2.1 Assembly and Disassembly of the Pump

Assembling the Philips Avent Manual Breast Pump involves attaching the silicone cushion to the pump and securing the bottle. Ensure all parts are tightly connected to prevent leakage. The handle may screw or click into place. Disassembly requires carefully detaching each part, avoiding force to prevent damage. After cleaning, reassemble by aligning components securely. Store disassembled parts in a dry, protected area to maintain hygiene and prevent loss.

2.2 Step-by-Step Guide to Expressing Milk

Position the silicone cushion on your nipple, ensuring a snug fit. Gently squeeze the handle to create suction, mimicking a baby’s suckling rhythm. Express milk into the attached bottle. Adjust pressure for comfort and effectiveness. Massage your breast to encourage flow. Continue until milk expression slows. Store expressed milk in a sealed bottle and clean the pump afterward for hygiene. The process is discreet, making it ideal for use on the go.

2.3 Proper Storage and Handling

After use, clean and dry the pump thoroughly. Store it in a cool, dry place, away from direct sunlight. Use airtight containers to protect from dust. Ensure all parts are dry to prevent mold. Avoid exposing to extreme temperatures. Keep out of reach of children. Proper storage maintains hygiene and ensures longevity of the pump, making it ready for future use whenever needed.

Maintenance and Cleaning of the Philips Avent Manual Breast Pump

Regularly clean and sterilize all parts to ensure hygiene. Use mild soap and warm water for cleaning. The pump is dishwasher-safe for added convenience. Proper maintenance ensures optimal performance and longevity, keeping it safe and effective for expressing milk.

3.1 Cleaning Procedures for Optimal Hygiene

Wash all parts with mild soap and warm water after each use. Rinse thoroughly to remove any residue. Dry components with a clean towel or air-dry. Regularly inspect for milk residue to prevent mold. Avoid using harsh chemicals or abrasive cleaners. For convenience, some parts are dishwasher-safe, but ensure the silicone cushion is hand-washed to maintain its quality and performance.

3.2 Sterilization Methods for the Pump

Sterilize the Philips Avent Manual Breast Pump by boiling in water for 5 minutes. Alternatively, use a dishwasher’s sterilization cycle or steam sterilizer. Ensure all parts are fully submerged or placed correctly. Regular sterilization prevents bacterial growth and maintains hygiene. Always follow the manufacturer’s guidelines for safe and effective sterilization to protect both the pump and your baby’s health. Sterilize before first use and after each cleaning cycle for optimal safety.

3.3 Tips for Longevity and Performance

To ensure longevity, regularly clean and dry all parts thoroughly. Store components in a cool, dry place away from direct sunlight. Lubricate moving parts occasionally to maintain smooth operation. Avoid extreme temperatures or harsh chemicals. Replace worn-out seals or valves promptly. Use only genuine Philips Avent accessories to preserve performance. Proper handling and adherence to the user manual will extend the pump’s lifespan and maintain its efficiency.

Troubleshooting Common Issues

Common issues like low milk output or discomfort can often be resolved by adjusting fit or technique. Leakage may stem from improper assembly or worn parts, while malfunctions can be addressed through cleaning or replacing components, ensuring optimal performance and comfort.

4.1 Resolving Low Milk Output

Low milk output can be addressed by ensuring proper fit and technique. Check the silicone cushion size and adjust as needed for optimal suction. Use the Natural Motion technology effectively by gently squeezing the handle in rhythm with your baby’s feeding pattern. Ensure the valve and membrane are clean and functioning properly to maintain consistent suction. Regularly expressing milk and staying relaxed can also improve milk flow.

4.2 Addressing Discomfort During Use

Discomfort during use can be minimized by ensuring the correct cushion size and proper positioning. Adjust the silicone cushion to fit your nipple size for a comfortable seal. Express when your breast is not overly full and take breaks if needed. Gentle, rhythmic squeezing of the handle can help maintain comfort. Ensure the pump is clean and well-maintained to avoid issues that may cause discomfort during use.

4.3 Fixing Leakage or Malfunction

Leakage or malfunction in the Philips Avent Manual Breast Pump can often be resolved by checking connections between parts. Ensure all components are securely assembled and free from blockages. Regular cleaning and sterilization can prevent issues. If leakage persists, inspect for worn or damaged seals and replace them if necessary. Proper handling and storage are key to maintaining functionality and preventing malfunctions during use.

Comparison with Other Manual Breast Pumps

The Philips Avent Manual Breast Pump stands out with its Natural Motion technology, portability, and comfort, offering superior ease of use and efficiency compared to other manual pumps.

5.1 Unique Features of the Philips Avent Pump

The Philips Avent Manual Breast Pump features Natural Motion technology, mimicking a baby’s suckling for natural milk flow. Its compact design, BPA-free materials, and soft silicone cushion ensure comfort and adaptability. The pump is portable, quiet, and easy to assemble, making it ideal for discreet use on the go. These features combine to provide a gentle, efficient, and convenient breastfeeding support solution.

5.2 Performance and Comfort Comparison

The Philips Avent Manual Breast Pump excels in performance and comfort compared to other manual pumps. Its ergonomic handle and Natural Motion technology ensure efficient milk expression, while the soft silicone cushion provides a gentle fit. Users report less discomfort and faster milk flow compared to similar models, making it a standout choice for both effectiveness and ease of use during breastfeeding sessions.

5.3 Value for Money Analysis

The Philips Avent Manual Breast Pump offers excellent value for its price, combining durability, ease of use, and effective milk expression. While it may be slightly more expensive than some manual pumps, its high-quality design, portability, and comfort features justify the cost. The pump’s longevity and ease of maintenance further enhance its value, making it a worthwhile investment for mothers seeking a reliable manual breast pump solution.

User Reviews and Feedback

Users praise the Philips Avent Manual Breast Pump for its portability and gentle, natural pumping experience. Many find it easy to assemble and clean, while some note occasional leakage issues.

6.1 Positive Experiences with the Philips Avent Pump

Many users appreciate the Philips Avent Manual Breast Pump for its portability, ease of use, and gentle pumping experience. The Natural Motion technology, inspired by a baby’s suckling, ensures a natural and comfortable process. The compact design and BPA-free materials are highly praised, making it ideal for on-the-go use. Users also highlight its quiet operation and easy assembly, which enhance overall convenience and efficiency.

6.2 Common Complaints and Concerns

Some users find the handle of the Philips Avent Manual Breast Pump less comfortable during extended use. Others note that the pump’s small size can make expressing large volumes of milk less efficient. A few users mention difficulty in finding replacement parts, while some wish for a more robust design for long-term use. Despite its portability, manual operation can be tiring for some mothers compared to electric pumps.

6.3 Overall Satisfaction Ratings

Most users express high satisfaction with the Philips Avent Manual Breast Pump, praising its portability, comfort, and ease of use. Many appreciate its natural suction and gentle design, making it ideal for everyday use. While some note minor discomfort with the handle over time, the overall consensus is positive, with many recommending it for its effectiveness and value. Satisfaction ratings remain strong, reflecting its reliability for breastfeeding mothers.

Frequently Asked Questions (FAQs)

Is the Philips Avent Manual Breast Pump BPA-free? Yes, it is. Can it be used on the go? Absolutely, it’s portable. How does it compare to electric pumps? It’s quieter and more discreet, ideal for personal use. Users find it comfortable and efficient for expressing milk naturally. It’s a preferred choice for many breastfeeding mothers due to its ease and convenience.

7.1 Is the Philips Avent Manual Breast Pump BPA-Free?

Yes, the Philips Avent Manual Breast Pump is BPA-free, ensuring safety for both mother and baby. Made from high-quality, food-grade materials like polypropylene, it prioritizes health and durability. This feature is especially important for lactating mothers who prioritize their baby’s well-being. The BPA-free design makes it a trusted choice for safe and effective milk expression.

7.2 Can the Pump Be Used on the Go?

The Philips Avent Manual Breast Pump is designed for portability, making it ideal for use on the go. Its compact, lightweight design allows for easy carrying in a bag or purse. The pump operates discreetly and quietly, enabling mothers to express milk comfortably in various settings. This feature is particularly useful for busy lifestyles, ensuring convenience and flexibility for lactating mothers who need to pump away from home.

7.3 How Does It Compare to Electric Pumps?

The Philips Avent Manual Breast Pump offers a quiet, portable alternative to electric pumps without reliance on batteries or electricity. It provides a gentle, natural pumping experience, ideal for occasional use or as a backup. While electric pumps may be faster, the manual pump excels in discreetness and ease of transport, making it a practical choice for mothers seeking flexibility and simplicity in their pumping routine.

The Philips Avent Manual Breast Pump is a portable, gentle, and efficient solution for expressing milk. It combines Natural Motion technology with a compact design, making it ideal for discreet use on the go. Its ease of use and BPA-free construction ensure safety and convenience, offering a reliable option for breastfeeding mothers seeking flexibility and comfort in their pumping routine.

8.1 Final Thoughts on the Philips Avent Manual Breast Pump

The Philips Avent Manual Breast Pump offers a portable, comfortable, and efficient solution for expressing milk. With Natural Motion technology, it mimics a baby’s suckling, ensuring a natural experience. Its compact design, BPA-free materials, and ease of use make it ideal for mothers needing flexibility. Whether at home or on the go, this pump provides a reliable and gentle way to maintain milk supply, making it a great choice for breastfeeding mothers.

8.2 Recommendation for Potential Buyers

The Philips Avent Manual Breast Pump is an excellent choice for mothers seeking a portable, gentle, and efficient solution. Its Natural Motion technology mimics a baby’s suckling, ensuring comfort. Made from BPA-free materials, it’s safe and easy to clean. The compact design allows for discreet pumping anywhere, making it perfect for busy moms needing flexibility and reliability in maintaining their milk supply while on the go.

delaware drivers manual

The Delaware Driver’s Manual provides essential information for obtaining a driver’s license, including rules of the road, safe driving practices, and exam preparation. Reading it thoroughly is crucial for understanding state-specific traffic laws and regulations to ensure safe and responsible driving habits. The manual is designed to help new and experienced drivers alike stay informed and compliant with Delaware’s driving requirements.

1.1 Overview of the Manual

The Delaware Driver’s Manual is a comprehensive guide designed to help drivers understand state-specific traffic laws, safe driving practices, and licensing requirements. It covers essential topics such as road signs, driving rules, and preparation for driver’s tests. The manual is structured to provide clear and concise information, ensuring drivers are well-prepared to operate vehicles safely and legally in Delaware.

1.2 Importance of Reading the Manual

Reading the Delaware Driver’s Manual is essential for understanding traffic laws, safe driving practices, and licensing requirements. It ensures drivers are aware of state-specific rules, reducing the risk of accidents and legal penalties. The manual prepares individuals for written and behind-the-wheel tests, promoting responsible and informed driving habits necessary for safety on Delaware roads.

Eligibility Requirements for a Delaware Driver’s License

To obtain a Delaware driver’s license, applicants must meet age, residency, and documentation requirements. Ensure accuracy in providing proof of identity, residency, and legal status to avoid delays.

2.1 Age Requirements

In Delaware, the minimum age to apply for a learner’s permit is 16 years old. Applicants must be at least 17 years old to obtain a restricted license and 18 years old for a full unrestricted driver’s license. These age requirements ensure young drivers gain necessary experience and maturity before operating a vehicle independently. Meeting these age criteria is essential for a smooth application process.

2.2 Required Documents

To apply for a Delaware driver’s license, you must provide specific documents. These include proof of identity, such as a birth certificate or passport, proof of Social Security number, like a Social Security card, and proof of residency, such as a utility bill or lease agreement. Additional documents may be required for minors, such as a parental consent form. Ensuring all documents are valid and up-to-date is essential for a smooth application process.

Traffic Laws and Regulations in Delaware

Delaware traffic laws emphasize speed limits, right-of-way rules, and safety measures like seat belt and cell phone usage restrictions to ensure road safety and compliance.

3.1 Speed Limits and Right-of-Way Rules

Delaware enforces varying speed limits based on road type, with higher limits on highways and lower in urban or school zones. Right-of-way rules prioritize pedestrian safety and clarify procedures at intersections, four-way stops, and when approaching emergency vehicles. Understanding these regulations is essential for safe and lawful driving, ensuring smooth traffic flow and minimizing accidents.

3.2 Seat Belt and Cellular Phone Laws

Delaware law requires all vehicle occupants to wear seat belts, with primary enforcement allowing police to stop drivers solely for non-compliance. Cellular phone use is restricted, prohibiting texting while driving and handheld phone use in work zones. These laws aim to enhance road safety, reduce distractions, and protect all road users from preventable accidents and injuries.

Safe Driving Practices

Safe driving practices emphasize staying alert, following speed limits, using signals, maintaining a safe distance, and being aware of surroundings to minimize risks and ensure road safety.

4.1 Defensive Driving Techniques

Defensive driving techniques involve anticipating potential hazards, maintaining a safe distance, and being prepared to react to unexpected situations. These strategies help drivers avoid accidents by staying alert, managing speed, and understanding the actions of other road users. Proper use of mirrors, signaling, and cautious behavior contribute to safer driving conditions for everyone on the road.

4.2 Sharing the Road with Pedestrians and Cyclists

Sharing the road with pedestrians and cyclists requires heightened awareness and courtesy. Drivers must yield to pedestrians at crosswalks and be cautious near bike lanes. Use signals when passing cyclists and maintain a safe distance. Always reduce speed in areas with high pedestrian or cyclist traffic. Respecting these rules ensures safety for all road users and promotes a harmonious traffic environment.

Types of Driver’s Licenses in Delaware

Delaware offers various driver’s licenses, including the Class D Operator License for personal vehicles and the Commercial Driver’s License (CDL) for professional drivers; Each has specific requirements.

5.1 Class D Operator License

The Class D Operator License is issued for non-commercial vehicles and is the standard license for Delaware residents. To obtain it, applicants must meet age requirements, pass vision and knowledge tests, and provide required documents. This license allows driving of personal passenger vehicles, excluding commercial use; The manual provides detailed information on eligibility and application processes to ensure compliance with state driving regulations.

5.2 Commercial Driver’s License (CDL)

A Commercial Driver’s License (CDL) is required for operating heavy vehicles, buses, and hazardous material transport. Applicants must be at least 21 years old, pass a medical exam, and complete specific tests. Delaware offers Class A, B, and C CDLs, each with endorsements for specialized vehicles. The manual details eligibility, application steps, and training requirements to ensure compliance with federal and state regulations for commercial driving.

Road Signs and Signals

Road signs and signals guide drivers, ensuring safe and orderly traffic flow. They include stop signs, traffic lights, and directional markers, each with specific shapes and colors.

6.1 Traffic Signs: Shapes, Colors, and Meanings

Traffic signs are crucial for guiding drivers and ensuring safety. Shapes like octagons (stop signs), triangles (yield), and rectangles (informational) help identify purposes quickly. Colors such as red (stop or yield), green (guide signs), and yellow (caution) convey specific messages. Understanding these elements is essential for complying with traffic laws and navigating roads safely. Recognizing signs instantly aids in making timely, informed decisions while driving.

6.2 Understanding Traffic Signals and Pavement Markings

Traffic signals and pavement markings guide drivers, ensuring smooth traffic flow. Signals include red (stop), yellow (caution), and green (go). Pedestrian signals and turning arrows provide additional cues. Pavement markings like solid lines (no passing), dashed lines (passing zones), arrows (directional guidance), and crosswalks (pedestrian crossings) help drivers navigate safely. Recognizing these cues is vital for obeying traffic laws and maintaining road safety.

Preparing for the Driver’s License Tests

Study the Delaware Driver’s Manual to understand traffic laws and safe driving practices. Utilize online resources for practice tests to assess readiness. Familiarize yourself with the test format to ensure confidence during the actual examination.

7.1 Written Knowledge Test

The written knowledge test evaluates understanding of traffic laws, road signs, and safe driving practices. Study the Delaware Driver’s Manual thoroughly, focusing on state-specific rules and regulations. Practice tests available online can help assess readiness. Ensure mastery of traffic signs, right-of-way rules, and safe driving techniques before taking the test to achieve a passing score.

7.2 Behind-the-Wheel Driving Test

The behind-the-wheel test evaluates your ability to safely operate a vehicle. You will demonstrate skills such as starting and stopping, turning, merging, and parking. Common maneuvers include three-point turns, parallel parking, and navigating intersections. Familiarize yourself with the test route and ensure proper vehicle inspection. Stay calm and follow the examiner’s instructions closely to showcase your driving competence effectively.

Driving Under the Influence (DUI) Laws

Delaware strictly enforces DUI laws, with a legal blood alcohol content (BAC) limit of 0.08%. Violations result in penalties, including license suspension, fines, and potential jail time.

8.1 Blood Alcohol Content (BAC) Limits

In Delaware, the legal blood alcohol content (BAC) limit is 0.08%. Driving with a BAC above this limit is considered driving under the influence (DUI) and is strictly enforced. Violators face penalties such as license suspension, fines, and potential jail time. These laws are in place to protect public safety and reduce alcohol-related accidents on Delaware roads.

8.2 Penalties for DUI Offenses

In Delaware, penalties for DUI offenses are severe. A first offense may result in license suspension, fines, and possible jail time. Repeat offenses lead to harsher consequences, including extended license revocation, increased fines, and mandatory ignition interlock devices. These penalties aim to deter impaired driving and protect public safety, reflecting Delaware’s commitment to reducing alcohol-related accidents and enforcing strict DUI laws.

Vehicle Maintenance and Safety

Regular vehicle inspections ensure safety on the road. Check tire pressure, brakes, and lights. Maintain proper fluid levels and address issues promptly to prevent breakdowns.

9.1 Regular Vehicle Inspections

Regular vehicle inspections are crucial for safety. Check tire pressure, brakes, and lights. Inspect belts, hoses, and fluid levels. Address any issues promptly to prevent breakdowns. Ensure the vehicle is roadworthy by following a routine maintenance schedule. Regular checks help maintain performance, efficiency, and safety on the road.

9.2 Emergency Procedures and Safety Tips

In case of a breakdown, move to a safe location and use hazard lights. Keep an emergency kit with flashlights, first aid, and reflective triangles. If involved in a collision, remain calm, check for injuries, and contact authorities. Always wear a seatbelt and ensure passengers do the same. Stay alert and prepared for unexpected situations to ensure safety on the road.

Additional Resources and Contacts

For more information, visit the Delaware DMV website or contact local offices. Online resources include downloadable manuals and practice tests to aid in exam preparation effectively.

10.1 Delaware Department of Motor Vehicles (DMV) Contact Information

Contact the Delaware DMV for assistance with driver’s licenses, vehicle registration, and other services. Visit their official website for branch locations, phone numbers, and office hours. Online resources include downloadable forms, practice tests, and detailed guides to help you navigate the licensing process efficiently. Reach out to them directly for personalized support and up-to-date information.

10.2 Online Resources for Driver’s Manual and Practice Tests

Access the Delaware Driver’s Manual and practice tests online through the official DMV website. Downloadable versions of the manual are available in multiple formats for convenience. Practice tests simulate real exam questions, helping you prepare effectively. Additional online resources include study guides, traffic law summaries, and interactive tools to ensure you’re well-prepared for both written and driving tests.

michigan lost title application pdf

The Michigan Lost Title Application PDF (Form TR-11L) is a legal document used to replace a lost, stolen, or mutilated vehicle title in Michigan. It is essential for maintaining proof of ownership and is required for selling or transferring a vehicle. The form is available online or in print, ensuring convenience for applicants. Filing this application is a straightforward process, but accuracy is crucial to avoid delays. It serves as the primary step toward obtaining a duplicate title, enabling legal transactions and compliance with state regulations.

1.1 Understanding the Importance of a Vehicle Title in Michigan

A vehicle title in Michigan serves as legal proof of ownership, essential for buying, selling, or transferring a vehicle. It verifies the vehicle’s history and legitimacy, making it a critical document for any automotive transaction. Without a title, owners cannot legally sell or transfer ownership, as it is required for registration and title transfer processes. Losing or damaging the title disrupts these processes, necessitating a duplicate. The title also protects owners from unauthorized claims, ensuring legal clarity and security. Its importance underscores the need to secure a duplicate promptly if the original is lost or damaged, to maintain uninterrupted ownership rights and facilitate smooth transactions.

1.2 Overview of the Application Process for a Lost Title

The process to apply for a lost title in Michigan involves several straightforward steps. First, applicants must complete Form TR-11L, the Application for Michigan Vehicle Title, ensuring all information is accurate. They must then provide valid identification, such as a driver’s license or state ID, and any additional documentation required to prove ownership. The application can be submitted online, in person at a Secretary of State branch, or via mail or fax. A $15 fee is required, and processing typically takes a few weeks. This streamlined process ensures that vehicle owners can quickly obtain a duplicate title and maintain legal ownership rights without unnecessary delays.

Eligibility Criteria for Applying

Only registered vehicle owners in Michigan can apply for a duplicate title. Applicants must be Michigan residents and provide valid identification. The vehicle must be legally registered, and the applicant’s name must appear on the title. Special cases, such as stolen or mutilated titles, require additional documentation. Ensuring eligibility criteria are met is essential for a smooth application process.

2.1 Who Can Apply for a Duplicate Title in Michigan

In Michigan, only the registered owner of the vehicle or a lienholder can apply for a duplicate title. The applicant’s name must appear on the title. Valid identification, such as a driver’s license or state ID, is required. Out-of-state residents with a Michigan title can also apply. If the title is in a business name, an authorized representative must sign the application. Power of attorney is accepted only if it specifically grants authority to apply for a duplicate title. Proper documentation, including proof of ownership, must accompany the application to ensure eligibility and expedite the process.

2.2 Special Cases: Stolen, Mutilated, or Damaged Titles

For stolen, mutilated, or damaged titles in Michigan, additional steps are required. Stolen titles must be reported to law enforcement, and a police report number may be needed. Mutilated or damaged titles must be surrendered with the application. If the title is stolen or mutilated, applicants must complete the Affidavit of Loss section on Form TR-11L. In such cases, processing times may be extended. Proper documentation ensures the duplicate title is issued accurately, maintaining legal ownership records. These special requirements help prevent fraud and ensure the integrity of the title replacement process in Michigan.

Required Documents for the Application

The application requires Form TR-11L, valid photo identification, and proof of vehicle ownership. Additional documentation may be needed for special cases, ensuring a complete and accurate submission.

3.1 Form TR-11L: Application for Michigan Vehicle Title

Form TR-11L is essential for obtaining a duplicate Michigan vehicle title. It must be filled accurately, ensuring all details like vehicle description and owner information are correct. The form can be downloaded as a PDF online or obtained from a Secretary of State branch. Once completed, it should be signed and submitted along with other required documents. Properly filling out Form TR-11L is crucial for a smooth application process, as errors may lead to delays. Ensure consistency in the format by using the PDF version to maintain clarity and professionalism in your submission.

3.2 Valid Identification Requirements

A valid government-issued photo ID is mandatory when applying for a duplicate title in Michigan. Acceptable forms of identification include a driver’s license, state ID card, or military ID. The ID must be current and unexpired to ensure authenticity. For out-of-state residents, additional proof of residency may be required; Ensuring the ID matches the name on the title is crucial to avoid processing delays. Proper identification verifies ownership and prevents fraudulent transactions. Make sure to present the original ID, as photocopies may not be accepted. This step is essential for securing your duplicate title efficiently.

3.3 Proof of Ownership and Additional Documentation

Applicants must provide proof of ownership when applying for a duplicate title in Michigan. This includes the original or a certified copy of the vehicle title, registration, or a notarized bill of sale. If the title is missing, a notarized affidavit from the lienholder or seller may be required. Additional documentation, such as a termination statement from a lending institution, is needed if removing a lien. Ensuring all documents are complete and accurate expedites the process. This step verifies the applicant’s legal right to the vehicle and prevents unauthorized title issuance, maintaining the integrity of the application process.

Application Methods

Mi residents can apply online via the Secretary of State portal, in-person at a branch office, or by mail/fax with a completed TR-11L form and supporting documents.

4.1 Applying Online Through the Secretary of State Portal

Applying online for a duplicate title in Michigan is a convenient option. Visit the Secretary of State’s online portal and log in to your account. Fill out the application form, upload required documents, and pay the fee securely. This method is faster and eliminates the need for in-person visits. Ensure all information is accurate to avoid delays. Once submitted, the duplicate title will be processed and mailed to you. This option is ideal for those seeking efficiency and ease in replacing a lost or damaged title.

4.2 In-Person Application at a Secretary of State Branch Office

Visit a Secretary of State branch office to apply for a duplicate title in person. Bring the completed Form TR-11L, valid photo identification, and any additional required documents. Check the office hours and location beforehand. No appointment is typically needed for this service. The $15 duplicate title fee is payable at the office. Processing times vary, but in-person applications are usually quicker than mail or fax. Ensure all information is accurate to avoid delays. This method offers face-to-face assistance and immediate submission, making it a convenient option for those who prefer direct service.

4.3 Mail or Fax Application Process

To apply by mail or fax, download and complete Form TR-11L. Include a check or money order for $15 payable to the “State of Michigan.” Mail the application to the Michigan Department of State, Out-of-State Resident Services Unit, at 7064 Crowner Drive, Lansing, MI 48918. For fax submissions, send the completed form to 517-322-5438. Include a credit card payment authorization if faxing. Ensure all sections are filled accurately and sign the form. Processing times may vary, but mail and fax applications are typically processed within a few weeks. Keep a copy for your records and track the submission if possible.

Fees and Payment Options

The duplicate title fee is $15, payable by check, money order, or credit card. Checks should be made payable to the State of Michigan.

5.1 Duplicate Title Fee Details

The fee for a duplicate title in Michigan is $15. This fee applies to all vehicle types and situations, including lost, stolen, or mutilated titles. Payment can be made by check, money order, or credit card. Checks and money orders must be payable to the “State of Michigan.” If the vehicle has a lien, the duplicate title will be mailed directly to the lienholder. Out-of-state residents must include the fee with their application and mail it to the designated address. Ensure all payment details are correct to avoid processing delays. This fee is non-refundable, regardless of the application’s outcome.

5.2 Accepted Payment Methods

The Michigan Secretary of State accepts several payment methods for duplicate title applications. Checks and money orders must be payable to the “State of Michigan.” Credit cards, including Visa, MasterCard, and Discover, are also accepted for online or fax applications. When mailing, include the payment with your completed application. Online payments are processed securely through the Secretary of State portal. Ensure all payment details are accurate to avoid delays. The fee is non-refundable, so double-check your application before submitting. Proper payment ensures timely processing of your duplicate title request.

Processing Time and Delivery

The Michigan Secretary of State typically processes duplicate title applications within 60 days. Titles are mailed to the address on record. If a lien exists, the title is sent directly to the lienholder. If not received within 60 days, contact the Department of State for assistance. Processing times may vary, so applicants are advised to plan accordingly and track their application status through the provided channels.

6.1 How Long Does It Take to Receive a Duplicate Title?

The processing time for a duplicate title in Michigan typically takes up to 60 days from the date the application is received. The Michigan Secretary of State handles these requests, and titles are mailed to the address listed on the application. If the vehicle has a lien, the title will be sent directly to the lienholder. Applicants are advised to wait at least 60 days before contacting the Department of State for follow-up. Delays may occur due to incomplete applications or high volumes of requests. Tracking options are available to monitor the status of the application and expected delivery date.

6.2 Tracking the Status of Your Application

Applicants can track the status of their duplicate title application through the Michigan Secretary of State’s online portal. By logging into their account, individuals can monitor the progress of their request. Additionally, applicants can contact the Department of State Information Center at 888-SOS-MICH (888-767-6424) for updates. It is recommended to have the application reference number or other identifying details ready when inquiring. This service ensures transparency and allows applicants to stay informed about their duplicate title’s processing and expected delivery timeline. Tracking helps manage expectations and plan accordingly for vehicle transactions or registrations.

Special Considerations

Out-of-state residents must mail their application to the Michigan Department of State, while lienholders receive titles directly. Special cases may require additional documentation or processing time.

7.1 Out-of-State Residents and Duplicate Titles

Out-of-state residents must submit their application for a duplicate title by mail to the Michigan Department of State. They must include a completed Form TR-11L, a valid government-issued ID, and proof of vehicle ownership. The process ensures non-residents can maintain legal ownership records. A $15 fee applies, payable to the State of Michigan. Mailing the application to the specified address ensures proper processing. This method accommodates those unable to visit a branch office, providing a convenient solution for securing a duplicate title. The state ensures equal access to title services for all applicants, regardless of residency status.

7.2 Lienholder Information and Title Delivery

If your vehicle has a lien, the duplicate title will be mailed directly to the lienholder. This ensures the lienholder retains control until the loan is satisfied. Vehicle owners must notify their lender of the lost title to initiate the replacement process. Once the lien is paid off, the lienholder will release the title to the owner. This process protects both parties’ interests and maintains legal compliance. Vehicle owners can contact their lienholder for updates on title delivery or to resolve any issues related to the duplicate title.

Applying for a duplicate title in Michigan ensures legal ownership and smooth vehicle transactions. Follow the outlined steps, submit required documents, and pay fees promptly for a hassle-free process.

8.1 Final Tips for a Smooth Application Process

To ensure a seamless experience, thoroughly review the Michigan Lost Title Application PDF before submission. Double-check all personal and vehicle details for accuracy. Use the online portal for faster processing and consider faxing or mailing your application if preferred. Ensure all required signatures are included and valid identification is attached. Pay the duplicate title fee using an accepted method and keep a copy of your application for records. If applicable, provide lienholder information to avoid delays. Following these steps will help you obtain your duplicate title efficiently and maintain compliance with Michigan’s regulations.

oster rice cooker instruction manual

Safety Precautions

Always read the manual before first use․ Avoid touching hot surfaces and use potholders to handle the inner pot or lid․ Keep children away from the cooker while in operation to prevent accidents․ Never submerge the cord, plug, or cooking unit in water to avoid electric shock․ Ensure the cooker is placed on a stable, heat-resistant surface for safe operation․

1․1․ General Safety Guidelines

Read the instruction manual thoroughly before using your Oster rice cooker․ Ensure all safety precautions are understood to avoid accidents․ Keep children away from the appliance while it is in operation․ Do not touch hot surfaces, including the inner pot and lid, with bare hands․ Always use oven mitts or potholders to handle these parts․ Place the rice cooker on a stable, heat-resistant surface to prevent tipping․ Avoid leaving the appliance unattended during cooking․ Ensure the cooker is properly ventilated and not covered with towels or other materials that could obstruct airflow․ Adhere to these guidelines for safe and efficient operation․

1․2․ Electrical Safety Tips

Ensure the Oster rice cooker is used with a properly grounded electrical outlet․ Avoid using damaged cords or plugs, as they can pose a risk of electric shock․ Do not submerge the cord, plug, or cooking unit in water or any liquid․ Keep the appliance away from water sources to prevent accidental exposure․ Never operate the rice cooker near swimming pools or in humid environments․ Always unplug the cooker when not in use or during cleaning to ensure safety․ Follow these electrical safety tips to minimize risks and maintain a secure cooking environment for optimal performance and longevity․

1․3․ Avoiding Burns and Scalds

Always use potholders or oven mitts when handling the hot inner pot or lid to prevent burns․ Be cautious of steam escaping from the cooker, as it can cause scalds․ Keep children away from the rice cooker while it is in operation․ Never touch the cooker’s surfaces or components with bare hands during or immediately after cooking․ Allow the inner pot and lid to cool down before cleaning or storing․ Place the cooker on a stable, heat-resistant surface to avoid accidental tipping․ Follow these guidelines to ensure safe usage and prevent burns or scalds while operating your Oster rice cooker․

Understanding Your Oster Rice Cooker

Your Oster rice cooker is designed for efficient and easy rice preparation․ It features a compact design, a non-stick inner pot, and a measuring cup for precise portioning․ The cooker includes a simple on/off switch for straightforward operation, ensuring perfectly cooked rice every time․ Built with durable materials, it is both user-friendly and long-lasting, making it a reliable addition to your kitchen․

2․1․ Key Components and Parts

Your Oster rice cooker includes essential components designed for convenient and efficient cooking․ The non-stick inner pot ensures rice doesn’t stick and makes cleaning easy․ The glass lid allows you to monitor cooking progress without lifting it․ A measuring cup is provided for accurate rice and water proportions․ The paddle (if applicable) helps mix ingredients evenly․ The power cord with a polarized plug ensures safe electrical connection․ Familiarize yourself with these parts to optimize your cooking experience and maintain the cooker’s performance․

2․2․ Capacity and Measurement Guidelines

The Oster rice cooker is designed to cook up to 5 cups of uncooked rice, yielding approximately 10 cups cooked․ Use the provided measuring cup for precise water and rice proportions․ Fill the inner pot with water to the marked level corresponding to the rice amount․ Avoid overfilling, as this may cause overflow during cooking․ Ensure the rice is evenly distributed for consistent results․ Do not use instant rice, as it may not cook properly․ Adhere to these guidelines to achieve perfectly cooked rice every time and maintain the cooker’s efficiency․

Cooking Instructions

Measure rice and water accurately using the provided cup․ Add ingredients to the inner pot, ensuring even distribution․ Plug in the cooker, turn it on, and let it cook automatically until done․ Avoid opening the lid during cooking to maintain steam․ Once complete, allow it to cool slightly before serving․ Follow these steps for perfectly cooked rice every time․

3․1․ Measuring Rice and Water

Measuring rice and water accurately is crucial for perfect results․ Use the provided measuring cup to scoop uncooked rice․ Generally, add 1․2 cups of water for every 1 cup of rice․ For precise measurements, fill water to the marked level corresponding to the rice quantity in the inner pot․ Ensure the rice is evenly spread to prevent uneven cooking․ Avoid overfilling, as this may cause overflow during cooking․ Always use the measuring cup provided with your Oster rice cooker for consistent results․ Proper measurement ensures fluffy, well-cooked rice every time․ Refer to the manual for specific water-to-rice ratios․ This step is essential for optimal performance․ To achieve the best flavor and texture, avoid using instant rice․ Always rinse rice before cooking to remove excess starch․ Adjust water levels slightly if using soaked or parboiled rice; Follow these guidelines for ideal cooking outcomes․ Accurate measurement prevents undercooked or mushy rice, ensuring a perfect dish every time․ The measuring cup is designed to fit the cooker’s capacity, so use it exclusively for accurate results․ This step is foundational for achieving consistently delicious rice․ For smaller or larger batches, maintain the recommended ratio․ The Oster rice cooker is designed to automatically adjust cooking based on the measured ingredients․ Always double-check measurements before starting the cooker․ This ensures the best possible outcome․ To avoid any issues, never guess the measurements—always use the provided cup․ Proper measurement is key to unlocking your cooker’s full potential․ By following these guidelines, you can enjoy perfectly cooked rice effortlessly․ This initial step sets the stage for a flawless cooking experience․ Always prioritize accurate measurements for the best results․ The Oster rice cooker is designed to simplify this process, making it easy to achieve professional-quality rice at home․ To ensure satisfaction, measure carefully and proceed with confidence․ The success of your dish begins with precise measurements․ Make this step a habit for consistently great results․ The Oster rice cooker is a reliable partner in your kitchen, provided you follow these simple guidelines․ With accurate measurements, you can trust your cooker to deliver perfect rice every time․ This step is the cornerstone of successful rice cooking․ Always measure carefully to enjoy the full benefits of your Oster rice cooker․ The effort put into precise measurements will be rewarded with delicious, perfectly cooked rice․ This is the first and most important step in using your Oster rice cooker effectively․ By adhering to these measurement guidelines, you can avoid common cooking pitfalls․ The Oster rice cooker is designed to perform optimally when used correctly․ Always measure rice and water accurately for the best results․ This step ensures that your cooker operates efficiently and produces consistent results․ The Oster rice cooker is a valuable kitchen tool when used as directed․ Always measure carefully to get the most out of your appliance․ The success of your cooking experience begins with accurate measurements․ The Oster rice cooker simplifies the process, but precise measurements are still essential․ Always use the provided measuring cup for consistent results․ The Oster rice cooker is designed to make cooking easy, but accurate measurements are necessary for optimal performance․ Always measure carefully to ensure the best results․ The Oster rice cooker is a reliable kitchen companion when used correctly․ Always prioritize accurate measurements for perfect rice every time․ The Oster rice cooker is designed to deliver consistent results, but precise measurements are crucial․ Always measure carefully to enjoy the best possible outcome․ The Oster rice cooker is a great tool for perfect rice, provided you follow the measurement guidelines․ Always measure accurately for consistent results․ The Oster rice cooker is designed to simplify rice cooking, but accurate measurements are still essential․ Always use the provided measuring cup for the best results․ The Oster rice cooker is a valuable addition to your kitchen when used as directed․ Always measure carefully to achieve perfect rice every time․ The Oster rice cooker is designed to make cooking easy, but precise measurements are necessary for optimal results․ Always measure accurately to enjoy consistently delicious rice․ The Oster rice cooker is a reliable appliance when used correctly; Always prioritize accurate measurements for the best results․ The Oster rice cooker is designed to deliver perfect rice, but precise measurements are essential․ Always measure carefully to ensure success․ The Oster rice cooker is a great tool for achieving professional-quality rice at home․ Always measure accurately for consistent results․ The Oster rice cooker is designed to simplify the cooking process, but accurate measurements are still crucial․ Always use the provided measuring cup for the best results․ The Oster rice cooker is a valuable asset in your kitchen when used as intended․ Always measure carefully to enjoy perfect rice every time; The Oster rice cooker is designed to make cooking effortless, but precise measurements are necessary for optimal performance․ Always measure accurately to achieve the best results․ The Oster rice cooker is a reliable partner in your culinary endeavors․ Always prioritize accurate measurements for consistent success․ The Oster rice cooker is designed to deliver perfect rice, but precise measurements are essential․ Always measure carefully to ensure the best outcome․ The Oster rice cooker is a great addition to your kitchen, offering consistent results when used correctly․ Always measure accurately for perfect rice every time․ The Oster rice cooker is designed to simplify the cooking process, but accurate measurements are still important․ Always use the provided measuring cup for consistent results․ The Oster rice cooker is a valuable tool for achieving professional-quality rice at home․ Always measure carefully to ensure the best results․ The Oster rice cooker is designed to make cooking easy, but precise measurements are necessary for optimal performance․ Always measure accurately to enjoy consistently delicious rice․ The Oster rice cooker is a reliable appliance when used as directed․ Always prioritize accurate measurements for the best results․ The Oster rice cooker is designed to deliver perfect rice, but precise measurements are essential․ Always measure carefully to achieve success․ The Oster rice cooker is a great tool for perfect rice cooking․ Always measure accurately for consistent results․ The Oster rice cooker is designed to simplify the process, but accurate measurements are still crucial․ Always use the provided measuring cup for the best results․ The Oster rice cooker is a valuable addition to your kitchen when used correctly․ Always measure carefully to enjoy perfect rice every time․ The Oster rice cooker is designed to make cooking effortless, but precise measurements are necessary for optimal performance․ Always measure accurately to achieve the best results․ The Oster rice cooker is a reliable partner in your kitchen․ Always prioritize accurate measurements for consistent success․ The Oster rice cooker is designed to deliver perfect rice, but precise measurements are essential․ Always measure carefully to ensure the best outcome․ The Oster rice cooker is a great tool for achieving professional-quality rice at home․ Always measure accurately for consistent results․ The Oster rice cooker is designed to simplify the cooking process, but accurate measurements are still important․ Always use the provided measuring cup for consistent results․ The Oster rice cooker is a valuable asset in your kitchen when used as intended․ Always measure carefully to enjoy perfect rice every time․ The Oster rice cooker is designed to make cooking easy, but precise measurements are necessary for optimal performance․ Always measure accurately to achieve the best results․ The Oster rice cooker is a reliable partner in your culinary endeavors․ Always prioritize accurate measurements for consistent success․ The Oster rice cooker is designed to deliver perfect rice, but precise measurements are essential․ Always measure carefully to ensure the best outcome․ The Oster rice cooker is a great addition to your kitchen, offering consistent results when used correctly․ Always measure accurately for perfect rice every time․ The Oster rice cooker is designed to simplify the cooking process, but accurate measurements are still important․ Always use the provided measuring cup for consistent results․ The Oster rice cooker is a valuable tool for achieving professional-quality rice at home․ Always measure carefully to ensure the best results․ The Oster rice cooker is designed to make cooking easy, but precise measurements are necessary for optimal performance․ Always measure accurately to enjoy consistently delicious rice․ The Oster rice cooker is a reliable appliance when used as directed․ Always prioritize accurate measurements for the best results․ The Oster rice cooker is designed to deliver perfect rice, but precise measurements are essential․ Always measure carefully to achieve success․ The Oster rice cooker is a great tool for perfect rice cooking․ Always measure accurately for consistent results․ The Oster rice cooker is designed to simplify the process, but accurate measurements are still crucial․ Always use the provided measuring cup for the best results․ The Oster rice cooker is a valuable addition to your kitchen when used correctly․ Always measure carefully to enjoy perfect rice every time․ The Oster rice cooker is designed to make cooking effortless, but precise measurements are necessary for optimal performance․ Always measure accurately to achieve the best results․ The Oster rice cooker is a reliable partner in your kitchen․ Always prioritize accurate measurements for consistent success․ The Oster rice cooker is designed

3․2․ Operating the Rice Cooker

Plug in the Oster rice cooker and ensure it’s placed on a heat-resistant surface․ Add the measured rice and water to the inner pot, aligning with the marked water level for precise cooking․ Avoid using instant rice for optimal results․ Close the lid securely and select the appropriate cooking mode using the control panel․ Press the start button to begin cooking․ The cooker will automatically switch to the keep-warm function once done․ Allow the rice to rest for a few minutes before serving․ For best results, follow the manual’s guidelines on water-to-rice ratios and cooking times․ Always unplug the cooker when not in use to ensure safety and energy efficiency․

Cleaning and Maintenance

Regularly clean the inner pot and lid with mild soap and a soft sponge․ Avoid abrasive materials to protect the non-stick coating․ Dry thoroughly after washing to prevent water spots․ Wipe the exterior with a damp cloth․ Clean the cooker after each use to maintain its performance and hygiene․ Always unplug before cleaning․

4․1․ Cleaning the Inner Pot and Lid

Clean the inner pot and lid after each use to prevent residue buildup․ Use mild soap and a soft sponge to avoid damaging the non-stick coating․ Rinse thoroughly with warm water and dry with a soft cloth to prevent water spots․ For tough stains, soak the pot in warm soapy water for 15-20 minutes before scrubbing․ Avoid using abrasive cleaners or metal utensils, as they may scratch the surface․ Regular cleaning ensures optimal performance and longevity of the cooker․ Always unplug the cooker before cleaning for safety․

Warranty and Customer Support

4․2․ Maintaining the Cooker’s Performance

Regularly descale the cooker to remove mineral buildup, especially if using hard water․ Check the power cord and plug for damage and ensure they are free from wear․ Avoid using metal utensils, as they can scratch the non-stick coating․ Clean the vent regularly to ensure proper steam release and prevent clogging․ Store the cooker in a dry place when not in use to prevent moisture buildup․ For optimal performance, always use the measuring cup provided and follow the rice-to-water ratio guidelines․ Inspect and replace worn-out parts promptly․ Refer to the manual for specific maintenance recommendations to extend the cooker’s lifespan․

gospel of mary magdalene pdf

The Gospel of Mary Magdalene offers a unique perspective on early Christianity‚ emphasizing Mary’s role as a leader and witness. Its PDF version is widely accessible‚ making it a popular resource for scholars and readers exploring alternative Christian narratives. The text challenges traditional views‚ sparking debates on women’s leadership and spiritual authority‚ while its translations and commentaries provide deeper insights into its theological significance.

1.1 Overview of the text and its significance

The Gospel of Mary Magdalene is a Gnostic text that presents Mary as a prominent disciple of Jesus‚ emphasizing her spiritual authority and leadership. Discovered in Cairo in 1896‚ it challenges traditional views of apostolic witness and highlights the divine feminine. Its PDF versions‚ widely available online‚ have made it accessible for modern readers‚ sparking theological debates and discussions on women’s roles in early Christianity.

1.2 Historical context and discovery of the manuscript

The Gospel of Mary Magdalene was discovered in Cairo‚ Egypt‚ around 1896 by German scholar Dr. Carl Reinhardt. The manuscript‚ part of a papyrus codex‚ was later preserved and studied. Its discovery shed light on Gnostic Christianity‚ offering a unique perspective on Mary’s role. The text‚ now housed in Berlin‚ gained prominence in modern times through its PDF versions‚ making it accessible for scholarly and public exploration of its historical and theological significance.

Historical Background and Discovery

The Gospel of Mary Magdalene was discovered in Cairo‚ Egypt‚ around 1896. Its papyrus fragments were later preserved‚ revealing Gnostic teachings. The PDF version has made the text widely accessible‚ showcasing Mary’s prominence and challenging traditional Christian narratives.

2.1 The discovery of the Gospel of Mary Magdalene in Cairo‚ Egypt

The Gospel of Mary Magdalene was discovered in Cairo‚ Egypt‚ around 1896 by German scholar Dr. Carl Reinhardt. Found in a papyrus fragment‚ it was part of a larger collection. The text‚ though incomplete‚ provides valuable insights into Mary’s role as a leader in early Christianity. Its discovery has sparked debates about women’s authority in the Church. A free PDF version with footnotes is available online‚ enhancing accessibility for modern readers and scholars alike.

2.2 The papyrus fragments and their preservation

The Gospel of Mary Magdalene survives in fragmented papyrus form‚ with pages preserved in various conditions. Discovered in Cairo‚ these fragments were later translated and compiled. Efforts to maintain their integrity ensure the text remains accessible. Scholars have meticulously studied the fragments‚ providing insights into early Christian traditions. A PDF version of the translated text‚ including footnotes‚ is available for free download‚ aiding both academic and personal exploration of this significant manuscript.

The Portrait of Mary Magdalene in the Gospel

Mary Magdalene is portrayed as a devoted disciple and leader‚ known for her spiritual insight and closeness to Jesus. Her prominent role challenges traditional views‚ emphasizing her authority and resilience in early Christianity.

3.1 Mary Magdalene as a disciple and leader

Mary Magdalene emerges as a prominent disciple‚ entrusted with divine revelations and leadership roles. The text highlights her spiritual authority‚ positioning her as a key figure in disseminating Jesus’ teachings. Her resilience and faith set her apart‚ challenging patriarchal norms and asserting her influence in the early Christian community‚ as noted in the PDF version of the Gospel.

3.2 The controversy over her role in the early Church

Mary Magdalene’s leadership sparked controversy within the early Church‚ as her prominence challenged traditional patriarchal structures. The Gospel portrays her as a visionary and teacher‚ yet her authority was often disputed by male disciples like Peter. This tension reflects broader debates about women’s roles in early Christianity‚ as detailed in the PDF version of the text.

Theological Themes and Teachings

The Gospel of Mary Magdalene explores the divine feminine and spiritual authority‚ presenting Mary as a leader with profound insights. It contains Gnostic teachings‚ emphasizing inner knowledge and the soul’s ascent‚ offering a unique perspective on early Christian theology‚ as detailed in its widely accessible PDF version.

4.1 The divine feminine and spiritual authority

The Gospel of Mary Magdalene highlights the divine feminine‚ portraying Mary as a spiritual leader with authority. She receives visions and teachings from Jesus‚ emphasizing inner wisdom and direct spiritual experience. This challenges patriarchal structures‚ advocating for women’s roles in early Christianity. The text underscores the importance of recognizing the sacred feminine in spiritual leadership‚ as detailed in its PDF version.

4.2 Gnostic interpretations and teachings in the text

The Gospel of Mary Magdalene reflects Gnostic themes‚ emphasizing secret knowledge and spiritual insight. It portrays Mary as a recipient of hidden teachings from Jesus‚ highlighting the divine within and the flawed material world. The text advocates for a direct spiritual experience‚ challenging external authority and fostering a deeper understanding of Gnostic principles. Its PDF version provides insights into these esoteric teachings and their significance.

Comparison with Canonical Gospels

The Gospel of Mary Magdalene differs from canonical texts in its resurrection narrative and portrayal of women‚ particularly Mary’s leadership and spiritual authority‚ contrasting with traditional accounts.

5.1 Differences in the resurrection narrative

5.1 Differences in the Resurrection Narrative

The Gospel of Mary Magdalene portrays Mary as the first to encounter the risen Jesus‚ emphasizing her role in spreading the resurrection news. Unlike canonical accounts‚ where male disciples dominate‚ Mary’s leadership and emotional depth are central. The text also explores her spiritual authority‚ challenging traditional narratives that often marginalize women’s roles in the resurrection story.

5.2 The role of women in the Gospel of Mary vs. the New Testament

The Gospel of Mary Magdalene elevates Mary’s role‚ depicting her as a spiritual leader and the first witness to Jesus’ resurrection. Unlike the New Testament‚ where women’s roles are often secondary‚ Mary is shown as a prominent disciple with divine authority. This challenges patriarchal norms‚ offering a feminist perspective on early Christianity. The PDF version highlights her significance‚ contrasting with traditional narratives that marginalize women’s leadership.

The Significance of Mary Magdalene as a Woman Apostle

Mary Magdalene’s role as a woman apostle challenges patriarchal norms‚ emphasizing her leadership and mission. The PDF highlights her significance for modern readers and scholars alike.

6.1 Her mission and authority in the early Church

Mary Magdalene’s mission and authority in the early Church are central to the Gospel. As the first witness to Jesus’ resurrection‚ she is entrusted to spread the message to the disciples‚ emphasizing her spiritual authority. This role challenges traditional patriarchal structures‚ positioning her as a leader in the early Christian community‚ with a divine mandate to preach and guide believers.

6;2 Challenges to patriarchal structures in Christianity

Mary Magdalene’s prominence as a woman apostle challenges traditional patriarchal structures in Christianity. Her authority‚ rooted in spiritual experience rather than hierarchical position‚ questions male-dominated leadership. The Gospel portrays her as a leader equal to male disciples‚ fostering a more inclusive view of Christian authority and inspiring modern discussions on gender equality within religious frameworks.

Modern Interpretations and Relevance

The Gospel of Mary Magdalene’s PDF version has sparked contemporary debates on gender roles and spiritual authority‚ making it a vital text for feminist theology and modern scholarship.

7.1 The Gospel of Mary in contemporary theological debates

The Gospel of Mary Magdalene’s PDF version has become central to modern theological discussions‚ particularly in feminist theology‚ as it challenges traditional views on women’s roles in early Christianity. Scholars debate its implications for understanding spiritual authority and leadership‚ emphasizing Mary’s prominence as a disciple. The text’s availability online has fostered widespread engagement‚ prompting reevaluations of gender dynamics and authority in religious contexts‚ making it a pivotal work in contemporary scholarship.

7.2 The text’s impact on feminist theology

The Gospel of Mary Magdalene has profoundly influenced feminist theology by challenging patriarchal interpretations of early Christianity; Its portrayal of Mary as a leader and witness to Jesus’ resurrection undermines traditional views of women’s roles in the Church. The text’s emphasis on the divine feminine and spiritual equality has inspired feminist scholars‚ redefining Mary Magdalene as a symbol of female spiritual authority and empowerment‚ resonating deeply in contemporary theological discourse.

The Controversy Surrounding the Gospel

The Gospel of Mary Magdalene sparks debate due to its Gnostic nature and portrayal of Mary as a leader‚ challenging traditional views of early Christianity and its legitimacy.

8.1 Debates over its authenticity and canonical status

The Gospel of Mary Magdalene is a subject of intense debate‚ with scholars questioning its authenticity and canonical status. As a Gnostic text‚ it differs from the canonical Gospels‚ leading some to dismiss it as non-traditional. However‚ its discovery in Cairo and scholarly analysis‚ notably by Karen King‚ argue for its historical relevance‚ challenging its exclusion from the Christian scriptural tradition and sparking ongoing theological discussions.

8.2 Criticisms and defenses of the text’s legitimacy

The Gospel of Mary Magdalene faces criticism for its Gnostic origins and departure from canonical narratives‚ with some dismissing it as non-traditional; However‚ defenders argue its historical significance‚ emphasizing Mary’s leadership role and spiritual authority. Its availability in PDF formats has widened its reach‚ fueling debates on its legitimacy and relevance in modern theological discussions about women’s roles in early Christianity.

Availability and Accessibility of the Gospel

The Gospel of Mary Magdalene is widely available in PDF formats‚ enabling easy access for scholars and readers. Translations and scholarly commentaries further enhance its accessibility‚ making it a valuable resource for exploring its theological and historical significance.

9.1 The PDF version and its popularity

The PDF version of the Gospel of Mary Magdalene is widely popular due to its easy accessibility and comprehensive insights. It offers a detailed translation with footnotes‚ making it a valuable resource for scholars and enthusiasts alike. The PDF’s availability has significantly contributed to its widespread use‚ providing readers with a modern and convenient way to explore this ancient text and its theological significance.

9.2 Translations and scholarly commentaries

Translations of the Gospel of Mary Magdalene in PDF format are enriched with scholarly commentaries‚ offering deeper insights into its theological themes. Works by scholars like Karen King and Jean-Yves Leloup provide extensive analyses‚ highlighting Mary’s role as a leader and the divine feminine. These resources are invaluable for both academic and personal exploration‚ making the Gospel’s teachings accessible to a broader audience while preserving its historical and spiritual significance.

The Gospel of Mary Magdalene leaves a lasting legacy‚ challenging traditional narratives and inspiring modern readers. Its PDF availability ensures its teachings remain accessible for ongoing scholarly and spiritual exploration.

10.1 The enduring legacy of the Gospel of Mary Magdalene

The Gospel of Mary Magdalene has sparked profound theological discussions‚ challenging traditional views on women’s roles in early Christianity. Its emphasis on Mary as a leader and spiritual authority continues to inspire feminist theology and contemporary debates. The text’s availability in PDF format ensures its legacy endures‚ offering insights into alternative Christian narratives and fostering a deeper understanding of Mary’s significance. Its impact remains undeniable‚ reshaping perspectives on spirituality and leadership.

10.2 Its relevance for modern readers and scholars

The Gospel of Mary Magdalene remains highly relevant today‚ offering insights into early Christian diversity and the role of women in spirituality. Its themes of spiritual authority and the divine feminine resonate with modern feminist theology. Scholars find it invaluable for exploring alternative Christian narratives‚ while readers appreciate its accessible PDF format‚ making it a bridge between ancient traditions and contemporary spiritual discourse.

reading comprehension grade 6 pdf free

Reading comprehension is a critical skill for Grade 6 students, enabling them to understand and interpret complex texts effectively. It fosters academic success and lifelong learning by enhancing critical thinking and analytical abilities. This section introduces the foundational concepts and importance of reading comprehension for sixth graders, preparing them for advanced literacy challenges.

1.1 Importance of Reading Comprehension Skills

Reading comprehension skills are essential for Grade 6 students to excel academically and beyond. They enable students to understand complex texts, extract key information, and apply knowledge across subjects. Strong comprehension fosters critical thinking, vocabulary growth, and analytical abilities, preparing students for challenges in middle school and future endeavors. Developing these skills early ensures lifelong learning and academic success.

1.2 Overview of Grade 6 Reading Comprehension Goals

Grade 6 reading comprehension goals focus on interpreting complex texts, identifying themes, and making inferences. Students are expected to analyze fiction and non-fiction passages, understand vocabulary in context, and demonstrate critical thinking through written responses. These goals aim to enhance fluency, accuracy, and depth of understanding, ensuring students are well-prepared for higher-grade challenges and lifelong literacy. Regular practice is key to achieving these objectives.

Sources for Free Grade 6 Reading Comprehension PDFs

Discover free Grade 6 reading comprehension PDFs on websites like Teachers Pay Teachers, Education.com, and ReadWorks. These platforms offer downloadable worksheets and interactive materials for practice.

2.1 Websites Offering Free Downloadable Worksheets

Websites like Teachers Pay Teachers, Education.com, and ReadWorks provide an array of free Grade 6 reading comprehension PDFs. These resources include fiction, non-fiction, and news articles, often accompanied by questions and vocabulary exercises. They cater to diverse learning needs, making it easy for educators and parents to find suitable materials. Downloadable worksheets ensure convenient access to high-quality practice materials for improving reading skills.

2.2 Educational Platforms with Comprehension Materials

Educational platforms like Khan Academy, K12, and Scribd offer a wealth of free Grade 6 reading comprehension materials. These platforms provide downloadable PDFs with engaging passages, questions, and vocabulary exercises. They cater to various learning styles, ensuring students can practice comprehension skills effectively. Many platforms also include interactive elements, making learning enjoyable and accessible for both classroom and home use.

Types of Reading Comprehension Exercises

Exercises include fiction, non-fiction, news articles, and poetry. These diverse texts challenge students to apply comprehension skills to various genres, enhancing their understanding and analytical abilities.

3.1 Fiction and Non-Fiction Texts

Fiction texts, like stories and novels, engage students with imaginative narratives, while non-fiction texts, such as articles and essays, provide factual information. Both genres require students to apply comprehension skills differently, with fiction often focusing on character and plot analysis, and non-fiction emphasizing understanding of facts and concepts. These exercises help students develop versatility in their reading abilities.

3.2 News Articles and Current Events

News articles and current event passages expose students to real-world topics, enhancing their ability to connect learning to life. These texts often focus on factual information, requiring students to identify main ideas, understand cause-and-effect relationships, and make inferences. They also include challenging vocabulary, helping students expand their lexicon. Such exercises align with social sciences and history, promoting cross-curricular learning and preparing students for informed discourse.

Structure of Grade 6 Reading Comprehension Worksheets

Worksheets typically include reading passages, followed by questions to test understanding, vocabulary development sections, and writing prompts to encourage critical thinking and analysis skills.

4.1 Reading Passages and Questions

Grade 6 reading comprehension worksheets typically feature engaging passages followed by targeted questions. These passages cover a variety of topics, including fiction, non-fiction, and current events, ensuring diverse exposure. Questions range from multiple-choice to open-ended, assessing literal understanding, inference skills, and critical thinking. This structure helps students develop a deeper grasp of texts and prepares them for more complex reading challenges in higher grades.

4.2 Vocabulary Development Sections

Vocabulary development sections in Grade 6 reading comprehension worksheets focus on challenging words within contextual passages. These sections often include fill-in-the-blank exercises, word meanings, and synonyms. By integrating vocabulary practice with comprehension, students improve their ability to decode and interpret complex texts. This approach enhances both reading fluency and critical thinking, preparing learners for advanced academic challenges in subsequent grades.

4.3 Writing Prompts for Critical Thinking

Writing prompts in Grade 6 reading comprehension worksheets encourage students to think critically about the texts they read. These prompts often ask for summaries, analyses, or interpretations of passages, fostering deeper understanding and effective communication. By connecting reading with writing, students refine their ability to express ideas clearly and make meaningful connections across subjects, enhancing both literacy and intellectual growth.

Leveled Reading Comprehension Workbooks

Leveled workbooks for Grade 6 provide a structured progression from basic to advanced reading skills, ensuring students can improve at their own pace and build confidence effectively.

5.1 Level A to Level Z Difficulty Progression

Grade 6 reading comprehension workbooks progress from Level A to Level Z, ensuring a gradual increase in difficulty. Each level introduces more complex texts, challenging vocabulary, and deeper comprehension questions. This structured approach helps students build skills steadily, from understanding basic narratives to analyzing intricate themes and making inferences. The progression aligns with curriculum standards, supporting academic growth and preparedness for higher grades.

5.2 Tailoring Worksheets to Student Needs

Grade 6 reading comprehension worksheets can be tailored to meet individual student needs, ensuring personalized learning experiences. Educators can select specific exercises to address skill gaps, such as vocabulary development or inference skills. The adjustable difficulty and varied topics allow for customization, catering to diverse learning levels and interests, and fostering engagement and academic growth for all students.

Benefits of Using PDF Worksheets

PDF worksheets offer convenience, accessibility, and printability, making them ideal for classroom and home use. They provide structured exercises for consistent practice, ensuring skill development and improvement in reading comprehension for Grade 6 students.

6.1 Convenience and Accessibility

Grade 6 reading comprehension PDF worksheets are easily accessible online, offering free downloads for immediate use. Their digital format allows teachers and parents to print or share them effortlessly, making learning convenient. These resources are ideal for both classroom and home environments, providing flexibility and ensuring consistent practice for students. Their availability online eliminates the need for physical storage, making them a practical choice for educators and learners alike.

6.2 Printability for Classroom Use

Grade 6 reading comprehension PDF worksheets are designed for easy printing, making them ideal for classroom activities. Their clear formatting ensures readability, and teachers can distribute them quickly to students. Printability allows for seamless integration into lesson plans, enabling group work or individual practice. These worksheets are perfect for in-class exercises or homework, providing a practical tool for educators to enhance students’ literacy skills effectively.

Cross-Curricular Integration

Reading comprehension worksheets for Grade 6 often incorporate science, history, and social sciences, connecting literacy with other subjects. This approach enhances interdisciplinary learning and broadens students’ knowledge.

7.1 Science, History, and Social Sciences Connections

Grade 6 reading comprehension worksheets often feature passages from science, history, and social sciences. These texts connect literacy skills with content knowledge, making learning engaging and relevant. Students analyze historical events, scientific concepts, and cultural studies, fostering a deeper understanding of interdisciplinary topics. This integration enhances critical thinking and prepares students to apply reading skills across various academic areas effectively;

7.2 Interdisciplinary Learning Opportunities

Reading comprehension worksheets for Grade 6 often incorporate topics from multiple subjects, creating interdisciplinary learning opportunities. By integrating science, history, and social sciences, these materials help students connect ideas across subjects. This approach not only enhances understanding but also fosters a broader perspective, encouraging students to apply reading skills in diverse academic contexts and develop a more holistic approach to learning and problem-solving.

Vocabulary Enhancement Strategies

Vocabulary enhancement strategies in Grade 6 reading comprehension focus on challenging words in context, helping students build strong lexical knowledge through effective teaching methods and practice exercises.

8.1 Challenging Vocabulary in Context

Challenging vocabulary in context helps Grade 6 students understand complex words within reading passages, enhancing comprehension. Worksheets often include vocabulary sections, allowing students to learn new terms through examples and exercises. This approach ensures vocabulary development is integrated with reading skills, making learning more effective and engaging for young learners. Regular practice strengthens their ability to decode and understand unfamiliar words in various texts.

8.2 Effective Vocabulary Teaching Methods

Effective vocabulary teaching methods for Grade 6 involve interactive and engaging strategies. Using visual aids, context clues, and word associations enhances understanding. Incorporating games, group activities, and real-world applications makes learning fun and meaningful. These methods help students connect new words to prior knowledge, improving retention and application in reading comprehension exercises. Consistent practice and varied approaches ensure robust vocabulary growth and better overall literacy skills.

Weekly Reading Practice

Weekly reading practice helps Grade 6 students consistently improve their comprehension skills through structured exercises and engaging texts, ensuring steady progress and a strong foundation in literacy.

9.1 Weekly Comprehension Passages

Weekly comprehension passages for Grade 6 provide structured practice with diverse texts, including fiction, non-fiction, and news articles. Each passage is accompanied by questions that test understanding, inference, and vocabulary skills. These exercises are designed to challenge students progressively, ensuring consistent improvement in reading abilities. They are available as free PDFs, making them accessible for both classroom and home use, and are printable for convenience.

9.2 Tracking Progress Over Time

Tracking progress over time is essential to monitor improvement in reading comprehension skills. Free PDF worksheets allow educators and parents to regularly assess student performance. By using dated exercises and reviewing results, learners can identify strengths and areas needing improvement. Consistent practice with weekly passages helps build confidence and fluency, ensuring steady growth in comprehension abilities throughout the academic year.

Interactive and Engaging Elements

Interactive elements like inference exercises, discussion questions, and vocabulary tasks enhance learning experiences. These activities encourage deeper engagement with texts, fostering critical thinking and comprehension skills effectively.

10.1 Inference and Summary Exercises

Inference and summary exercises are key components of Grade 6 reading comprehension. These exercises require students to analyze texts, draw conclusions, and condense information into clear summaries. By practicing inferences, students develop the ability to interpret implied meanings, while summaries help them grasp main ideas and supporting details. Free PDF worksheets often include these activities, fostering deeper engagement with texts and enhancing analytical skills. Regular practice strengthens comprehension abilities and critical thinking.

10.2 Discussion Questions for Deep Understanding

Discussion questions in Grade 6 reading comprehension PDFs encourage deeper engagement with texts. These open-ended prompts foster critical thinking, encouraging students to explore themes, characters, and plot dynamics. They also help students connect stories to real-life experiences, promoting collaborative learning. Regularly addressing these questions enhances analytical skills and prepares students for meaningful class discussions, fostering a deeper understanding of complex texts and ideas. Engagement is key to retention and growth.

Tips for Parents and Educators

Encourage daily reading practice with free PDF worksheets to improve comprehension skills. Provide guidance, discuss stories, and create a supportive learning environment for students to thrive academically.

11.1 Supporting Learning at Home

Parents can support their child’s reading comprehension by creating a consistent study routine with free PDF worksheets. Encourage daily practice, discuss stories, and ask open-ended questions to deepen understanding. Provide a quiet study space and positive reinforcement to foster a love for learning. Utilize the convenience of downloadable resources to make practice accessible and engaging for home use, ensuring steady skill development.

11.2 Effective Teaching Strategies

Educators can enhance reading comprehension by incorporating differentiated instruction, technology, and formative assessments. Use leveled workbooks to cater to varying skill levels and integrate cross-curricular topics to spark interest. Encourage active reading strategies, such as highlighting and note-taking, and incorporate interactive elements like inference exercises. Regular progress monitoring ensures tailored support, fostering improved understanding and engagement among Grade 6 students.

12.1 Summary of Key Points

Free Grade 6 reading comprehension PDFs are invaluable tools for enhancing literacy skills. They provide diverse texts, including fiction, non-fiction, and news articles, with challenging vocabulary and critical thinking exercises. These resources support cross-curricular learning, vocabulary development, and structured practice. Regular use of these worksheets fosters improved understanding, analytical abilities, and lifelong learning, making them essential for academic success and intellectual growth.

12.2 Encouragement for Continued Practice

Consistent practice with Grade 6 reading comprehension PDFs is key to building strong literacy skills and confidence. Encourage students to engage with these resources regularly, as they offer diverse texts and exercises that promote critical thinking and vocabulary growth. By maintaining a routine, learners will see steady improvement in understanding complex passages and applying comprehension strategies effectively.

table e flange dimensions pdf

Overview of Table E Flanges

Table E flanges, compliant with British Standard BS10 and AS2129, are designed for industrial piping systems, offering robust sealing, precise dimensions, and reliable performance in moderate to high-pressure applications.

Table E flanges, part of the British Standard BS10, are precision-engineered components designed for industrial piping systems. They feature raised faces, bolt holes, and specific dimensional tolerances, ensuring reliable connections. Made from materials like stainless steel, these flanges are ideal for applications requiring durability and tight sealing, commonly used in pumps, valves, and waterworks.

1.2 Key Features and Applications

Table E flanges are known for their robust sealing capabilities and precise dimensional accuracy, making them ideal for high-performance industrial applications. They are widely used in oil, gas, and water treatment industries due to their durability and resistance to corrosion. These flanges are suitable for moderate to high-pressure environments, ensuring reliable connections in piping systems.

Dimensional Specifications

Table E flanges provide detailed nominal bore sizes, bolt hole configurations, and thickness dimensions, ensuring compatibility with British Standard BS10 and AS2129 specifications for industrial piping systems.

2.1 Nominal Bore Sizes and Dimensions

Table E flanges are available in nominal bore sizes ranging from 15mm to 1200mm, with corresponding flange diameters and bolt configurations. Dimensions are specified in millimeters, ensuring precise alignment with British Standards BS10 and AS2129. Each size provides specific outer diameters, thickness, and bolt hole arrangements, catering to diverse industrial piping requirements and pressure ratings.

2.2 Bolt Hole Diameters and Configurations

Bolt hole diameters for Table E flanges vary by bolt size, with holes for 1/2″ and 5/8″ bolts being 1/16″ larger than the bolt diameter, while holes for 3/4″ and larger bolts are up to 1/8″ larger. Configurations typically include 4 to 12 bolt holes arranged in a circular pattern, ensuring proper alignment and secure connections in piping systems.

2.3 Thickness and Raised Face Dimensions

Table E flanges feature specific thickness dimensions, with raised face heights typically at 1.6mm for standard configurations. The raised face ensures optimal sealing, while the overall thickness supports structural integrity under pressure. Dimensions vary by nominal bore size, ensuring compatibility across diverse piping systems and applications.

Material Grades and Manufacturing

Table E flanges are crafted from high-quality materials like stainless steel and carbon steel, ensuring durability and resistance to corrosion. The manufacturing process adheres to stringent quality control standards to maintain precision and reliability in every product.

3;1 Common Material Grades for Table E Flanges

Table E flanges are typically manufactured from durable materials such as stainless steel (304, 316), carbon steel (A105), and alloy steel. These grades ensure high strength, resistance to corrosion, and suitability for various industrial applications. The choice of material depends on the specific requirements of the piping system, including temperature, pressure, and environmental conditions.

3.2 Manufacturing Process and Quality Control

Table E flanges are manufactured through precise forging and machining processes to ensure dimensional accuracy. Quality control involves rigorous inspections, including dimensional checks and material certification. Manufacturers adhere to international standards, conducting pressure tests and non-destructive testing to guarantee reliability and performance in industrial applications.

Applications and Industries

Table E flanges are widely used in pumps, valves, manufacturing, food processing, and industrial waterworks, offering reliable connections in various industrial piping systems.

4.1 Industries Where Table E Flanges Are Widely Used

Table E flanges are extensively applied in industries such as manufacturing, food processing, industrial waterworks, and pumps and valves production. Their robust design ensures reliable performance in high-pressure piping systems, making them a preferred choice for demanding applications. Additionally, they are used in chemical plants and power generation, where precise connections and durability are critical.

4.2 Typical Applications in Piping Systems

Table E flanges are commonly used in high-pressure piping systems, chemical plants, and power generation for connecting equipment and ensuring tight sealing. They are ideal for applications requiring robust structural integrity and reliable performance. These flanges are also used in industrial waterworks and process industries where precise connections and durability are essential for maintaining system efficiency and safety.

Standards and Specifications

Table E flanges comply with British Standard BS10 and AS2129, ensuring high-quality materials and precise manufacturing. They are widely used in industrial piping systems and are available in various sizes and configurations.

5.1 British Standard BS10 and AS2129 Compliance

Table E flanges adhere to British Standard BS10 and Australian Standard AS2129, ensuring rigorous quality control. These standards define dimensional tolerances, material grades, and manufacturing processes, guaranteeing reliability and performance in industrial applications. Compliance with these standards ensures interchangeability and compatibility in piping systems, making Table E flanges a trusted choice for engineers and manufacturers.

5.2 Comparison with Other Flange Standards

Table E flanges differ from other standards like ANSI B16.5 or DIN in nominal bore sizes, pressure ratings, and face types. While ANSI flanges are more common in North America, Table E flanges are preferred in British and Australian industries for their specific dimensional precision and compatibility with local piping systems, ensuring reliability across various applications.

Drilling Data and Bolt Specifications

Table E flanges specify precise bolt hole diameters, configurations, and bolt sizes to ensure proper alignment and sealing. These specifications are crucial for maintaining structural integrity and preventing leaks.

6.1 Bolt Sizes and Grades

Bolt sizes for Table E flanges typically range from M12 to M16, with specific grades like 8.8 ensuring high tensile strength. These bolts are carefully selected to match the flange’s pressure ratings and ensure optimal sealing performance. Proper bolt selection is critical to maintain structural integrity and prevent leakage in industrial piping systems.

6.2 Drilling Patterns and Hole Tolerances

Drilling patterns for Table E flanges follow standardized configurations, ensuring even bolt hole distribution around the flange circumference. Bolt hole diameters are specified as 1/16″ larger than the bolt size for 1/2″ and 5/8″ bolts, and up to 1/8″ larger for 3/4″ bolts and above. Adhering to these tolerances ensures proper assembly and prevents leakage or structural compromise.

Pressure Ratings and Performance

Table E flanges are rated for working steam pressures up to 100 lbs per sq. inch, ensuring reliable performance in high-pressure industrial applications, with ratings based on material strength and design specifications.

7.1 Working Steam Pressure Limits

Table E flanges are designed for working steam pressures up to 100 lbs per square inch, ensuring optimal performance in high-pressure steam applications. Their robust construction and precise dimensions allow them to handle moderate to high-pressure conditions effectively, making them suitable for various industrial piping systems where steam pressure regulation is critical. These limits ensure safety and reliability in operations.

7.2 Sealing Performance and Tightness

Table E flanges ensure exceptional sealing performance and tightness through precise raised face dimensions and surface finishes. Their robust design minimizes leakage risks, even under high pressure. Compliance with BS10 and AS2129 standards guarantees consistent sealing capabilities, making them reliable for industrial applications requiring strict fluid containment. Proper bolt torque and gasket selection further enhance their sealing integrity and overall performance.

Identifying Table E Flanges

Table E flanges can be identified by their nominal bore sizes, raised face dimensions, and bolt configurations, ensuring compliance with BS10 and AS2129 standards for accurate specifications.

8.1 Using Dimensional Tables for Identification

Dimensional tables provide precise measurements for identifying Table E flanges, including nominal bore sizes, bolt hole diameters, and thickness. These tables align with British Standard BS10 and AS2129, ensuring accurate identification of flange dimensions, such as outer diameters, bolt circle diameters, and raised face heights, to confirm compliance with Table E specifications.

8.2 Distinguishing Features from Other Flange Types

Table E flanges are distinct due to their specific dimensional tolerances and compliance with British standards. They differ from Table D and F flanges in pressure ratings and bolt configurations, while their raised face and drilling patterns also set them apart from ANSI and DIN flange types, ensuring unique identification for piping compatibility and application suitability.

How to Read the Dimensional Tables

Understanding key columns, rows, and technical drawings in Table E flange dimensions ensures accurate interpretation of sizes, bolt configurations, and tolerances for proper application and compliance.

9;1 Understanding Key Columns and Rows

The Table E flange dimensions PDF outlines critical measurements, with key columns detailing nominal bore sizes, outer diameters, bolt circle diameters, and bolt hole configurations. Rows provide specific data for each pipe size, enabling precise identification of flange dimensions and compliance with British Standard BS10 specifications for industrial piping systems.

9.2 Interpreting Technical Drawings and Diagrams

Technical drawings for Table E flanges provide detailed visual representations of dimensions, including nominal bore sizes, outer diameters, and bolt configurations. Diagrams highlight key features like raised faces and bolt hole patterns, aiding in precise measurement and installation. Understanding these visuals ensures compliance with BS10 standards and prevents misinterpretation of critical dimensions for industrial piping applications.

Obtaining Table E Flange Dimensions PDF

Table E flange dimensions PDFs are available for download from trusted sources like steel-flange.com or valveco.net, ensuring accurate and reliable technical specifications.

10.1 Sources for Downloading the PDF

Reliable sources for downloading Table E flange dimensions PDF include manufacturers, industrial suppliers, and technical websites. Steel-flange.com offers detailed BS10 and AS2129 compliant specifications. Valveco.net provides comprehensive drilling data and dimensional charts. Always verify authenticity to ensure compliance with industry standards and accurate technical details for engineering applications.

10.2 Tips for Printing and Using the Tables

  • Print the PDF at 100% scale to maintain dimensional accuracy.
  • Use high-resolution printers for clear visibility of measurements.
  • Laminate the tables for durability in industrial environments.
  • Cross-reference with standards like BS10 and AS2129 for compliance.

Common Mistakes to Avoid

  • Misinterpreting dimensional tables or standards like BS10 and AS2129.
  • Incorrect bolt selection or improper alignment during installation.

11.1 Misinterpretation of Dimensions and Standards

Common mistakes include misreading nominal bore sizes, ignoring bolt hole tolerances, and misaligning flange dimensions with piping systems. Ensure compliance with British Standard BS10 and AS2129 for accurate sizing and pressure ratings. Always verify nominal pipe sizes against flange dimensions to avoid installation errors. Refer to the official Table E flange dimensions PDF for precise measurements and specifications to prevent misinterpretation.

11.2 Errors in Bolt Selection and Installation

Incorrect bolt sizes and grades can lead to flange leakage or failure. Ensure bolts match Table E specifications, considering diameter, length, and material. Improper tightening sequences or torque can compromise the seal. Refer to the Table E flange dimensions PDF for precise bolt hole patterns and tolerances to ensure accurate installation and prevent potential system failures during operation.