Blog

dyna glo propane heater manual

Dyna-Glo propane heaters are reliable, efficient, and versatile heating solutions designed for various applications. They offer a range of models, from portable to construction heaters, ensuring safety and performance. With certifications like CSA 2.14 and ANS Z83.7, these heaters meet strict safety standards, making them ideal for indoor and outdoor use. Their durability and advanced features provide consistent heat, while the comprehensive manual guides users through installation, operation, and maintenance.

1.1 Overview of Dyna Glo Propane Heater Models

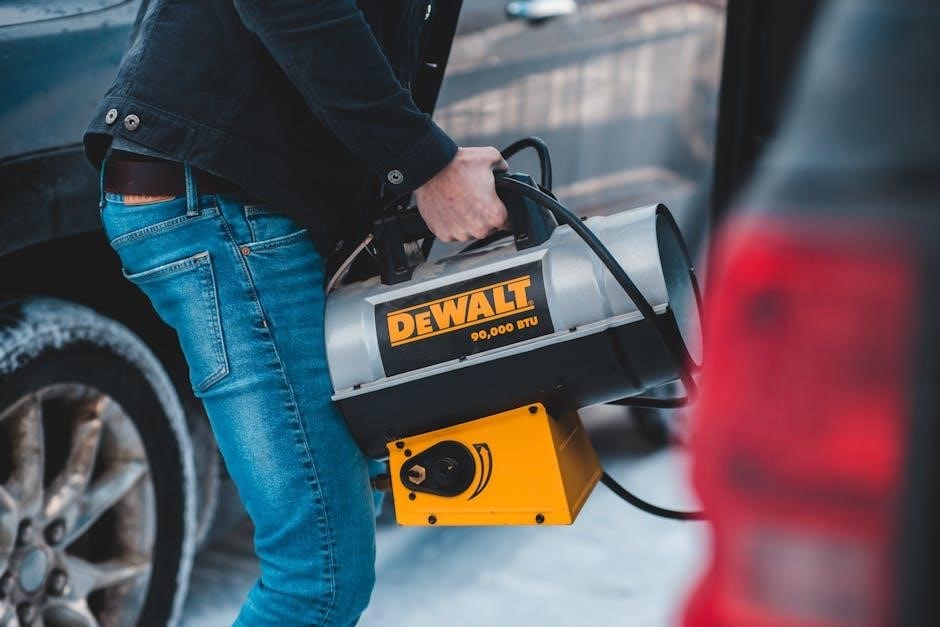
Dyna-Glo propane heaters offer a variety of models, including portable radiant heaters like the HA18R and forced-air construction heaters such as the RMC-FA40DGD. These models provide efficient heating solutions for both indoor and outdoor applications. The RMC-FA40DGD, for instance, delivers 40,000 BTU/HR, while the RA125DGD offers 125,000 BTU/HR for larger spaces. All models are designed with safety and durability in mind, featuring CSA and ANSI certifications for reliable performance in construction and residential settings.

1.2 Importance of Using the Manual

Using the Dyna-Glo propane heater manual is crucial for safe and effective operation. It provides essential safety precautions, installation guidelines, and maintenance tips to ensure optimal performance. The manual outlines proper usage, ventilation requirements, and troubleshooting steps to address common issues. Adhering to the instructions helps prevent accidents, ensures compliance with safety standards, and maintains warranty validity. Always refer to the manual before assembling, operating, or servicing the heater to guarantee safety and efficiency.

Safety Precautions

Dyna-Glo propane heaters must be used as directed in the manual to ensure safe operation. Always maintain proper ventilation and follow local fire safety codes; The heater is designed for construction use under specific safety standards, such as CSA 2.14 and ANS Z83.7. Never operate in confined spaces without adequate airflow, and keep the unit clean to avoid hazards.

2.1 General Safety Guidelines

Always ensure proper ventilation and maintain a clean heater to prevent combustion airflow obstruction. Keep the heater away from flammable materials and avoid modifications. Never service the heater while it is connected to the propane supply or in operation. Ensure all electrical connections are grounded and meet local codes to prevent shocks. Follow the manual instructions precisely to avoid hazards and ensure safe operation under CSA 2.14 and ANS Z83.7 standards.

2.2 Propane Safety Tips

Always turn off the propane supply when the heater is not in use. Regularly inspect the propane tank, hose, and connections for leaks or damage. Use a soapy water solution to detect gas leaks. Never use an damaged or unauthorized propane hose. Store propane tanks upright in a well-ventilated area, away from open flames or sparks. Ensure the heater is cool before disconnecting the propane tank to prevent accidental ignition.

2.3 Ventilation Requirements

Proper ventilation is essential for safe operation of Dyna-Glo propane heaters; Ensure the area is well-ventilated to prevent carbon monoxide buildup. Maintain at least 1 square foot of ventilation opening in the room. Never block airflow vents or grilles, as this can obstruct combustion air. Follow local codes and manufacturer guidelines for ventilation. Failure to provide adequate ventilation can lead to shutdowns or create hazardous conditions, including carbon monoxide risks. Always ensure fresh air supply for optimal performance and safety;

Installation and Setup

Install your Dyna-Glo propane heater in a safe, well-ventilated area, following local codes and manufacturer guidelines. Ensure the location is level and clear of flammable materials. Connect the propane supply securely, and complete electrical connections as specified. Always check for proper clearance from walls and ceilings to ensure safe operation and efficiency. Refer to the manual for detailed installation steps and safety precautions to avoid potential hazards.

3.1 Choosing the Right Location

When selecting a location for your Dyna-Glo propane heater, ensure it is well-ventilated to prevent carbon monoxide buildup. Keep the heater away from flammable materials and combustible substances. The area must be level and stable to prevent tipping. Always maintain the required clearance from walls, windows, and doors as specified in the manual. Ensure the location complies with local fire safety regulations and manufacturer guidelines for safe and efficient operation. Proper placement is crucial for both performance and safety.

3.2 Connecting the Propane Supply

Before connecting the propane supply, ensure the heater is turned off and the tank valve is closed. Use the hose assembly specified in the manual for safe connection. Always check for leaks by applying a soapy water solution to the connections. Turn the tank valve counterclockwise slowly to avoid sudden gas surges. Never overtighten connections, as this may damage the threads. If you smell gas, do not light the heater; turn off the supply and ventilate the area immediately. Follow all safety guidelines to ensure a secure connection.

3.3 Electrical Connections and Grounding

Ensure all electrical connections are made according to local codes and the manual’s instructions. The heater must be properly grounded to prevent electrical shock. Connect the power cord to a grounded outlet with the correct voltage rating. Never modify or tamper with the electrical components. Use the specified fuses or circuit breakers to protect the heater’s circuit. If unsure, consult a licensed electrician. Always follow safety standards to ensure safe and reliable operation.

Operating Instructions

Follow the manual for ignition, startup, and heat adjustment. Monitor the heater’s operation to ensure safe and efficient performance. Always adhere to safety guidelines provided.

4.1 Ignition and Start-Up Process

Ensure the area is well-ventilated and free from flammable materials. Turn the control knob to the pilot position, then press and hold the ignition button while depressing the knob. Once the pilot lights, continue holding for 30 seconds to ensure it stays lit. Release the knob and adjust the heat setting as needed. Never use unapproved ignition sources. If the pilot goes out, wait a few minutes before retrying. Always refer to the manual for specific start-up procedures.

4.2 Adjusting the Heat Output

To adjust the heat output, turn the control knob to the desired setting. For continuous operation, select the “Continuous” mode, while variable heat control allows precise temperature adjustment. Ensure the pilot remains lit during operation. Avoid overheating by monitoring the temperature and adjusting as needed. Always follow the manual’s guidelines for safe operation. Proper ventilation is essential to prevent carbon monoxide buildup. Refer to the manual for specific instructions on fine-tuning the heat output for optimal performance and safety.

4.3 Monitoring and Maintaining the Heater

Regular monitoring ensures optimal performance and safety. Check for blockages in vents or burners and ensure proper ventilation. Inspect for soot buildup, which may indicate incomplete combustion. Clean the heater as specified in the manual to maintain efficiency. Schedule annual professional servicing if needed. Always follow the manual’s maintenance guidelines to prevent malfunctions. Proper upkeep extends the heater’s lifespan and ensures reliable operation. Refer to the manual for detailed maintenance schedules and procedures.

Maintenance and Troubleshooting

Regular cleaning and inspection are crucial for optimal performance. Address issues like low line pressure or blocked vents promptly. Refer to the manual for troubleshooting guides and solutions to ensure safety and efficiency.

5.1 Cleaning and Servicing the Heater

Regular maintenance ensures optimal performance. Clean the heater’s exterior and combustion surfaces to prevent obstructions. Inspect burners, vents, and heat exchangers for damage or blockages. Use a soft brush or cloth to remove debris. Check the propane hose for leaks and ensure all connections are secure. Replace damaged parts with manufacturer-approved components. Turn off the propane supply and allow the heater to cool before servicing. Follow the manual’s guidelines for detailed cleaning and servicing procedures to ensure safety and efficiency.

5.2 Common Issues and Solutions

Common issues include low heat output, ignition failure, or error codes. Check propane levels and ensure proper ventilation. For low line pressure, inspect the regulator and hoses for leaks. If the heater shuts off, ensure fresh air intake is unobstructed. Refer to the manual for specific error code solutions. Always turn off the heater and allow it to cool before troubleshooting. Contact customer support if issues persist after following manual guidelines.

5.3 Replacing Parts and Accessories

Replacement parts like hoses, burners, or igniters should only be installed using genuine Dyna-Glo components. Turn off the propane supply and allow the heater to cool before starting any replacement. Refer to the manual for specific part numbers and diagrams. Use the provided parts list to identify and order necessary accessories. Always follow safety guidelines to avoid hazards. For complex replacements, consult a professional or contact Dyna-Glo customer support for assistance.

Winterization and Storage

Disconnect the propane supply, drain the tank, and clean the heater thoroughly before storage. Store in a dry, well-ventilated area to ensure safety and longevity.

6;1 Preparing the Heater for Storage

To prepare your Dyna-Glo propane heater for storage, first turn off the propane supply by closing the tank valve. Allow the heater to cool completely before disconnecting any components. Clean the unit thoroughly, removing dirt or debris to prevent corrosion. Protect any exposed metal parts with a rust-inhibiting coating. Store the heater in a dry, well-ventilated area away from flammable materials. Ensure all connections are secure to avoid damage during storage.

6.2 Storing Propane Tanks Safely

When storing propane tanks, ensure they are turned off and disconnected from the heater. Store tanks upright in a well-ventilated, dry area away from direct sunlight and flammable materials. Protect the tank from extreme temperatures and physical damage. Check for leaks before storage and secure the tank to prevent tipping; Always follow local regulations and manufacturer guidelines for safe propane tank storage to prevent accidents and ensure readiness for future use.

Technical Specifications

Dyna-Glo propane heaters feature high BTU ratings, efficient fuel consumption, and compliance with CSA 2.14 and ANSI Z83.7 safety standards, ensuring reliable performance and safety.

7.1 BTU Ratings and Fuel Efficiency

Dyna-Glo propane heaters offer varying BTU ratings, from 30,000 to 125,000 BTU/HR, ensuring efficient heating for diverse spaces. These heaters are designed for high fuel efficiency, with features like direct-fired technology and optimized combustion chambers. They provide consistent heat while minimizing propane consumption, making them environmentally friendly and cost-effective. Built-in safety features, such as automatic shut-off, further enhance their performance and reliability, ensuring safe and efficient operation in both indoor and outdoor settings.

7.2 Clearance Requirements

Dyna-Glo propane heaters require specific clearance from combustible materials to ensure safe operation; Maintain minimum distances from walls, ceilings, and flammable objects as specified in the manual. Proper clearance prevents fire hazards and ensures efficient airflow. Always adhere to local fire safety regulations and manufacturer guidelines. If unsure about placement, consult local authorities to confirm compliance with safety standards and optimal heater performance.

7.3 Compliance with Safety Standards

Dyna-Glo propane heaters are designed to meet rigorous safety standards, including CSA 2.14 and ANSI Z83.7 certifications. These standards ensure the heaters operate safely and efficiently. Compliance with these regulations is verified through extensive testing, guaranteeing protection against hazards. Always follow the manufacturer’s guidelines and local safety codes to maintain compliance. Proper installation, regular maintenance, and adherence to safety protocols are essential to ensure the heater functions as intended and provides a safe heating solution.

Warranty and Support

Dyna-Glo propane heaters come with a limited warranty covering defects in materials and workmanship. Contact customer service for support, warranty details, and repair assistance. Proper registration ensures coverage.

8.1 Understanding the Warranty Terms

Dyna-Glo propane heaters are backed by a limited warranty that covers defects in materials and workmanship. The warranty period varies by model, typically ranging from one to five years. Registration is required to activate coverage. The warranty does not apply to damage caused by improper installation, neglect, or unauthorized modifications. Review the manual for specific terms and conditions to ensure compliance. Contact customer service for detailed warranty information.

8.2 Contacting Customer Service

For assistance with your Dyna-Glo propane heater, contact customer service via phone, email, or through the official website. Representatives are available to address inquiries, provide troubleshooting support, and assist with warranty claims. Ensure you have your model number and serial number ready for efficient service. Visit the Dyna-Glo website for contact details and additional resources, such as FAQs and downloadable manuals, to help resolve any issues promptly.

to kill a mokingbird pdf

Background and Publication of “To Kill a Mockingbird”

Harper Lee’s To Kill a Mockingbird, published in 1960, won the Pulitzer Prize in 1961, becoming a timeless classic exploring racial injustice and moral growth in a small Alabama town.

1.1 Harper Lee and the Novel’s Creation

Harper Lee, born in 1926 in Monroeville, Alabama, drew inspiration from her childhood and father, a lawyer, to craft To Kill a Mockingbird. The novel, published in 1960, took over two years to write. Lee’s exploration of racial injustice and moral growth in a small town resonated deeply, earning her the Pulitzer Prize in 1961 and cementing her legacy in American literature.

1.2 Publication History and Initial Reception

To Kill a Mockingbird was published in 1960 and quickly gained acclaim, earning Harper Lee the Pulitzer Prize in 1961. The novel became a modern American classic, praised for its exploration of racial injustice and moral courage. Its success led to an Academy Award-winning film adaptation in 1962, further cementing its place in literature and popular culture, with over 40 million copies sold worldwide.

Availability of “To Kill a Mockingbird” in PDF Format

Harper Lee’s To Kill a Mockingbird is widely available in PDF format, with free downloads accessible via platforms like Google Drive, Internet Archive, and various e-book repositories.

2.1 Free Download Options and Sources

To Kill a Mockingbird in PDF is freely available on platforms like Google Drive, Internet Archive, and e-book repositories. These sources provide direct links for downloading the novel, often alongside study guides and LitCharts for educational purposes. Users can access the full text without registration, ensuring easy availability for readers worldwide.

2.2 Platforms Offering the PDF Version

The PDF version of To Kill a Mockingbird is available on platforms like Internet Archive, Google Drive, and educational websites. These platforms provide easy access to the novel, often accompanied by study guides and analysis tools. Users can download the PDF directly, making it a convenient option for readers seeking digital access to Harper Lee’s classic novel.

Plot and Characters of “To Kill a Mockingbird”

Set in Maycomb, Alabama, the story follows Scout Finch, her brother Jem, and their father Atticus, a morally steadfast lawyer defending Tom Robinson, a wrongly accused Black man in a racially divided society.

3.1 Setting and Main Characters

To Kill a Mockingbird is set in the fictional town of Maycomb, Alabama, during the 1930s. The story revolves around the Finch family: Scout, a young girl; her brother Jem; and their father, Atticus, a morally upright lawyer. Other key characters include Calpurnia, the family’s Black housekeeper, and Tom Robinson, a Black man falsely accused of rape, whose case becomes central to the story.

3.2 Key Events and Conflicts in the Story

The trial of Tom Robinson, a Black man falsely accused of raping a white woman, is central to the story. Scout and Jem Finch witness their father, Atticus, defend Tom despite knowing he’ll face prejudice. Meanwhile, the children’s fascination with their reclusive neighbor Boo Radley leads to a dramatic confrontation. The trial’s outcome and its aftermath highlight racial tensions and injustice, deeply affecting the community and the Finch family.

Themes and Social Issues in the Novel

To Kill a Mockingbird explores profound themes like racial injustice, prejudice, and moral growth. It highlights the loss of innocence and examines human nature, promoting empathy and understanding in a divided society.

4.1 Racial Injustice and Equality

To Kill a Mockingbird vividly portrays racial injustice through Tom Robinson’s trial, highlighting systemic prejudice in a deeply divided society. Atticus Finch’s courageous defense of Tom, despite knowing the outcome, underscores the moral fight for equality. The novel exposes the entrenched racism in Maycomb, illustrating how societal biases deny justice to African Americans, while emphasizing the importance of empathy and standing up against inequality.

4.2 Moral Education and Childhood Innocence

To Kill a Mockingbird explores moral education through Scout and Jem’s experiences, guided by Atticus Finch’s teachings on empathy, courage, and justice. Their journey from childhood innocence to understanding societal complexities highlights the importance of moral guidance. Atticus’s lessons on walking in others’ shoes shape their moral framework, contrasting with the harsh realities of prejudice and injustice they encounter in Maycomb.

Educational Use of “To Kill a Mockingbird”

To Kill a Mockingbird is widely used in schools for its exploration of racial injustice and moral growth, supported by lesson plans, study guides, and resources like LitCharts.

5.1 Lesson Plans and Study Guides

Educators utilize To Kill a Mockingbird with comprehensive lesson plans and study guides, including LitCharts, to explore themes and characters. Resources like “To Kill a Mockingbird Lit Link Gr. 7-8 ─ PDF Download” offer enrichment activities and analysis tools, supporting both teachers and students in deeper understanding and engagement with the novel’s moral and social themes.

5.2 LitCharts and Analysis Tools

LitCharts and analysis tools provide in-depth insights into To Kill a Mockingbird, offering quote explanations, page numbers, and thematic breakdowns. These resources help educators and students explore themes like racial injustice and moral growth. AI tools and study guides enhance teaching preparation, making complex concepts accessible and engaging for classroom discussions and individual study.

Popularity and Cultural Impact

To Kill a Mockingbird remains a timeless classic, winning the Pulitzer Prize and inspiring an Oscar-winning film. Its exploration of racial injustice continues to resonate globally, ensuring its enduring relevance and cultural significance.

6.1 The Novel’s Enduring Popularity

To Kill a Mockingbird remains a beloved classic, its exploration of racial injustice and moral education resonating across generations. The Pulitzer Prize-winning novel, adapted into a iconic film, continues to be widely read and studied. Its themes of courage and equality ensure its relevance, making it a cornerstone of American literature and a testament to Harper Lee’s profound impact on modern storytelling.

6.2 Film Adaptations and Stage Productions

The 1962 film adaptation of To Kill a Mockingbird, starring Gregory Peck as Atticus Finch, won three Academy Awards and remains a cinematic landmark. The novel has also been adapted into a successful Broadway play, with Daniel’s 100th performance as Atticus Finch highlighting its enduring appeal. Both adaptations faithfully capture the novel’s themes of justice and equality, ensuring its timeless relevance across mediums.

Awards and Legacy

To Kill a Mockingbird won the Pulitzer Prize in 1961, solidifying its status as a modern American classic. Its exploration of justice and morality continues to inspire both literary and legal communities, leaving a lasting legacy in modern literature.

7.1 Pulitzer Prize and Other Honors

To Kill a Mockingbird earned Harper Lee the prestigious Pulitzer Prize in 1961, recognizing its profound exploration of racial injustice and moral courage. The novel’s success also led to an Academy Award-winning film adaptation, further cementing its cultural impact. Its enduring popularity and thematic relevance have solidified its place as a cornerstone of modern American literature, inspiring countless readers and adaptations worldwide.

7.2 The Novel’s Place in Modern Literature

To Kill a Mockingbird remains a cornerstone of modern literature, celebrated for its timeless themes of racial justice and moral education. Its exploration of human dignity and societal inequality continues to resonate, making it a staple in educational curricula and a cultural touchstone. The novel’s influence is evident in its enduring popularity and its ability to inspire discussions on justice and equality in contemporary society.

Legal and Ethical Insights

The novel explores themes of justice, morality, and ethics through Atticus Finch’s defense of Tom Robinson, highlighting racial bias and the importance of moral integrity in legal systems.

8.1 The Character of Atticus Finch

Atticus Finch, the moral backbone of the novel, embodies integrity and compassion. As a lawyer, he defends the wrongly accused Tom Robinson, showcasing his commitment to justice despite societal prejudice. His parenting of Scout and Jem emphasizes moral education, teaching them empathy and understanding. Atticus’s unwavering principles and kindness make him a timeless symbol of ethical behavior, inspiring readers to stand for what is right.

8.2 Legal Ethics and Justice in the Novel

The novel explores legal ethics through Atticus Finch’s defense of Tom Robinson, a Black man falsely accused of rape. Despite overwhelming evidence of Tom’s innocence, societal prejudice leads to a guilty verdict, highlighting racial injustice. Atticus’s commitment to fairness and morality underscores the flaws in the legal system, emphasizing the importance of standing up for what is right, even in the face of overwhelming opposition.

Controversies and Criticisms

To Kill a Mockingbird has faced challenges in schools due to its racial themes and language, with critics arguing it oversimplifies racism and portrays Black characters marginally.

9.1 Challenges to the Novel’s Content

To Kill a Mockingbird has been banned or challenged in schools for its racial themes, use of the N-word, and portrayal of violence. Critics argue the novel oversimplifies racism and marginalizes Black characters, reinforcing stereotypes. Despite its exploration of injustice, some claim it lacks depth in addressing systemic racism, sparking debates about its appropriateness in educational settings.

9.2 Responses to Criticisms

Despite criticism, To Kill a Mockingbird remains widely studied for its exploration of racial injustice and moral themes. Educators argue its historical context and ethical lessons outweigh its flaws, emphasizing its role in fostering empathy and critical thinking. The novel continues to spark dialogue, with many defending its value as a tool for understanding complex social issues and promoting moral education.

Sequel and Related Works

Go Set a Watchman, published in 2015, serves as a sequel to To Kill a Mockingbird, exploring Scout Finch’s later life and revisiting Maycomb’s societal themes.

10.1 “Go Set a Watchman” and Its Relation to the Original Novel

Go Set a Watchman, published in 2015, is often regarded as a sequel to To Kill a Mockingbird. It follows Scout Finch as an adult, revisiting Maycomb and its societal issues. While connected to the original novel, it offers a distinct exploration of racial tensions and small-town life, providing new insights into beloved characters and their development.

10.2 Other Works by Harper Lee

Harper Lee’s literary output was limited, but her works remain deeply impactful. Besides To Kill a Mockingbird and Go Set a Watchman, she wrote essays and letters, offering insights into her writing process. Her work continues to be celebrated for its exploration of moral and social issues, leaving a lasting legacy in American literature.

Impact and Relevance in the Modern World

To Kill a Mockingbird remains a powerful exploration of racial justice and moral education, continuing to resonate in modern discussions on equality and social change.

11.1 The Novel’s Continued Relevance

To Kill a Mockingbird remains a poignant exploration of racial injustice and moral education, resonating deeply in modern discussions on equality and social change. Its themes of empathy and understanding continue to inspire readers, making it a timeless classic. The novel’s relevance endures as it challenges societal norms and promotes reflection on human dignity and justice in contemporary contexts.

11.2 Modern Discussions and Adaptations

To Kill a Mockingbird continues to spark modern discussions on race, justice, and morality. Its themes resonate in contemporary debates, with adaptations like Broadway performances and educational programs keeping it relevant. The novel’s influence extends to legal education, inspiring discussions on ethics and justice. Its enduring popularity highlights its universal appeal, making it a cornerstone of modern literary and cultural discourse, adapting to new generations and mediums.

disabled parking permit victoria application form online

The Disabled Parking Permit Victoria provides parking concessions for individuals with significant mobility impairments, offering priority access to parking spaces. Apply online via the Accessible Parking Permit Scheme for convenience.

Overview of the Accessible Parking Permit Scheme

The Accessible Parking Permit Scheme in Victoria is designed to assist individuals with significant mobility impairments, providing priority access to parking spaces. The scheme offers three types of permits: permanent, temporary, and organizational. Applicants can apply online via the Victorian Government’s Accessible Parking Permit website, streamlining the process. The permits allow users to park in designated accessible spaces, promoting independence and accessibility. The scheme ensures consistency across Victoria, with permits valid statewide. It’s essential to meet eligibility criteria, such as having a medical condition that impacts mobility, to qualify for a permit.

Benefits of the Disabled Parking Permit in Victoria

Holding a Disabled Parking Permit in Victoria offers numerous benefits, enhancing mobility and independence for individuals with disabilities. Permit holders can park in designated accessible spaces, often closer to amenities, reducing physical strain. Time-based parking restrictions are waived in standard spaces, and fees are exempt in some locations. The permit is recognized statewide, ensuring consistent access to parking concessions. Additionally, the online application process simplifies permit management, allowing easy renewal or replacement. These benefits collectively aim to improve quality of life and accessibility for Victorians with mobility challenges.

Eligibility Criteria for the Disabled Parking Permit

The permit is for individuals with significant disabilities affecting mobility, including drivers, passengers, or both. Organisations transporting people with disabilities may also apply under specific conditions.

Medical Conditions That Qualify for the Permit

The Disabled Parking Permit is available to individuals with significant disabilities affecting mobility. Qualifying conditions include severe walking difficulties, chronic illnesses like arthritis, heart conditions, or neurological disorders such as Parkinson’s disease. The disability must be permanent, though temporary permits are available for conditions expected to last at least six months. Applicants must provide medical certification confirming their condition significantly impacts their mobility. Organisations transporting individuals with such disabilities may also apply. The permit aims to enhance accessibility for those with genuine mobility challenges, ensuring easier access to public spaces and essential services.

Types of Permits Available in Victoria

Victoria offers three types of Accessible Parking Permits tailored to meet the needs of individuals and organisations. The Individual Permit is for people with significant mobility impairments, while the Temporary Permit is for short-term conditions lasting up to 12 months. Organisations transporting individuals with disabilities can apply for an Organisational Permit. Each permit type requires certification from a medical professional. Applications can be submitted online or via paper forms, with processing handled through the Accessible Parking Permit Scheme. These permits ensure eligible individuals and groups have convenient access to parking, supporting independence and accessibility in public spaces.

How to Apply for a Disabled Parking Permit Online

Visit the Victorian Government’s Accessible Parking Permit website to start your application. Create an account, complete the form, and receive a reference number for further steps.

Step-by-Step Guide to the Online Application Process

Visit the Victorian Government’s Accessible Parking Permit website and log in or create an account.
Complete the online application form with your personal and medical details.
Submit the form and receive a reference number via SMS.
Take the reference number to your medical practitioner for certification.
Upload the completed and certified form along with required documents.
Wait for the application to be processed and reviewed.
If approved, your permit will be mailed to you.
If additional information is needed, you will be contacted directly.

Required Documents for the Application

To complete the online application, you will need:

  • A completed application form, certified by a medical practitioner or occupational therapist.
  • Proof of identity, such as a driver’s license or passport.
  • Proof of Victorian residency, like a utility bill or lease agreement.
  • For organisations, additional documents such as an Australian Company Number (ACN) or Australian Business Number (ABN) may be required.

Ensure all documents are scanned and ready for upload during the online process. Organisations must also provide a letter explaining their need for the permit.

How to Complete the Application Form

To complete the Disabled Parking Permit application form online:

  1. Log in to your City of Melbourne services account or create one if you don’t have it.
  2. Fill in your personal and contact details accurately.
  3. Select the type of permit you are applying for (individual or organisational).
  4. Upload the required documents, such as medical certification and proof of residency.
  5. Review and submit the form.
  6. Upon submission, you’ll receive a reference number via SMS for further processing.

Ensure all information is correct to avoid delays in processing your application.

Processing and Approval of the Application

After submitting your application online, you’ll receive a reference number via SMS. Take this to your medical practitioner for verification, ensuring timely processing of your permit.

How Long Does It Take to Process the Application?

Processing times for the Disabled Parking Permit Victoria vary depending on the completeness of the application and verification by medical practitioners. Typically, it takes a few weeks for approval once all documents are submitted. Applicants can check their application status online through the Accessible Parking Permit portal. Delays may occur if additional information is required. Ensuring all steps are followed correctly and promptly can help expedite the process. Once approved, the permit is mailed to the applicant, allowing them to park in designated accessible spaces across Victoria.

What Happens After Submitting the Application?

After submitting your Disabled Parking Permit Victoria application online, you will receive a reference number via SMS. This number is essential for tracking your application status. Your medical practitioner will verify the details, and once approved, the permit will be mailed to you. If additional information is required, you will be contacted by the processing team. Upon approval, the permit allows parking in designated accessible spaces across Victoria. Ensure all steps are completed promptly to avoid delays. The permit is typically mailed within a few weeks of successful verification.

Renewing or Replacing a Disabled Parking Permit

Renew or replace your Disabled Parking Permit online via the Victorian Government’s Accessible Parking website. Lost or stolen permits require completing a replacement form and contacting the issuing authority.

How to Renew Your Existing Permit

To renew your Disabled Parking Permit in Victoria, visit the Accessible Parking website and log in to your account. Start your application online, providing required details and a mobile number to receive a reference number via SMS. Once submitted, take the reference number to your medical practitioner for verification. After approval, your new permit will be mailed, replacing the expired one. Ensure to destroy the old permit upon receipt of the new one. For assistance, contact the Victorian Government’s Accessible Parking support team.

What to Do If Your Permit is Lost or Stolen

If your Disabled Parking Permit is lost or stolen, notify the Victorian Government’s Accessible Parking Permit office immediately. Visit the Accessible Parking website and log in to your account to report the incident. Follow the prompts to apply for a replacement, providing your reference number from your initial application. Once processed, a new permit will be mailed to you. Destroy the old permit upon receiving the replacement to prevent misuse. For further assistance, contact the Accessible Parking support team via phone or email.

Using the Disabled Parking Permit in Victoria

The Disabled Parking Permit allows holders to use designated accessible parking spaces across Victoria, ensuring convenient and equitable access for individuals with mobility impairments.

Where Can You Use the Permit?

The Disabled Parking Permit in Victoria allows holders to use designated accessible parking spaces across the state, including shopping centers, hospitals, and public transport locations. These spaces are designed to provide easy access for individuals with mobility impairments, ensuring convenient parking. The permit is recognized statewide and can be used in public and private car parks that display the accessible parking sign. Additionally, it is valid in council-managed parking areas, making it a versatile tool for improving mobility and independence for permit holders.

Rules and Regulations for Permit Use

The Disabled Parking Permit must be displayed clearly on the vehicle’s dashboard when parked in accessible spaces. Only the permit holder or their driver may use the permit, and it must only be used when transporting the holder. Vehicles must comply with posted parking signs and time limits, as the permit does not exempt holders from meter fees or time restrictions. Misuse of the permit, such as lending it to others or using it improperly, may result in fines or permit cancellation. Always ensure the permit is valid and not expired to avoid penalties.

Additional Resources and Support

Visit the Victorian Government’s Accessible Parking Permits website for detailed guides, application forms, and FAQs. Contact (03) 9278 4444 or email for further assistance.

Helpful Links for Applicants

Visit the Accessible Parking Permits website to access the online application form, eligibility criteria, and required documents. Explore the Apply Now section for step-by-step guidance. Review the Eligibility Criteria page to confirm your qualifications. Download the required forms and visit the FAQs for common questions. Contact the Victorian Government’s support team via phone or email for further assistance. These resources ensure a smooth application process for your Disabled Parking Permit in Victoria.

Contact Information for Assistance

For assistance with your Disabled Parking Permit application, visit the Accessible Parking Permits website. Contact the Victorian Government’s support team at phone: (03) 9278 4444 or email: email protected. You can also visit the Customer Service Centre at 1 Bridge Street East, Benalla VIC 3672 for in-person support. These resources provide help with applications, renewals, or replacements, ensuring a seamless experience for applicants.

norristown high speed line schedule pdf

Welcome to the Norristown High Speed Line (NHSL) schedule guide, providing essential details for seamless travel. This PDF offers timetables, route maps, and service alerts, ensuring efficient commuting.

Overview of the Norristown High Speed Line

The Norristown High Speed Line (NHSL) is a 13.4-mile interurban light rapid transit line operated by SEPTA. Connecting 69th Street Transportation Center to Norristown Transportation Center, it features 21 stations. As part of SEPTA’s Metro network, the NHSL provides frequent service, with 24-hour operations on the 69th Street route. This line is a vital link for commuters in Montgomery County, Delaware County, and Philadelphia, offering efficient travel options.

Importance of the Schedule PDF for Commuters

The Norristown High Speed Line schedule PDF is essential for planning trips efficiently. It provides detailed timetables, real-time updates, and service alerts, ensuring commuters stay informed; The PDF format allows easy access on mobile devices, enabling quick reference. With this guide, passengers can navigate the NHSL network seamlessly, plan around holidays, and adjust to special events, making it a vital tool for daily commutes and travel planning.

History of the Norristown High Speed Line

The Norristown High Speed Line, originally part of the Philadelphia and Western Railroad, dates back to 1907. It evolved into a key SEPTA route, serving the region for over a century.

Establishment and Evolution of the Line

The Norristown High Speed Line was established in 1907 as part of the Philadelphia and Western Railroad. Originally a trolley line, it evolved into a high-speed service after becoming part of SEPTA in 1966. Over the years, the line has undergone modernization, including infrastructure upgrades and the introduction of new railcars, enhancing its efficiency and service quality for commuters.

Key Milestones in the Line’s Development

Key milestones include its establishment in 1907 as part of the Philadelphia and Western Railroad and its integration into SEPTA in 1966. The line introduced new railcars in 1993, enhancing service quality. Plans for extension to King of Prussia highlight its ongoing development, ensuring improved connectivity and efficiency for commuters.

Current Operations of the Norristown High Speed Line

The NHSL operates with two routes, running 24/7 towards 69th Street and from 12:35 AM to 11:38 PM towards Norristown. It is part of SEPTA’s Metro network;

Routes and Frequency of Trains

The Norristown High Speed Line operates on two routes, with trains running frequently throughout the day. The line connects 69th Street Transportation Center to Norristown Transportation Center, serving 21 stations. Trains towards 69th Street run 24/7, while those towards Norristown operate from 12:35 AM to 11:38 PM. Frequencies vary, with more trains during peak hours to accommodate commuter demand. This ensures reliable service for passengers traveling across the network.

Station Locations and Accessibility Features

The Norristown High Speed Line features 21 stations, stretching from 69th Street Transportation Center to Norristown Transportation Center. Key stations include Norristown Transportation Center, offering SEPTA bus connections. Many stations are equipped with elevators and ramps, ensuring accessibility for all passengers. Ample parking options and clear signage further enhance convenience for commuters. SEPTA’s commitment to accessibility ensures easy navigation across the entire NHSL network.

Norristown High Speed Line Schedule Details

The NHSL operates on modified schedules, with weekday trains running 24 hours towards 69th St Ctr and 12:35 AM–11:38 PM towards Norristown Trans Ctr. Holidays follow Sunday timetables.

Weekday and Weekend Timetables

The Norristown High Speed Line operates on a consistent schedule, with weekday trains running 24 hours towards 69th Street Transportation Center and from 12:35 AM to 11:38 PM towards Norristown Transportation Center. Weekend services follow a Sunday schedule, ensuring reliable travel options for all passengers. The line maintains frequent departures, with trains arriving every 10-20 minutes during peak hours and less frequently during off-peak times.

No express services are available on weekends, but the regular timetable remains unchanged. This schedule ensures seamless connectivity for commuters, whether heading to work or planning leisure trips. Always check the latest updates on the SEPTA website or app for any service alerts or changes.

Holiday and Special Event Schedules

The Norristown High Speed Line observes holiday schedules on major holidays such as New Year’s Day, Memorial Day, Independence Day, Labor Day, Thanksgiving, and Christmas. On these days, the line operates on a Sunday schedule, ensuring consistent service for passengers. For special events or unexpected disruptions, SEPTA provides timely updates through its website, app, and service alerts. Always verify the latest information before planning your trip.

Connecting Services and Transfer Options

The Norristown High Speed Line seamlessly connects with SEPTA buses, trolleys, and regional rail lines, offering convenient transfers at key stations like Norristown Transportation Center. Riders can easily switch to Market-Frankford or Broad Street Lines for broader city access, enhancing overall mobility. Use the SEPTA app for real-time updates and optimal route planning.

SEPTA Bus and Trolley Connections

The Norristown High Speed Line connects seamlessly with numerous SEPTA bus and trolley routes, enhancing travel flexibility. At Norristown Transportation Center, passengers can transfer to buses like Routes 90, 93, 96, 97, 98, 99, and 131, providing access to surrounding neighborhoods and employment hubs. Additionally, the line links with the Manayunk/Norristown Line, ensuring a robust network of transit options for commuters and residents alike.

Regional Rail and Other Transit Links

The Norristown High Speed Line seamlessly integrates with SEPTA’s Regional Rail network, offering convenient transfers at key stations. Passengers can connect to the Manayunk/Norristown Line and other regional services, ensuring easy access to destinations across the Philadelphia region. This interconnected system provides a comprehensive transit experience, allowing riders to travel efficiently between suburban and urban areas with minimal transfers.

Fares and Payment Options

The SEPTA Key Card is the primary payment method, offering convenience and discounts. Cash payments are also accepted at stations, ensuring flexible fare options for all riders.

SEPTA Key Card and Fare Information

The SEPTA Key Card is the convenient payment method for fares on the Norristown High Speed Line. Riders can load funds or passes, including single rides, transfers, and discounted options. The Key Card streamlines payment, offering flexibility and ease. Cash is also accepted at station fare kiosks. For the most up-to-date fare details, visit the official SEPTA website or use the SEPTA app for real-time information.

Special Fares and Discounts

SEPTA offers various fare options and discounts for riders on the Norristown High Speed Line. Seniors, children, and students qualify for reduced fares with proper identification. The SEPTA Key Card provides flexibility, with options for single rides, transfers, and discounted passes. Riders can also benefit from weekly or monthly passes for frequent travel. Additional discounts are available for certain groups, making commuting more affordable and convenient for all passengers.

Future Developments and Projects

The Norristown High Speed Line is set for exciting upgrades, including planned extensions to improve connectivity and infrastructure modernization to enhance service efficiency and passenger experience.

Planned Extensions and Upgrades

The Norristown High Speed Line is slated for significant expansion, including a proposed extension to King of Prussia. This project aims to enhance connectivity and reduce travel times. Additionally, SEPTA plans to modernize infrastructure, improving station accessibility and upgrading rail systems. These upgrades will increase service reliability and accommodate growing passenger demand. However, delays due to funding and the pandemic have pushed timelines, with ongoing efforts to secure resources for completion.

Impact of Expansion on Service

The expansion of the Norristown High Speed Line aims to enhance service quality and connectivity. Proposed extensions, such as the King of Prussia project, will increase ridership and reduce congestion. Modernized infrastructure and upgraded stations will improve accessibility and efficiency. However, delays due to funding and the pandemic have slowed progress, potentially limiting short-term service improvements. Despite challenges, these upgrades promise long-term benefits for commuters and regional transit integration.

Service Alerts and Real-Time Updates

Stay informed with real-time updates and service alerts for the Norristown High Speed Line. Use the SEPTA app or website for live tracking, ensuring a smooth commute.

Importance of Checking Service Alerts

Checking service alerts is crucial for a smooth commute on the Norristown High Speed Line. Real-time updates help passengers avoid delays due to unexpected disruptions, such as equipment issues or accidents. Staying informed ensures commuters can adjust their plans accordingly, minimizing travel inconveniences. Service alerts often include details about modified schedules, track conditions, or special events impacting service. Regularly reviewing these updates through the SEPTA app or website is essential for reliable and efficient travel.

Using the SEPTA App for Live Updates

The SEPTA app provides real-time updates, enabling passengers to track their trains and plan journeys efficiently. Features include live arrival times, service alerts, and trip planning tools. Users can access the Norristown High Speed Line schedule, receive notifications about delays, and navigate the network seamlessly. The app is available for both iOS and Android, offering a user-friendly experience for staying informed on the go.

Accessibility and Amenities

The Norristown High Speed Line features accessible stations with elevators, ramps, and clear signage. Additional amenities include SEPTA parking options and convenient connections to other transit lines.

Accessible Stations and Services

All NHSL stations are equipped with elevators, ramps, and clear signage, ensuring easy access for passengers with disabilities. SEPTA prioritizes accessibility, offering QuietRide cars on weekdays for a quieter commute. Additional amenities include priority seating and audio announcements, enhancing the travel experience for all riders. These features make the Norristown High Speed Line a convenient and inclusive option for everyone.

Additional Amenities for Passengers

The Norristown High Speed Line offers convenient amenities to enhance your travel experience. Real-time updates are available via the SEPTA app, ensuring you stay informed. Stations feature clean, well-lit platforms with seating and digital displays. Parking options are available at select stations, and connecting bus routes provide seamless transfers. These amenities make commuting easy and stress-free, catering to all passenger needs.

The Norristown High Speed Line is a commuter lifeline, offering a comprehensive schedule and efficient service. Its reliability makes it a top choice for seamless travel.

Final Thoughts on the Schedule PDF

The Norristown High Speed Line schedule PDF is an indispensable guide for efficient commuting. It provides real-time updates, route maps, and detailed timetables, ensuring passengers can plan their trips effortlessly. With accessible stations and frequent service, the NHSL remains a reliable option for travelers. Download the PDF for a seamless experience and stay informed about service alerts and special schedules through the SEPTA website or app.

Encouragement to Use the Norristown High Speed Line

The Norristown High Speed Line offers a convenient, efficient, and accessible way to travel. With frequent trains and accessible stations, it’s an ideal choice for daily commutes. By using the schedule PDF, passengers can plan trips effortlessly, ensuring a smooth and stress-free journey. Embrace the NHSL for reliable transit, supporting sustainable and timely travel across the region.

orbit sprinkler timer manual 4 station

The Orbit 4-Station Sprinkler Timer is a versatile, efficient, and user-friendly solution for lawn irrigation, offering easy programming and customizable watering options for optimal lawn care.

Overview of the Orbit 4-Station Sprinkler Timer

The Orbit 4-Station Sprinkler Timer is a digital irrigation controller designed for efficient lawn and garden watering. It supports up to four independent zones, allowing customized watering schedules for different areas of your property. With a user-friendly interface, it offers features like multiple start times, rain delay, and manual override. Suitable for both indoor and outdoor use, it is compatible with 24VAC valves and can connect to a rain sensor for enhanced water conservation. The timer’s compact design and straightforward programming make it a practical solution for homeowners seeking precise irrigation control.

Key Features and Benefits

The Orbit 4-Station Sprinkler Timer offers a range of features that make it an excellent choice for efficient irrigation. Its four independent stations allow for customized watering schedules, ensuring each area of your lawn or garden receives the right amount of water. The timer supports multiple start times and adjustable intervals, providing flexibility for different watering needs. Additionally, the rain delay function pauses irrigation during rainfall, conserving water and preventing overwatering. The timer is easy to install and program, with a user-friendly interface that simplifies setup. Its compact design and compatibility with 24VAC valves make it a practical solution for both indoor and outdoor use.

Importance of Proper Programming and Setup

Proper programming and setup of the Orbit 4-Station Sprinkler Timer are essential for efficient and effective irrigation. Correctly configuring the timer ensures that each station operates as intended, delivering the right amount of water to the right areas. Improper setup can lead to overwatering or underwatering, wasting resources and potentially damaging plants. By following the manual’s guidelines, users can customize watering schedules, set precise run times, and utilize features like rain delay. This ensures optimal watering performance, conserves water, and extends the lifespan of the system. Proper setup also prevents issues like valve misfires or wiring problems.

Installation and Setup

The Orbit 4-Station Sprinkler Timer installation involves mounting, connecting wires, and installing batteries. Follow the manual’s step-by-step guide to ensure proper setup and functionality.

MOUNTING THE TIMER

To mount the Orbit 4-Station Sprinkler Timer, choose a dry, accessible location, preferably indoors or under cover to protect it from harsh weather conditions. Ensure the area is level and close to the water valves and wiring connections for ease of installation.

Use the provided screws or wall anchors to secure the timer firmly to the wall. Avoid direct sunlight or excessive moisture exposure to maintain optimal performance and longevity of the device.

CONNECTING THE WIRES

Connect the wires to the Orbit 4-Station Sprinkler Timer by matching the common wire to the “COM” terminal and the valve wires to their respective station terminals (1-4). Use Orbit sprinkler wire or 20-gauge wire for distances under 700 feet or 16-gauge wire for longer distances. Secure connections with wire nuts and ensure no wires are loose or crossed to prevent malfunctions. Double-check the wiring diagram in the manual to confirm proper connections before powering up the timer.

INSTALLING THE BATTERIES

To install the batteries in the Orbit 4-Station Sprinkler Timer, first detach the timer from the manifold. Remove the battery tray located on the back by sliding or pulling it out. Insert 6 AA batteries into the tray, ensuring the positive (+) and negative (-) terminals are correctly aligned. Replace the tray securely and reattach the timer to the manifold. Batteries typically last 2-3 years, depending on usage. Proper installation ensures the timer operates reliably and maintains programmed settings.

Programming the Timer

Program the Orbit 4-Station timer to set watering schedules by days, intervals, or odd/even dates, with options for manual runs, individual station adjustments, and multiple program management (A, B, C).

SETTING WATERING SCHEDULES

Setting watering schedules on the Orbit 4-Station timer allows you to customize your irrigation plan. Choose specific days, intervals, or odd/even dates for watering. The timer supports up to 4 start times per day, enabling sequential watering of all stations. Use the intuitive controls to set the duration for each station, ensuring optimal water distribution. The Easy-Set Logic feature simplifies programming by guiding you through the process. You can also manually override schedules for one-time watering sessions. Proper scheduling ensures water efficiency and healthy plant growth, making it easy to maintain your lawn’s appearance year-round.

MANUAL RUN FOR ZONE TESTING

The manual run feature on the Orbit 4-Station timer allows you to test individual zones or all stations sequentially. Press the Manual button to activate a zone, ensuring it operates correctly. This feature is ideal for troubleshooting or verifying proper installation. You can run each station independently to check for leaks, coverage, or alignment issues. The timer will run the selected zone until manually stopped, providing a quick way to ensure your irrigation system is functioning as intended. Regular zone testing helps maintain system efficiency and ensures optimal watering performance.

ADJUSTING INDIVIDUAL STATION TIMES

Adjusting individual station times on the Orbit 4-Station timer allows for customized watering schedules; Each station can be programmed with specific run times, ensuring each zone receives the right amount of water. Use the timer’s interface to select the desired station and modify its duration. This feature is essential for accommodating different lawn areas, soil types, or plant needs. Proper adjustment ensures efficient water use and promotes healthy plant growth. Regular updates to station times help maintain optimal irrigation performance throughout the growing season.

MANAGING MULTIPLE PROGRAMS (A, B, C)

The Orbit 4-Station timer allows users to manage up to three distinct programs (A, B, C), each with unique settings for start times, intervals, and station assignments. This feature is ideal for adapting to seasonal changes or varying watering needs across different zones. Programs can be customized to run on specific days, odd/even dates, or at intervals ranging from daily to weekly. By organizing schedules into separate programs, users can efficiently manage complex irrigation requirements without overlapping or conflicts. This flexibility ensures optimal watering for diverse lawn and garden conditions, making it easier to maintain a healthy and thriving landscape year-round.

Troubleshooting and Maintenance

Regularly check wire connections and valve functionality to prevent issues. Ensure proper programming and test zones manually to identify and address potential problems promptly for optimal performance.

TROUBLESHOOTING COMMON ISSUES

Common issues with the Orbit 4-Station Sprinkler Timer often relate to wiring, valve activation, or programming errors. If a station isn’t working, check connections and ensure wires are securely attached. Test valves manually by activating the Manual On position. For no water flow, verify that the main water supply is turned on and check for leaks. If the timer isn’t responding, reset it by removing and reinserting the batteries. For inconsistent watering schedules, review programmed settings and ensure the timer is in the correct mode (Auto or Manual). Addressing these issues promptly ensures reliable performance and efficient watering.

RESETTING THE TIMER

Resetting the Orbit 4-Station Sprinkler Timer restores it to factory defaults, erasing all programmed settings. To reset, detach the timer from the manifold and remove the battery tray. Take out the batteries, then press and hold the Manual button for 5 seconds to discharge any stored power. Reinsert the batteries and reattach the timer; All settings, including watering schedules and station times, will be cleared, requiring reprogramming. This step is useful for resolving persistent issues or preparing the timer for a new setup.

RAIN DELAY FUNCTION

The Rain Delay function on the Orbit 4-Station Sprinkler Timer allows you to pause watering schedules for a specified period, helping to conserve water and reduce runoff. This feature is especially useful after heavy rainfall or during wet conditions. To activate, press the Rain Delay button and select the desired delay duration (1-7 days) using the arrow keys. The timer will temporarily suspend all watering cycles during this period, resuming automatically once the delay ends. This ensures your lawn receives the right amount of water without overwatering.

The Orbit 4-Station Sprinkler Timer offers efficient and customizable watering solutions. For detailed guidance, download the official manual or explore additional resources online.

FINAL THOUGHTS ON THE Orbit 4-Station Sprinkler Timer

The Orbit 4-Station Sprinkler Timer is a reliable and efficient watering solution, offering a user-friendly interface and customizable features. It balances simplicity with smart technology, making it suitable for both small and medium-sized lawns. With its easy setup and programming options, it ensures optimal water usage and healthy plant growth. The timer’s durability and compatibility with various sprinkler systems make it a valuable investment for homeowners seeking to automate their irrigation needs effectively. Additionally, the comprehensive manual and online resources provide excellent support for troubleshooting and maintenance.

DOWNLOADING THE MANUAL AND ADDITIONAL GUIDES

Downloading the Orbit 4-Station Sprinkler Timer manual and additional guides is straightforward. Visit the official Orbit website or authorized retailers to find the correct model number, such as 57894 or 57114. These resources provide detailed instructions for installation, programming, and troubleshooting. The manual is available in PDF format, ensuring easy access on various devices. For further assistance, explore the Orbit B-hyve app, quick start guides, and installation instructions. These materials ensure users can maximize their timer’s functionality and maintain their lawn care system efficiently.

kenwood nx-1000 manual

The Kenwood NX-1000 Series offers versatile two-way radios with NXDN and DMR digital protocols, providing flexible communication solutions for various professional needs.

1.1 Overview of the NX-1000 Series

The Kenwood NX-1000 Series is a feature-rich line of two-way radios designed for professional communication. It includes handheld and mobile models, supporting NXDN and DMR digital protocols, as well as analog operation. Known for reliability and clear audio, these radios offer advanced features like AMBE2+ voice coding and multi-protocol support, making them suitable for various industries and applications.

1.2 Key Features and Benefits

The Kenwood NX-1000 Series offers advanced communication features, including NXDN and DMR compatibility, AMBE2™ voice coding for clear audio, and support for multiple signaling types like QT/DQT, DTMF, 2-Tone, and 5-Tone. It provides individual and group call capabilities, durable construction, and GPS functionality, ensuring reliable performance in demanding environments while meeting diverse professional needs.

Models Covered in the NX-1000 Series Manual

The NX-1000 Series manual covers NXDN/Analog Transceivers (NX-1200N/VHF, NX-1300N/UHF), DMR/Analog Transceivers (NX-1200D/VHF, NX-1300D/UHF), and Analog-Only Transceivers (NX-1200A/VHF, NX-1300A/UHF), ensuring comprehensive model support.

2.1 NXDN/Analog Transceivers

The NXDN/Analog Transceivers, including NX-1200N (VHF) and NX-1300N (UHF), support both NXDN digital and analog modes. These models offer advanced features like AMBE2™ voice coding for clear audio and compatibility with QT/DQT, DTMF, 2-Tone, and 5-Tone signaling. Built for reliability, they meet rigorous safety standards and are designed for demanding environments, ensuring seamless communication in various professional settings.

2.2 DMR/Analog Transceivers

The DMR/Analog Transceivers, such as NX-1200D and NX-1300D, combine DMR digital and analog capabilities. These models support individual and group calls, offering flexible communication options. They feature robust signaling types, including DTMF and 2-Tone/5-Tone, ensuring compatibility with existing systems. Designed for versatility, they cater to businesses needing a mix of digital and analog functionalities for efficient operations.

2.3 Analog-Only Transceivers

The Analog-Only Transceivers, including NX-1200A and NX-1300A, provide reliable analog communication. These models support up to 260 channels and 128 zones, offering flexible configuration options. They feature QT/DQT, DTMF, 2-Tone, and 5-Tone signaling, ensuring compatibility with legacy systems. Designed for simplicity, they are ideal for organizations requiring cost-effective, analog-only solutions without digital functionality.

Installation and Setup

Installation involves hardware setup and software configuration. Follow the manual for antenna placement and wiring. Ensure proper configuration of settings for optimal performance and functionality.

3.1 Hardware Installation

Mount the transceiver securely, ensuring all connections are tight. Attach the antenna by screwing it clockwise until secure. Connect power cables and accessories as per the manual. Ensure proper grounding to prevent interference. Verify all components are installed correctly before powering on the device. Follow safety guidelines to avoid damage or electrical issues.

3.2 Software Setup and Configuration

Launch the Kenwood software and connect the transceiver via USB. Select the appropriate firmware version and follow on-screen instructions for installation. Configure zones, channels, and digital settings as needed. Set up voice announcement and signal types like QT/DQT and DTMF. Ensure all parameters match your communication requirements for optimal performance. Refer to the manual for detailed configuration guidance.

3.3 Antenna Installation

Screw the antenna into the connector on the top of the transceiver by holding its base and turning clockwise until secure. Ensure a tight connection for optimal performance. Avoid exposing the antenna to extreme temperatures or physical stress. Proper installation ensures reliable communication and prevents signal loss or damage to the device.

Basic Operations

The Kenwood NX-1000 Series enables users to power on/off, adjust volume, select zones/channels, and make/receive calls with ease, ensuring smooth communication.

4.1 Powering On/Off and Volume Control

Powering on/off is done by turning the Power switch/Volume control clockwise. Volume adjustment is intuitive, with the control also serving as the power toggle. The device indicates power-on status with a display prompt, ensuring users are informed of its operational state.

4.2 Selecting Zones and Channels

Selecting zones and channels on the Kenwood NX-1000 Series involves using the device’s intuitive buttons or menu navigation. Users can scroll through zones and channels using the directional keys or keypad. Once the desired zone and channel are selected, confirmation is required to ensure proper communication routing within the chosen parameters.

4.3 Making and Receiving Calls

To initiate a call, press the PF button or use the keypad to select the desired contact. Speak clearly into the microphone for optimal audio quality. For receiving calls, the device alerts you with a tone or vibration. Adjust volume as needed for clear communication. Ensure proper antenna positioning for stable signal reception and reliable call connectivity.

Advanced Features

The NX-1000 Series supports enhanced communication with AMBE2™ voice coding, ensuring clear digital audio. It also features signal types like QT/DQT, DTMF, 2-Tone, and 5-Tone for versatile operations.

5.1 Digital Voice Coding (AMBE2™)

Digital voice coding with AMBE2™ enhances audio clarity, reducing noise and improving communication quality. This advanced technology ensures clear voice transmission, even in challenging environments, making it ideal for professional use.

5.2 Signal Types (QT/DQT, DTMF, 2-Tone, 5-Tone)

The Kenwood NX-1000 Series supports multiple signal types, including QT/DQT, DTMF, 2-Tone, and 5-Tone, enabling versatile communication. These signals facilitate call setup, tone encoding, and system integration, ensuring compatibility with various communication systems and enhancing operational efficiency.

5.3 Individual and Group Calls

The Kenwood NX-1000 Series supports both individual and group calls, enhancing communication flexibility. Individual calls use unique ID numbers (1000-4999), while group calls utilize predefined IDs for multiple user engagement. This feature ensures efficient coordination within fleets or teams, streamlining operations and improving response times in professional settings.

Troubleshooting and Maintenance

This section addresses common issues, battery care, and firmware updates, ensuring optimal performance and longevity of the Kenwood NX-1000 Series transceivers.

6.1 Common Issues and Solutions

Addressing common issues like power problems, antenna connectivity, and battery life. Solutions include checking power switches, securing antenna connections, and avoiding metal objects near batteries to prevent short circuits.

6.2 Battery Care and Replacement

Properly care for your Kenwood NX-1000 battery by avoiding extreme temperatures and metal objects. Store batteries in a cool, dry place when not in use. Replace batteries when capacity diminishes or they no longer hold a charge. Follow manufacturer guidelines for disposal and recycling of old batteries to ensure environmental safety.

6.3 Updating Firmware

Regularly update the firmware of your Kenwood NX-1000 Series transceiver to ensure optimal performance and access to the latest features. Download the latest firmware version from Kenwood’s official website and follow the provided instructions. Use compatible programming cables and software tools to avoid malfunctions. Always back up settings before updating to prevent data loss.

Safety Precautions

Follow safety guidelines to prevent accidents. Avoid exposing the transceiver to extreme temperatures. Comply with local regulations when using the device while driving. Protect batteries from metal objects to prevent short circuits.

7.1 General Safety Guidelines

Always handle the transceiver with care to avoid damage. Ensure antennas are securely attached to prevent exposure to high RF energy. Avoid extreme temperatures and moisture, as they can degrade performance. Keep batteries away from metal objects to prevent short circuits. Regularly inspect accessories for wear and tear. Follow all safety precautions to ensure reliable operation and longevity of the device.

7.2 Compliance with Regulations

Ensure compliance with local laws and regulations when using the transceiver. Avoid operating the device while driving, as it may violate traffic laws. Use the transceiver in accordance with FCC and CE regulations. Always maintain proper licensing for radio operation. Follow all safety guidelines to ensure legal and secure communication. Consult Kenwood’s official resources for detailed regulatory information.

7.3 Environmental Considerations

Protect the transceiver from extreme temperatures and moisture. Avoid exposing it to direct sunlight or freezing conditions. Do not store batteries with metal objects to prevent short circuits; Dispose of batteries and electronic components responsibly, following local environmental regulations. Ensure proper handling to maintain device performance and longevity in various operating environments.

Model-Specific Features

The NX-1000 Series includes models like the NX-1200N, NX-1300N, and NX-1200D, offering specific features tailored to VHF/UHF frequencies, zones, and channels, with advanced digital capabilities.

8.1 NX-1200/E3 and NX-1300-E2/E3

The NX-1200/E3 and NX-1300-E2/E3 models support NXDN and Analog modes, offering VHF/UHF frequency ranges. They feature the AMBE2+ vocoder for clear digital voice, supporting QT/DQT, DTMF, 2-Tone, and 5-Tone signaling. These models provide up to 1,000 channels, 128 zones, and advanced functionality for professional communication needs.

8.2 NX-1200D and NX-1300D

The NX-1200D and NX-1300D are DMR/Analog Transceivers, offering VHF and UHF frequency bands. These models support both digital and analog modes, ensuring compatibility with existing systems. They feature a built-in AMBE2+ vocoder for clear digital voice communication and support various signaling types, making them ideal for organizations transitioning to digital communication systems.

8.3 NX-1200N and NX-1300N

The NX-1200N (VHF) and NX-1300N (UHF) are NXDN/Analog Transceivers, supporting both NXDN digital and analog modes. They feature a built-in AMBE2+ vocoder for clear digital voice and support various signaling types. These models are ideal for users needing flexible communication solutions, with compatibility with Kenwood’s KAIROS DMR Tier II solution for advanced system integration.

The Kenwood NX-1000 Series offers reliable communication solutions with advanced digital voice coding and flexible protocol support, ensuring clear and efficient connectivity for professional use.

9.1 Summary of Key Points

The Kenwood NX-1000 Series provides flexible communication solutions with NXDN and DMR protocols, offering clear digital voice quality, multi-protocol support, and robust features. It includes models like the NX-1200N and NX-1300N, ensuring compatibility for various professional needs while maintaining reliability and efficiency in diverse operational environments.

9.2 Final Tips for Optimal Use

  • Explore all features to maximize functionality.
  • Refer to the manual for guidance on advanced settings.
  • Ensure compliance with local regulations.
  • Handle the device with care to avoid damage.
  • Store the transceiver in a cool, dry place.

Resources for Further Reading

Visit Kenwood’s official website for detailed manuals, guides, and support. Download PDF manuals for NX-1000 Series models, including operation and installation instructions, from authorized sources.

10.1 Official Kenwood Documentation

Kenwood provides comprehensive official documentation for the NX-1000 Series, including user manuals, installation guides, and technical specifications. These resources are available on Kenwood’s website and cover detailed instructions for operation, configuration, and troubleshooting. Users can download PDF versions for easy reference, ensuring access to accurate and up-to-date information.

10.2 Online Manuals and Guides

Official Kenwood NX-1000 manuals are available on websites like Manualzz and Kenwood’s support site. Users can download PDF guides for models such as NX-1200N, NX-1300N, and NX-1200D. These resources cover installation, operation, troubleshooting, and advanced features in multiple languages, including English, French, and Spanish.

10.3 Manufacturer Support and Contact

Kenwood provides dedicated support for the NX-1000 Series through their official website. Users can access contact information, troubleshooting guides, and technical assistance. For inquiries, visit Kenwood’s support page or refer to the provided QR code in the manual for direct assistance and comprehensive resources.

tripp lite smartpro ups manual

Welcome to the Tripp Lite SmartPro UPS Manual. This guide provides essential information for installing, operating, and maintaining your line-interactive UPS system, ensuring optimal performance and safety.

1.1 Overview of the SmartPro UPS System

The Tripp Lite SmartPro UPS is a line-interactive uninterruptible power supply designed to provide reliable backup power and voltage regulation. It features sine-wave output, automatic voltage regulation (AVR), and extended runtime options. Available in capacities from 500VA to 3000VA, this system supports mission-critical applications with high efficiency and consistent power protection.

1.2 Importance of Reading the Manual

Reading the Tripp Lite SmartPro UPS Manual is crucial for understanding safety guidelines, proper installation, and optimal operation. It ensures compliance with warranty terms, helps troubleshoot issues, and provides maintenance tips for extending the UPS lifespan; Adhering to the manual’s instructions guarantees safe and efficient use of your uninterruptible power supply system.

Product Overview and Key Features

The Tripp Lite SmartPro UPS is a high-performance, line-interactive uninterruptible power supply designed for advanced networking and server applications. It features automatic voltage regulation, an LCD display, and communication ports for monitoring, ensuring reliable power protection and efficient energy management for critical systems.

2.1 Technical Specifications of the Tripp Lite SmartPro UPS

The Tripp Lite SmartPro UPS offers models ranging from 500VA to 3000VA, providing sine-wave output for consistent power quality. With line-interactive technology, it supports high-efficiency operation, reducing energy costs. The UPS includes communication ports for USB and RS-232 connectivity, enabling advanced monitoring and management through PowerAlert software, ensuring reliable backup power and system protection.

2.2 Line-Interactive UPS Technology Explained

The Tripp Lite SmartPro UPS utilizes line-interactive technology to regulate voltage fluctuations, providing consistent power quality. This system automatically adjusts input voltage to maintain stable output, preventing data loss and equipment damage. Unlike standby UPS models, line-interactive systems offer better protection against brownouts and overvoltages, ensuring reliable performance and extended runtime capabilities for connected devices.

2.3 Available Models and Capacities

The Tripp Lite SmartPro UPS series offers multiple models with capacities ranging from 500VA to 3000VA, catering to diverse power needs. These models support both rackmount and tower installations, providing flexibility for various applications. Each model ensures reliable power protection, with extended runtime options available for critical systems requiring longer backup support during outages.

Installation and Setup Guidelines

Proper installation ensures optimal performance and safety. Choose a suitable location, avoid moisture and heat, and use correct mounting methods. Follow safety guidelines to prevent damage.

3.1 UPS Location and Environmental Considerations

Ensure your UPS is installed indoors, away from moisture, heat sources, direct sunlight, and conductive contaminants. Avoid dusty environments to maintain efficiency. Place the unit upright in a well-ventilated area, following all safety guidelines to prevent damage and ensure reliable operation.

3.2 Physical Installation (Rackmount and Tower Options)

For rackmount installation, use a Tripp Lite 2-Post Rackmount Kit (sold separately). Tower models should be mounted upright with the LED/control panel on top. Ensure all hardware is securely tightened. During installation, avoid touching internal components to prevent damage. For detailed procedures, refer to the included hardware guide. Visit www.tripplite.com for specific replacement batteries.

3.3 Connecting Equipment and Power Sources

Connect your UPS to a reliable power source using the provided cord. Attach devices to the UPS outlets, ensuring the total VA rating does not exceed capacity. Use USB or RS-232 ports for communication with your computer. Install PowerAlert software for remote monitoring and shutdown. Avoid overloading the UPS to maintain optimal performance and safety.

First-Time Use and Basic Operation

Unpack and inspect the UPS, then power it on. Perform the self-test to ensure proper function. Familiarize yourself with operating modes to manage power effectively and safely.

4.1 Unpacking and Initial Inspection

Begin by carefully unpacking the UPS and accessories. Inspect the unit for any visible damage or defects. Verify all components, including cables and manuals, are included in the package. Ensure the UPS is free from physical damage before proceeding with installation or operation to avoid potential issues.

4.2 Powering On and Self-Test Procedures

Connect the UPS to a power source and plug in your equipment. Turn on the UPS using the front panel switch. The system will automatically perform a self-test, checking battery and inverter functionality. Listen for audible tones and observe LED indicators to confirm successful initialization. Refer to the manual for specific self-test instructions.

4.3 Understanding Basic Operating Modes

The Tripp Lite SmartPro UPS operates in three primary modes: Normal (grid power), Battery (backup during outages), and SmartCharge (optimized charging). The system automatically switches modes based on power conditions. LED indicators and alarms provide real-time status updates, ensuring seamless transitions and reliable power protection for connected equipment.

Indicators, Controls, and Monitoring

The Tripp Lite SmartPro UPS features LED indicators for status monitoring, front panel controls for easy navigation, and communication ports for integrating with PowerAlert software, ensuring comprehensive system oversight.

5.1 LED Indicators and Their Meanings

The Tripp Lite SmartPro UPS features LED indicators that provide real-time status updates. These LEDs show power status, battery health, fault conditions, and input/output issues. Each LED flashes or remains lit to signal specific states, such as normal operation, battery charging, low battery, or overload. Refer to the manual for detailed meanings of each indicator’s color and pattern.

5.2 Front Panel Controls and Functions

The front panel of the Tripp Lite SmartPro UPS includes a power button, LCD display, and navigation buttons. The power button turns the UPS on/off, while the LCD displays system status, voltage, and runtime. Navigation buttons allow users to scroll through menus and configure settings. A mute button silences alarm tones during operation.

5.3 Communication Ports (USB and RS-232)

The Tripp Lite SmartPro UPS features USB and RS-232 communication ports for connecting to a computer. These ports enable monitoring, shutdown, and UPS control via the PowerAlert software. The USB port simplifies connectivity, while the RS-232 provides serial communication options. Use the included cables to ensure proper connection and management of your UPS system effectively.

Maintenance and Troubleshooting

Regularly inspect the UPS and batteries to ensure optimal performance. Perform self-tests and check for firmware updates. Contact Tripp Lite support for unresolved issues or diagnostics.

6.1 Battery Replacement and Care

Replace batteries every 2-3 years or when the UPS indicates low battery. Use genuine Tripp Lite replacement cartridges for compatibility. Turn off the UPS and disconnect power before replacing. For hot-swap models, the UPS will not provide backup power during replacement. Visit Tripp Lite for correct RBCs and follow safety guidelines to avoid damage or voiding the warranty.

6.2 Common Issues and Diagnostic Steps

Common issues include battery failure, overload, and improper connections. Use LED indicators to identify problems. Perform self-test monthly. For persistent issues, unplug, wait 30 seconds, and reconnect. Contact Tripp Lite support at 1.773.869.1234 for assistance. Reference the manual or support resources for detailed diagnostic procedures and solutions.

6.3 Contacting Customer Support

For assistance, visit Tripp Lite’s website or call 1.773.869.1234. Their office is located at 1111 W. 35th Street, Chicago, IL 60609 USA. Customer support is available to address inquiries, provide repair services, and guide you through troubleshooting or warranty claims. Visit their website for additional resources and support options.

Advanced Features and Configuration

This section explores advanced features like Automatic Voltage Regulation (AVR) for consistent power quality and extended runtime options with external batteries. It also covers PowerAlert software integration for monitoring and configuring your UPS efficiently, ensuring optimal performance and scalability for advanced applications.

7.1 Automatic Voltage Regulation (AVR)

The Tripp Lite SmartPro UPS features Automatic Voltage Regulation (AVR), which automatically corrects voltage fluctuations without battery intervention. This advanced technology protects connected equipment from brownouts, overvoltages, and other power irregularities, ensuring stable and consistent power delivery. AVR enhances system reliability and extends equipment lifespan by maintaining optimal voltage levels during operation.

7.2 Extended Runtime Options and External Batteries

The Tripp Lite SmartPro UPS supports external battery packs for extended runtime, ensuring prolonged power availability during outages. These batteries integrate seamlessly with compatible UPS models, allowing for hot-swap replacement without disrupting power supply. The system is designed for efficient and safe operation, making it ideal for critical applications requiring extended backup power solutions.

7.3 PowerAlert Software Integration

The Tripp Lite SmartPro UPS integrates with PowerAlert software, enabling advanced monitoring and control. This software allows users to monitor power conditions, customize shutdown settings, and receive alerts for critical events. It ensures seamless communication between the UPS and connected devices, providing enhanced management and protection for your equipment during power disruptions or outages.

Environmental Protection and Compliance

The Tripp Lite SmartPro UPS adheres to eco-design principles, focusing on energy efficiency and reduced environmental impact. The manual provides guidelines for proper disposal and recycling of the unit.

8.1 Eco-Design and Energy Efficiency

The Tripp Lite SmartPro UPS incorporates eco-design principles, ensuring high energy efficiency and reduced environmental impact. It complies with global environmental standards, using advanced components to minimize power consumption and optimize energy use, thus promoting sustainability and eco-friendly operation.

8.2 Proper Disposal and Recycling

Proper disposal and recycling of the Tripp Lite SmartPro UPS and its components are crucial for environmental protection. Batteries and electronic waste must be handled according to local regulations to prevent hazardous materials from harming the environment. Always recycle responsibly and refer to the manual for specific disposal guidelines and recommendations.

Warranty and Support Information

Eaton provides a comprehensive warranty for the Tripp Lite SmartPro UPS, covering manufacturing defects for a specified period. Contact Tripp Lite support through their website or phone for assistance and inquiries.

9.1 Warranty Terms and Conditions

Eaton offers a comprehensive warranty covering manufacturing defects for the Tripp Lite SmartPro UPS. The standard warranty period is two years for the UPS and five years for the battery. Warranty coverage does not apply to misuse or neglect. For detailed terms and conditions, refer to the official Tripp Lite SmartPro UPS manual. Contact Tripp Lite support through their website or customer service hotline for assistance.

9.2 Accessing Support Resources

For assistance with your Tripp Lite SmartPro UPS, visit the official Tripp Lite website at www.tripplite.com. Utilize the support section for FAQs, manuals, and replacement parts. Contact customer service at 1.773.869.1234 or via email for technical inquiries. Ensure your product is registered for warranty and support updates. Additional resources include the PowerAlert software and a comprehensive knowledge base.

Safety Precautions and Warnings

Install your Tripp Lite SmartPro UPS indoors, away from moisture, heat, or direct sunlight. Use only approved cables and avoid overloading to prevent damage or hazards.

10.1 General Safety Guidelines

Always install your Tripp Lite SmartPro UPS indoors, away from moisture, heat, or direct sunlight. Use only approved cables and avoid overloading the system. Ensure proper ventilation and keep the UPS upright during operation. Follow all safety warnings to prevent damage, injury, or voiding the warranty.

10.2 Specific Warnings for Installation and Operation

Do not mount the Tripp Lite SmartPro UPS on its side, as this could cause damage. Avoid exposing the unit to conductive contaminants or excessive moisture. Ensure proper battery replacement to prevent electrical shock. Only authorized personnel should perform repairs. Incorrect installation or operation may void the warranty or result in equipment damage.

The Tripp Lite SmartPro UPS Manual provides comprehensive guidance for optimal performance and safety. By following the outlined procedures, users can ensure reliable power protection and extend equipment lifespan effectively.

11.1 Summary of Key Points

The Tripp Lite SmartPro UPS Manual emphasizes proper installation, advanced features like AVR, and regular maintenance for optimal performance. It highlights safety precautions, eco-friendly design, and warranty details to ensure longevity and reliability of your UPS system, providing comprehensive support for your power protection needs.

11.2 Best Practices for Optimal UPS Performance

  • Always install the UPS in a cool, dry environment, away from direct sunlight and moisture.
  • Regularly inspect and replace batteries as needed to ensure reliable backup power.
  • Avoid overloading the UPS to maintain efficiency and prevent damage.
  • Use genuine Tripp Lite replacement parts for optimal performance and warranty validity.
  • Schedule periodic self-tests and update PowerAlert software for enhanced functionality.

instant pot duo manual pdf

Welcome to the Instant Pot Duo Manual, your comprehensive guide to mastering the Instant Pot Duo series. This manual provides essential information for safe operation, features, and troubleshooting to enhance your cooking experience.

1.1 Overview of the Instant Pot Duo Series

The Instant Pot Duo Series is a line of multi-use pressure cookers designed for versatility and ease of use. Available in various models, including Duo, Duo Plus, and Duo Crisp, these cookers offer functions like pressure cooking, sautéing, steaming, and slow cooking. With 6 and 8-quart sizes, they cater to different household needs, ensuring efficient and safe cooking experiences with advanced features and user-friendly interfaces.

1.2 Importance of Reading the Manual

Reading the Instant Pot Duo manual is crucial for safe and effective use. It provides essential safety precautions, detailed operating instructions, and troubleshooting tips. Understanding the guidelines helps prevent accidents, ensures proper functionality, and maximizes the appliance’s potential. Familiarize yourself with the manual to avoid common mistakes and make the most of your cooking experience with the Instant Pot Duo series.

Safety Precautions and Warnings

Always read and follow the safety guidelines in the Instant Pot Duo manual. Proper usage prevents injuries and ensures safe operation. Avoid hot surfaces and use the correct lid to maintain pressure cooker functionality. Supervision is key to preventing accidents while cooking.

2.1 Essential Safety Guidelines

Always follow the Instant Pot Duo manual’s safety guidelines to prevent accidents. Avoid touching hot surfaces, keep children away, and ensure the lid is locked properly. Never use abrasive cleaners or immerse the base in water. Failure to follow these precautions may result in injury or damage. Read the manual thoroughly before first use for safe operation of your Instant Pot Duo.

2.2 Common Hazards and Prevention Tips

Prevent burns by using oven mitts when handling hot pots. Keep the cooker on a stable surface away from flammable materials. Regularly inspect the sealing ring for wear and tear. Ensure the pressure release valve is clear of obstructions. Always use the correct lid for your model to avoid malfunction. Follow these tips to minimize risks and ensure safe operation of your Instant Pot Duo.

Features of the Instant Pot Duo

The Instant Pot Duo offers multi-functionality, combining pressure cooking, slow cooking, sautéing, steaming, and more. Available in 3-quart, 6-quart, and 8-quart models, it features smart programs for effortless meal preparation.

3.1 Key Functions and Capabilities

The Instant Pot Duo combines 7-in-1 functionality, offering pressure cooking, slow cooking, sautéing, steaming, rice cooking, yogurt making, and warming. Its advanced microprocessor ensures precise temperature and cooking control, while the 3-quart, 6-quart, and 8-quart models cater to diverse cooking needs, making it versatile for various recipes and household sizes.

3.2 Technical Specifications and Models

The Instant Pot Duo series includes models like Duo Mini (3-quart), Duo (6-quart), and Duo Plus (8-quart). Each features a 120V, 60Hz, 1000W power rating, with advanced microprocessor technology for precise cooking control. The Duo Crisp model adds air frying capabilities. All models include a durable stainless steel pot, LCD display, and safety features like automatic shut-off and multiple pressure levels for versatile cooking experiences.

Control Panel and Basic Operations

The control panel features an LED display, cooking program keys, and operation buttons for easy navigation. Use the +/- keys to adjust settings and start/stop cooking functions effortlessly.

4.1 Understanding the Control Panel Layout

The control panel of your Instant Pot Duo features a clear LED display and intuitive buttons for selecting cooking modes and adjusting settings. The layout includes dedicated keys for pressure cooking, sauté, steam, and other functions, along with +/- buttons for setting timers and fine-tuning parameters. Familiarizing yourself with the control panel ensures smooth and efficient operation of your Instant Pot Duo.

4.2 Navigating Cooking Programs and Settings

Navigating the Instant Pot Duo’s cooking programs and settings is straightforward. Use the Pressure Cook, Sauté, Steam, and other function buttons to select modes. Adjust settings with the +/- buttons for timer, temperature, and pressure levels. Refer to the manual for detailed guidance on customizing settings and using specialized features like the steam function or manual mode for precise control over your cooking process.

Cooking Modes and Programs

The Instant Pot Duo offers versatile cooking modes, including Pressure Cook, Sauté, Steam, and Slow Cook. Customize settings for precise control over temperature, timer, and pressure levels effortlessly.

5.1 Pressure Cooking and Sauté Functions

The Instant Pot Duo excels in pressure cooking, significantly reducing cooking time while retaining flavors. The Sauté function allows for browning and simmering, perfect for pre-cooking or finishing dishes. Use the manual mode for precise control over pressure levels and cooking duration, ensuring optimal results for a variety of recipes, from hearty stews to tender grains.

5.2 Specialty Modes (Rice, Steam, Slow Cook)

The Instant Pot Duo offers versatile specialty modes for tailored cooking. The Rice mode ensures perfectly cooked grains, while Steam mode gently prepares vegetables and seafood. Slow Cook mode mimics traditional crockpot results, with options for 6-24 hours. These preset functions simplify cooking, delivering consistent results for a variety of dishes with minimal effort and monitoring.

Getting Started with Your Instant Pot Duo

Start by washing the lid, sealing ring, and pot. Place the cooker on a stable surface, plug it in, and refer to the quick start guide for first-time use.

6.1 Initial Setup and First-Time Use

Unbox your Instant Pot Duo and wash the components in warm soapy water. Dry thoroughly and ensure the sealing ring is correctly placed. Plug in the cooker, power it on, and follow the quick start guide for initial setup. Perform a water test to confirm proper function before cooking. Ensure all parts are securely fitted for safe operation.

6.2 Basic Cooking Techniques and Tips

Start with simple recipes, ensuring adequate liquid for pressure cooking. Use the sauté function to brown meats before pressure cooking for enhanced flavor. Always measure liquids accurately to avoid undercooked or burnt food. Experiment with natural release vs. quick release based on recipe requirements; For delicate foods, use the steam function with a trivet. Season the pot lightly to avoid over-salting dishes. Begin with short cooking times and adjust as needed for desired texture. Refer to the manual for specific settings and troubleshooting common issues during initial use.

Advanced Cooking Techniques

Master manual pressure release for precise control and customize recipes to suit your taste preferences. Experiment with layering flavors and optimizing cooking settings for superior results.

7;1 Using the Manual Pressure Release

Mastering the manual pressure release is crucial for precise control. Always ensure the valve is set to “venting” and use a long utensil to avoid burns. Keep your face away, as steam may escape rapidly. This method is ideal for preventing overcooking and achieving perfect texture in dishes like soups or grains. Practice makes perfect!

7.2 Customizing Recipes for Optimal Results

Customizing recipes for optimal results involves adjusting pressure levels, cooking times, and liquid ratios. Experiment with sautéing aromatics before pressure cooking for enhanced flavor. Layering ingredients can also elevate dish quality. Always ensure liquids cover ingredients to prevent burning and promote even cooking. Refer to the user manual for detailed guidance on customization techniques.

Maintenance and Cleaning

Regularly clean the lid, gasket, and exterior to maintain hygiene. Deep clean periodically and descale to prevent mineral buildup. Refer to the manual for detailed cleaning instructions.

8.1 Regular Maintenance Tips

Regular maintenance ensures optimal performance. Clean the lid, gasket, and exterior after each use. Descale every 1-3 months to prevent mineral buildup. Check and replace worn-out seals. Store the Instant Pot in a dry place to avoid mold. For detailed cleaning steps, refer to the manual or manufacturer’s guide to maintain hygiene and functionality.

8.2 Deep Cleaning and Troubleshooting Common Issues

For deep cleaning, soak removable parts in warm soapy water and use vinegar to eliminate odors. Troubleshoot common issues like error codes by resetting the device. Address pressure problems by ensuring the valve and seal are clean. If issues persist, refer to the manual or contact customer support for assistance. Regular deep cleaning ensures optimal performance and longevity of your Instant Pot Duo.

Troubleshooting Common Problems

Identify error codes and address pressure issues promptly. Refer to the manual for solutions or contact customer support for assistance with persistent problems and optimal performance.

9.1 Identifying and Solving Error Codes

The Instant Pot Duo manual outlines common error codes and their solutions. Codes like “E1” or “E2” often indicate issues with temperature or sensor malfunctions. Refer to the troubleshooting section for specific guidance. Resetting the device, checking for blockages, or ensuring proper lid alignment can resolve many errors. For persistent issues, consult the manual or contact customer support for assistance.

9.2 Resolving Pressure and Sealing Issues

Pressure and sealing issues are common but easily fixable. Ensure the lid is properly aligned and the steam release handle is in the “sealing” position. Check for blockages in the steam release valve or silicone sealing ring. Clean or replace these parts as needed. Refer to the manual for detailed troubleshooting steps to restore proper pressure function and sealing performance.

Frequently Asked Questions (FAQs)

Find answers to common queries about Instant Pot Duo usage, troubleshooting, and maintenance. Topics include warranty details, customer support, and resolving pressure issues effectively.

10.1 General Usage and Performance Queries

Discover solutions to common questions about daily usage and performance of your Instant Pot Duo. Learn about optimal cooking times, pressure settings, and how to achieve desired results. This section addresses frequently asked questions to ensure you make the most of your appliance’s versatile features and capabilities for delicious meals.

10.2 Warranty and Customer Support Information

Your Instant Pot Duo comes with a comprehensive warranty program, ensuring protection and support for your investment. For detailed warranty terms, visit the official website or refer to the provided manual. Customer support is readily available to address any inquiries or concerns, offering troubleshooting assistance and guidance to enhance your cooking experience with the Instant Pot Duo;

Mastering your Instant Pot Duo unlocks endless culinary possibilities. With this guide, you’re equipped to explore new recipes, optimize features, and enhance your cooking journey effortlessly.

11.1 Maximizing Your Instant Pot Duo Experience

To maximize your Instant Pot Duo experience, explore its versatile features like pressure cooking, sautéing, and slow cooking. Utilize the manual for troubleshooting and maintenance tips. Experiment with new recipes, from hearty stews to fluffy rice dishes. Regularly update your skills and stay informed about new accessories to elevate your culinary creativity and efficiency in the kitchen.

11.2 Encouragement to Explore More Recipes and Features

Adventure into diverse cuisines by experimenting with the Instant Pot Duo’s vast capabilities. Discover new flavors through pressure cooking, slow cooking, and sautéing. Explore the manual for creative ideas and troubleshooting tips. Expand your culinary horizons by trying recipes from global cuisines. Embrace the versatility of your Instant Pot Duo to enhance your cooking journey and unleash your full culinary potential.

Additional Resources

Access the Instant Pot Duo manual PDF online for detailed guidelines. Find user manuals, troubleshooting guides, and FAQs on the official Instant Pot website or authorized support channels.

12.1 Where to Find the Instant Pot Duo Manual PDF

The Instant Pot Duo manual PDF is available on the official Instant Pot website. Visit their support section or search online for “Instant Pot Duo manual PDF.” Ensure you download from trusted sources to avoid unauthorized versions. Additionally, retailer websites or forums may host the manual for easy access.

12.2 Recommended Accessories and Tools

Enhance your Instant Pot Duo experience with essential accessories like a steam basket, silicone rings, and ladle. For air frying, consider the Duo Crisp air fryer basket. Additional tools such as a pressure cooker-safe trivet and heat-resistant mitts are ideal for advanced cooking. Explore Instant Pot-branded or compatible third-party accessories for optimal performance and versatility in your culinary creations.

down the rabbit hole holly madison pdf

Down the Rabbit Hole by Holly Madison is a captivating memoir that delves into her journey from a small-town girl to a Playboy Bunny, revealing the stark contrast between the glamorous facade and the harsh realities of life inside the Playboy Mansion․ Drawing parallels to Alice in Wonderland, the title symbolizes her descent into a world that promised fantasy but delivered unexpected challenges․ This book offers a raw, unfiltered look at the complexities of fame, power dynamics, and personal growth, making it a compelling read for those intrigued by celebrity culture and the human experience․

Overview of Holly Madison’s Memoir

Down the Rabbit Hole is Holly Madison’s candid memoir detailing her transformative journey from a small-town Oregon girl to a prominent Playboy Bunny․ The book chronicles her life inside the Playboy Mansion, revealing the stark contrast between the glamorous image and the often harsh realities․ Madison shares personal anecdotes about her experiences with Hugh Hefner, the pressures of fame, and the challenges of navigating a world of celebrity and power․ The memoir also explores themes of identity, resilience, and self-discovery, offering readers an intimate and unfiltered look at her life both in and out of the spotlight․

The Significance of the Title

The title Down the Rabbit Hole draws inspiration from Lewis Carroll’s Alice’s Adventures in Wonderland, symbolizing Holly Madison’s journey into an unexpected and transformative world․ Just as Alice falls into a fantastical realm, Madison’s life takes a dramatic turn when she enters the Playboy Mansion․ The title reflects her descent into a reality that, while seemingly glamorous, hides darker truths․ It serves as a metaphor for her transition from innocence to awareness, capturing the essence of her memoir, which exposes the contrasts between illusion and reality in her extraordinary life․

Key Themes and Topics Explored

The memoir explores themes of power dynamics, identity transformation, fame’s illusions, personal growth, and resilience, offering a nuanced view of her life beyond the spotlight․

Life Inside the Playboy Mansion

Holly Madison’s memoir vividly portrays life inside the Playboy Mansion, revealing a stark contrast between its glamorous image and the harsh realities․ She details the controlling environment, constant scrutiny, and pressures of living under Hugh Hefner’s rule․ The book exposes the darker side of the mansion, including drug use, manipulation, and the emotional toll of her experiences․ Madison’s account offers a raw, unfiltered look at the complexities of her time there, shedding light on the challenges she faced and the struggles of navigating such a unique and isolating world․

Holly Madison’s Journey from Small-Town Girl to Playboy Bunny

Holly Madison’s transformation from a small-town Oregon girl to a prominent Playboy Bunny is a central theme of her memoir․ Born Holly Sue Cullen, she embraced a new identity, shedding her modest upbringing for the allure of the Playboy lifestyle․ Her spontaneous decision at 21 to pursue this path led her into a world of fame and opportunity, yet it also introduced her to unexpected challenges․ Madison’s journey explores her initial fascination with the Playboy world and the gradual realization of its complexities, offering a personal and introspective look at her evolution․

The Contrast Between Glamour and Reality

In Down the Rabbit Hole, Holly Madison vividly portrays the stark contrast between the glamorous image of the Playboy Mansion and the harsh realities she endured․ While the mansion symbolized luxury and fame, Madison reveals a world of manipulation, emotional abuse, and exploitation․ The memoir strips away the illusion of a fairytale life, exposing the darker truths behind the parties, photo shoots, and celebrity status․ Madison’s journey highlights the disconnect between the polished facade and the personal struggles she faced, offering a raw, unfiltered perspective on life within the Playboy empire․

Controversies and Revelations

Holly Madison’s memoir reveals shocking truths about the Playboy Mansion, exposing a culture of manipulation, abuse, and exploitation behind its glamorous facade, sparking widespread controversy․

Exposure of the Dark Side of the Playboy Lifestyle

Holly Madison’s memoir reveals the shocking realities behind the Playboy Mansion’s glamorous facade, exposing a culture of manipulation, emotional abuse, and exploitation․ She details how women were lured into a false sense of security, only to face pressure to conform to Hefner’s expectations, including mandatory gatherings and a rigid dress code․ The book sheds light on the emotional toll, lack of freedom, and constant competition among the women, painting a stark contrast to the idyllic image often portrayed in media․

Reactions from Hugh Hefner and Others

Hugh Hefner and those close to him were reportedly displeased with Holly Madison’s revelations in Down the Rabbit Hole․ Hefner dismissed her claims, suggesting they were exaggerated for attention․ However, some former Playboy models and staff corroborated parts of her story, sparking a divided reaction․ While Hefner’s supporters defended his legacy, others praised Madison for shedding light on the mansion’s hidden truths․ The book ignited debates about power dynamics and exploitation, leaving a lasting impact on public perception of the Playboy empire and its founder․

Reception and Impact of the Book

Down the Rabbit Hole sparked intense public and critical debate, with many praising its candid portrayal of life inside the Playboy Mansion․ The memoir reshaped perceptions of Hugh Hefner’s empire, revealing a stark contrast between its glamorous image and the darker realities within․ It became a cultural phenomenon, igniting discussions about exploitation, power dynamics, and the personal cost of fame, leaving a lasting impact on how the Playboy legacy is viewed today․

Public and Critical Response

Down the Rabbit Hole garnered significant attention and mixed reviews upon its release․ Critics praised Holly Madison’s candor, calling it a bold exposé that stripped away the glamour of the Playboy Mansion․ However, some reviewers felt the memoir focused too heavily on scandal rather than introspection․ The public response was divided, with many appreciating the raw honesty while others criticized its perceived sensationalism․ Despite this, the book sparked widespread debate about power dynamics, exploitation, and the reality behind the Playboy facade, solidifying its place as a cultural phenomenon and a must-read for those interested in celebrity culture and personal narratives․

How the Memoir Changed Perceptions of the Playboy Empire

Down the Rabbit Hole significantly altered public perception of the Playboy Empire, revealing a stark contrast between its glamorous image and the dark realities within․ Holly Madison’s candid account exposed exploitation, manipulation, and the emotional toll experienced by those inside the mansion․ The memoir shifted the narrative from one of luxury and fantasy to one of control and abuse, prompting broader discussions about consent, power dynamics, and the treatment of women in the entertainment industry․ This shift in perception continues to influence how the Playboy brand is viewed today, highlighting the importance of personal narratives in challenging cultural icons․

Why “Down the Rabbit Hole” is a Must-Read

Down the Rabbit Hole is a must-read for its unfiltered insights into celebrity culture, power dynamics, and personal resilience․ Holly Madison’s story offers a cautionary tale about the illusions of fame and the importance of self-discovery, making it a compelling and thought-provoking read for anyone interested in the behind-the-scenes truth of Hollywood’s glamour․

Insights into Celebrity Culture and Power Dynamics

Down the Rabbit Hole offers a raw exploration of celebrity culture, revealing the manipulative power dynamics within the Playboy empire․ Holly Madison’s memoir exposes how Hugh Hefner used his influence to control lives, masking exploitation behind glamour․ The book highlights the psychological toll of fame and the illusions of luxury, providing a cautionary tale about the dark side of ambition․ It sheds light on the exploitation of women and the emotional struggles of those trapped in a world of superficiality, making it a vital read for understanding the realities behind celebrity culture․

A Cautionary Tale for Aspiring Stars

Holly Madison’s memoir serves as a stark warning for aspiring stars, uncovering the hidden costs of fame․ The book details her journey from innocence to disillusionment, revealing the exploitation and emotional turmoil behind the glittering facade of the Playboy Mansion․ Madison’s experiences highlight the dangers of chasing celebrity status without fully understanding its consequences․ Her story is a powerful reminder that fame often comes at a steep personal price, urging young aspirants to approach stardom with caution and a critical eye․

Availability and Formats

Down the Rabbit Hole by Holly Madison is available as a PDF, Kindle edition, and in paperback․ The book can be found on platforms like Amazon, Project Gutenberg, and other online retailers, offering various formats for readers since its 2016 release․

Where to Find the PDF Version

The PDF version of Holly Madison’s memoir is widely available online․ Platforms like Project Gutenberg and Indigo offer free or paid downloads․ Additionally, Amazon provides the Kindle edition, which can be converted to PDF․ Some websites like buildlearn․com and listserv․hlth․gov․bc․ca also host the file․ Since its 2016 release, the book has been accessible in various formats, making it easy for readers to find and download the PDF version conveniently from multiple sources․

Other Editions and Formats

Holly Madison’s memoir is available in multiple formats to suit various preferences․ The book can be found in hardcover, paperback, and e-book formats, including Kindle and PDF․ Readers can also access it through Kindle Unlimited․ Additionally, an audiobook version is available for those who prefer listening․ Published in 2016, the memoir is widely distributed across platforms like Amazon, Barnes & Noble, and Indigo, ensuring accessibility for a broad audience․ This variety of formats allows readers to enjoy the book in their preferred medium, making it easily accessible to fans worldwide․

Holly Madison’s memoir offers a profound reflection on her experiences, shedding light on the complexities of fame and power․ By sharing her journey, she challenges the romanticized view of the Playboy lifestyle, providing a candid perspective on personal growth and resilience․ The book serves as a cautionary tale, urging readers to look beyond the glamour and understand the realities of such worlds․ Ultimately, Down the Rabbit Hole is a testament to the human spirit’s ability to navigate challenges and emerge stronger, making it a memorable and impactful read for anyone interested in true stories of transformation and self-discovery․

clybourne park play pdf

Clybourne Park‚ a play by Bruce Norris‚ explores racial tension and gentrification through two acts set in 1959 and 2009‚ reflecting societal changes and conflicts.

Overview of the Play

Clybourne Park‚ written by Bruce Norris‚ is a thought-provoking play inspired by Lorraine Hansberry’s A Raisin in the Sun. The story unfolds in two acts‚ set in the same Chicago house but separated by 50 years: 1959 and 2009. The first act explores the tensions as a white family prepares to move‚ while the second act delves into the neighborhood’s transformation and gentrification. The play examines themes of race‚ class‚ and social change through its characters’ interactions. Norris’s work challenges societal norms‚ blending humor with stark reality‚ and has been praised for its bold commentary on America’s evolving racial dynamics. It won the 2011 Pulitzer Prize for Drama and the 2012 Tony Award for Best Play‚ solidifying its impact on contemporary theater.

Historical Context of Clybourne Park

Clybourne Park is deeply rooted in the historical backdrop of racial segregation and social change in 1950s America. The play reflects the real-life struggles of African-American families moving into predominantly white neighborhoods‚ as depicted in Lorraine Hansberry’s A Raisin in the Sun. Set in Chicago’s Clybourne Park neighborhood‚ the story mirrors the resistance faced by families like the Youngs during the Civil Rights era. The play also juxtaposes these events with a modern narrative set in 2009‚ exploring gentrification and the complexities of integration. By bridging these time periods‚ Norris highlights the enduring impact of historical racial tensions on contemporary society‚ offering a poignant commentary on America’s evolving yet fraught relationship with race and class.

Themes in Clybourne Park

Clybourne Park explores racial tension‚ gentrification‚ and social integration‚ sparking conversations about race‚ class‚ and community through its portrayal of neighborhood evolution and interpersonal conflicts.

Racial Tension and Social Integration

Clybourne Park delves into the complexities of racial tension and social integration‚ mirroring real-life struggles of neighborhood dynamics. The play portrays how resistance to change and underlying prejudices fuel conflict‚ as seen in the 1959 act through Karl Lindner’s attempt to maintain racial homogeneity. His dialogue reveals the fears and anxieties of a community grappling with integration. The 2009 act highlights how these tensions evolve‚ showcasing the persistence of racial misunderstandings despite societal progress. By juxtaposing past and present‚ Norris illustrates the enduring impact of race on relationships and community identity‚ provoking audiences to reflect on the ongoing challenges of social integration and racial harmony.

Gentrification and Neighborhood Change

Clybourne Park examines the transformative impact of gentrification on neighborhoods‚ reflecting societal shifts over decades. The play portrays the evolution of Clybourne Park from a white‚ middle-class enclave in 1959 to a predominantly Black neighborhood‚ and later‚ in 2009‚ to a gentrifying area attracting wealthier‚ often white‚ residents. Through these changes‚ Norris highlights the tension between progress and displacement‚ as well as the clash of identities and values. The play critiques how gentrification often erases the history and culture of long-standing communities‚ while also exploring the complexities of neighborhood change and its effects on social dynamics and inequality.

Psychological Struggles and Family Dynamics

Clybourne Park delves into the psychological struggles and family dynamics of its characters‚ exploring themes of grief‚ guilt‚ and interpersonal conflict. Russ and Bev Stoller grapple with the loss of their son‚ Kenneth‚ while navigating their strained relationship. The play portrays how unaddressed emotional wounds can fester‚ affecting family interactions and societal perceptions. Through tense dialogue and subtle character development‚ Norris highlights the internal battles of individuals trying to cope with personal tragedies and societal expectations. The psychological depth of the characters adds complexity to the narrative‚ revealing how family dynamics are intertwined with broader social issues like race and gentrification‚ creating a layered exploration of human emotion.

Playwright and Production History

Bruce Norris’s Clybourne Park premiered at Playwrights Horizons in New York in 2010‚ later transferring to London’s Royal Court Theatre‚ earning acclaim and prestigious awards.

Bruce Norris and His Vision

Bruce Norris crafted Clybourne Park as a response to Lorraine Hansberry’s A Raisin in the Sun‚ offering a provocative exploration of race and gentrification. His vision was to present the story from the perspective of the white community‚ shedding light on their reactions to racial integration. Norris’s work challenges audiences to confront uncomfortable truths about societal change and the persistence of racial tensions. By blending dark humor with poignant drama‚ he creates a dialogue that resonates across generations‚ prompting viewers to reflect on their own biases and the evolution of social dynamics.

Premiere and Major Productions

Clybourne Park premiered at Playwrights Horizons in New York in January 2010‚ directed by Pam MacKinnon. Its success led to a Broadway production in 2012. The play also debuted in the UK at London’s Royal Court Theatre in 2010‚ directed by Dominic Cooke‚ and later transferred to the West End. These productions solidified its reputation as a groundbreaking work‚ with critics praising its bold narrative and timely themes. The play’s acclaim grew as it reached wider audiences‚ becoming a significant piece in contemporary theatre. Its ability to spark dialogue on race and gentrification made it a standout production in both the U.S. and U.K.

Awards and Critical Reception

Clybourne Park received widespread acclaim and numerous awards‚ including the 2011 Pulitzer Prize for Drama and the 2012 Tony Award for Best Play. Critics praised its bold exploration of race‚ class‚ and gentrification‚ with many highlighting its sharp dialogue and thought-provoking narrative. The play also earned the Olivier Award for Best New Play during its London run. Reviewers noted its ability to balance humor with uncomfortable truths‚ making it a standout work in contemporary theatre. The production was celebrated for its fearless approach to sensitive topics‚ solidifying its place as a significant contribution to American drama. Its success underscored Norris’s skill in crafting stories that resonate deeply with audiences.

Comparison with A Raisin in the Sun

Clybourne Park reflects on A Raisin in the Sun‚ offering a contrasting perspective on racial integration and neighborhood dynamics through the lens of the white community.

Shared Historical and Thematic Elements

Clybourne Park and A Raisin in the Sun share a historical and thematic connection‚ both set in the same Chicago house but from differing perspectives. A Raisin in the Sun focuses on the African-American Younger family’s struggle to integrate the predominantly white Clybourne Park neighborhood in the 1950s‚ while Clybourne Park explores the white community’s reaction to this integration. Both plays delve into racial tension‚ social integration‚ and the challenges of neighborhood change. They reflect the broader societal shifts of their time‚ with Clybourne Park also addressing gentrification in the 21st century. Together‚ they provide a comprehensive view of racial and social dynamics across generations.

Differences in Narrative Perspective

Clybourne Park and A Raisin in the Sun differ significantly in narrative perspective. While A Raisin in the Sun is told from the viewpoint of the African-American Younger family‚ Clybourne Park shifts focus to the white residents of Clybourne Park‚ exploring their reactions to racial integration. This dual perspective highlights the same historical event but through opposing lenses. Clybourne Park also extends the story into the 21st century‚ examining gentrification and modern racial dynamics. The plays contrast in tone as well‚ with A Raisin in the Sun emphasizing hope and resilience‚ while Clybourne Park uses satire and dark humor to critique societal attitudes. Together‚ they offer a balanced yet contrasting view of race and community.

Key Characters and Their Roles

Bev and Russ Stoller‚ a grieving white couple‚ dominate the first act‚ while Karl Lindner represents the neighborhood’s resistance to change. Their interactions reveal deep societal tensions.

Bev and Russ Stoller

Bev and Russ Stoller are central characters in Clybourne Park‚ portrayed as a white couple grappling with grief and societal change; Their son Kenneth’s death haunts Russ‚ who struggles to cope‚ while Bev‚ though emotionally distant‚ tries to maintain normalcy. The couple’s interactions reveal underlying tensions in their marriage and their attitudes toward race and neighborhood dynamics. Bev’sInvite of Jim‚ a local clergyman‚ underscores her attempt to support Russ‚ but their conversations often miss the mark. Their housekeeper‚ Francine‚ subtly challenges Bev’s assumptions‚ highlighting the racial and class divides. The Stollers’ story in the 1959 act reflects the broader themes of loss‚ denial‚ and the complexities of human relationships amid societal shifts.

Karl Lindner and His Impact

Karl Lindner‚ a pivotal character in Clybourne Park‚ embodies the racial tensions of the 1950s as a representative of the Clybourne Park neighborhood’s “Welcoming Committee.” His visit to the Stollers’ home in 1959 reveals his role in enforcing segregation‚ as he attempts to persuade them not to sell their house to a Black family. Karl’s polite yet firm demeanor masks a deeper prejudice‚ making him a symbol of systemic racism. His actions drive the plot‚ highlighting the resistance to integration and the fear of neighborhood change. Karl’s presence underscores the play’s exploration of racial conflict and the challenges of social progress‚ making him a significant figure in the narrative’s historical context.

Symbolism and Dramatic Structure

The house in Clybourne Park symbolizes societal change‚ its transformation reflecting racial shifts and gentrification over decades‚ while the nonlinear narrative bridges past and present tensions seamlessly.

The House as a Symbol of Change

The house in Clybourne Park serves as a potent symbol of societal transformation. It represents the evolution of a neighborhood from an affluent white community in 1959 to a predominantly Black area‚ and later‚ a gentrified space in 2009. The physical state of the house—well-maintained in the first act and dilapidated in the second—mirrors the changing dynamics of the community. It signifies the passage of time‚ the impact of racial integration‚ and the economic shifts that shape the neighborhood. Through the house‚ the play visually and metaphorically explores themes of race‚ class‚ and the enduring legacy of segregation.

Nonlinear Narrative and Its Significance

Bruce Norris’s Clybourne Park employs a nonlinear narrative‚ oscillating between 1959 and 2009‚ to explore the evolution of racial and social dynamics. The first act depicts the departure of a white family‚ while the second act shows the same house being gentrified decades later. This structure underscores the cyclical nature of societal change‚ with the past and present intersecting to reveal lingering prejudices and evolving attitudes. The nonlinear format allows for a comparative analysis‚ highlighting how progress coexists with regression. By juxtaposing two eras‚ Norris critiques the illusion of linear advancement‚ emphasizing that racial and class conflicts remain deeply embedded in American society. This narrative choice enhances the play’s thematic depth and provokes reflection on historical continuity.