Month: February 2026

idahoan instant potatoes instructions

Idahoan Instant Potatoes: A Comprehensive Guide

Idahoan instant potatoes offer a convenient and flavorful side dish, evolving from bland versions to creamy, surprisingly delicious options for home cooks everywhere․

Understanding Idahoan Instant Potatoes

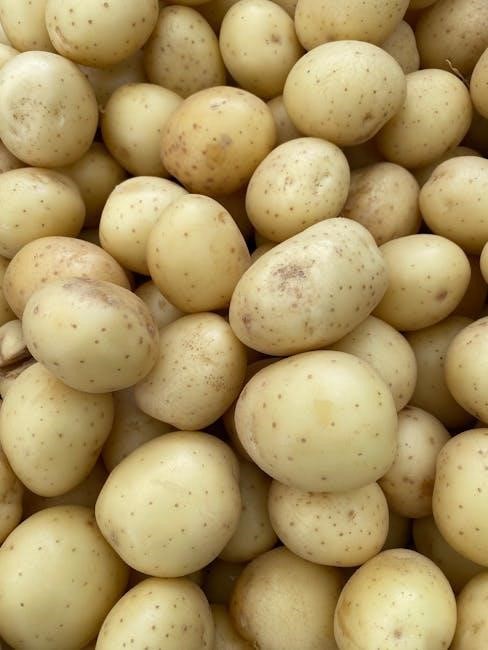
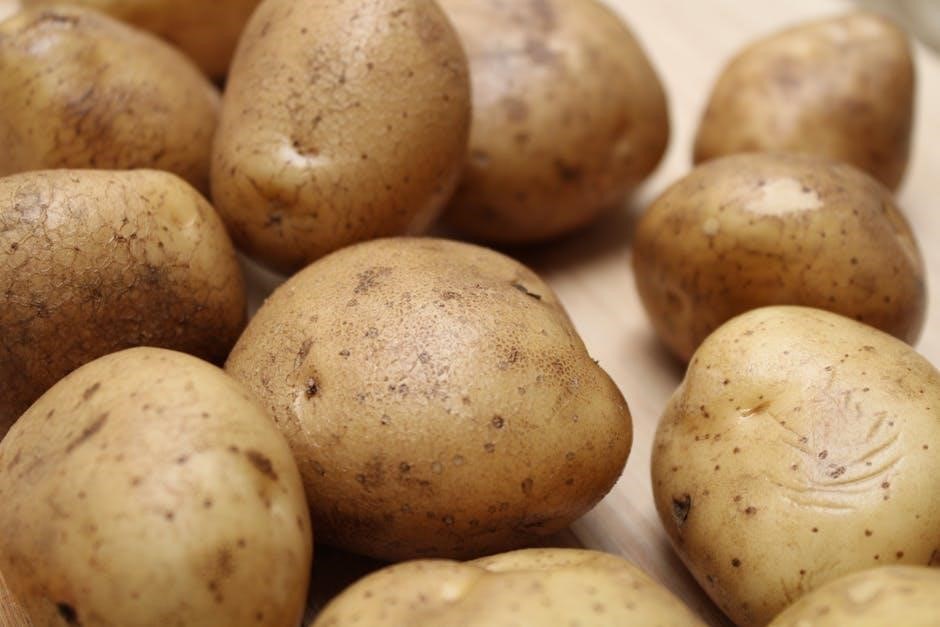
Idahoan instant potatoes represent a significant advancement in convenient meal preparation, offering a surprisingly satisfying alternative to traditional mashed potatoes․ These aren’t the powdery, bland flakes of the past; Idahoan has focused on retaining the texture and flavor of real potatoes․ The process involves cooking real Idaho potatoes, then carefully dehydrating them into flakes, preserving much of their original taste․

Understanding the core of Idahoan’s appeal lies in its simplicity and speed․ Unlike lengthy peeling, boiling, and mashing routines, Idahoan delivers fluffy, comforting mashed potatoes in minutes․ This makes them ideal for busy weeknights, holiday gatherings, or any occasion where a quick, dependable side dish is needed․ The brand’s commitment to quality ingredients and consistent results has solidified its position as a leading choice for instant potato lovers․

What Makes Idahoan Different?

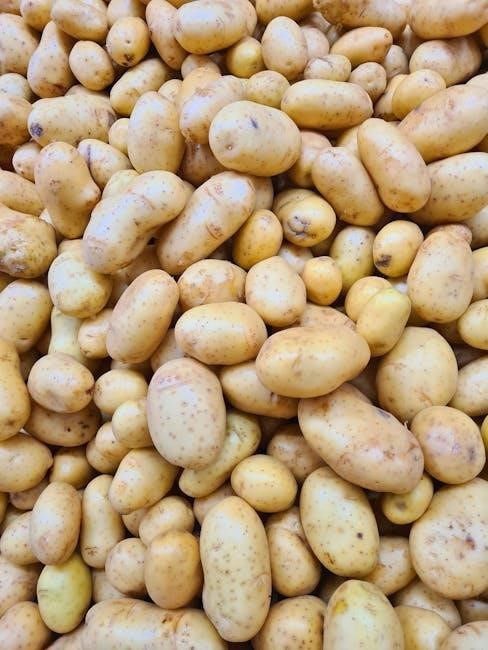
Idahoan distinguishes itself from competitors through a dedication to using 100% real Idaho potatoes, a key factor in achieving superior flavor and texture․ Unlike some brands that incorporate fillers or other potato varieties, Idahoan maintains a commitment to quality sourcing․ This focus translates to a noticeably richer, more authentic mashed potato experience․

Furthermore, Idahoan’s manufacturing process prioritizes preserving the natural characteristics of the potatoes․ The careful dehydration method minimizes flavor loss, resulting in flakes that rehydrate beautifully․ Consumers consistently praise Idahoan for its buttery flavor, even before adding additional ingredients․ This inherent taste profile, combined with the convenience factor, sets Idahoan apart, making it a preferred choice for those seeking a premium instant potato option․

Types of Idahoan Instant Potatoes Available

Idahoan offers a diverse range of instant potato products to cater to various preferences and culinary needs․ The classic line includes Original, Buttery, and Roasted Garlic varieties, providing foundational flavors for any meal․ For those seeking bolder tastes, Idahoan presents options like Cheddar, Bacon & Cheddar, and Four Cheese Potato flakes․

Beyond flavored flakes, Idahoan also features specific product lines like “Rustic BOULANGERIE” which offers a chunkier texture and enhanced flavor․ They also provide reduced-fat options for health-conscious consumers․ Convenient pouches and larger canister sizes are available, accommodating both individual servings and family-sized meals․ This extensive selection ensures there’s an Idahoan instant potato perfectly suited to every palate and occasion, offering versatility beyond simple mashed potatoes․

Basic Preparation Instructions: Classic Mashed Potatoes

Creating fluffy, delicious mashed potatoes with Idahoan is remarkably simple and quick․ Begin by bringing 2 cups of water to a rolling boil in a saucepan․ Gradually add 4 tablespoons of Idahoan instant potato flakes, stirring constantly to prevent clumping․ Reduce heat to low and continue stirring for approximately one minute, allowing the potatoes to fully hydrate and thicken․

For a richer, creamier texture, remove from heat and stir in ¼ cup of milk and 2 tablespoons of butter․ Season generously with salt and pepper to taste․ Adjust the water-to-flake ratio for desired consistency – more water for thinner potatoes, fewer flakes for thicker․ This basic recipe serves as a perfect base for customization with various seasonings and additions․

Water Temperature and Ratio

Achieving the perfect Idahoan mashed potato consistency hinges on precise water temperature and the correct flake-to-water ratio․ Always begin with water brought to a full, rolling boil; this ensures optimal hydration of the potato flakes․ The standard recommendation is 2 cups of boiling water for a 4-tablespoon serving of Idahoan flakes, yielding approximately four servings․

However, personal preference plays a key role․ For thinner, more fluid potatoes, incrementally increase the water amount – adding a tablespoon at a time – until the desired consistency is reached․ Conversely, for thicker, more substantial mashed potatoes, slightly reduce the amount of water or add a few extra flakes․ Experimentation is encouraged to find your ideal ratio!

Adding Milk and Butter for Creaminess

Elevating Idahoan instant potatoes from good to exceptional involves incorporating milk and butter․ After the initial hydration with boiling water, reduce heat to low․ Add cold milk – approximately ¼ to ½ cup per 4-tablespoon serving – for a richer, smoother texture․ The colder the milk, the better it tempers the potato mixture, preventing a gluey consistency․

Butter is equally crucial, contributing both flavor and luxurious creaminess․ Begin with 2 tablespoons of butter per 4-tablespoon serving, stirring until fully melted and incorporated․ For an even more decadent experience, consider using heavy cream or sour cream in place of some of the milk․ Adjust quantities to suit your taste, remembering that a little indulgence goes a long way!

Seasoning Options: Beyond Salt and Pepper

While salt and pepper are foundational, Idahoan instant potatoes truly shine with expanded seasoning profiles․ Garlic powder is a classic addition, offering a savory depth․ Onion powder complements garlic beautifully, creating a robust flavor base․ For a smoky note, consider a dash of paprika or smoked paprika․ Herbs like chives, parsley, or dill add freshness and visual appeal;

Don’t be afraid to experiment! A pinch of cayenne pepper introduces subtle heat, while a sprinkle of nutmeg provides warmth․ Cheese powder, beyond pre-flavored varieties, enhances the creamy texture․ Granulated chicken or beef bouillon adds umami․ Remember to taste and adjust seasonings gradually, building layers of flavor to create your perfect mashed potato experience․

Variations: Flavored Idahoan Potatoes

Idahoan offers a delightful range of pre-flavored options, but creating your own variations is remarkably easy․ For Cheesy Idahoan Potatoes, stir in shredded cheddar, Monterey Jack, or a blend of your favorites along with a dash of garlic powder․ Garlic Idahoan Potatoes benefit from roasted garlic mashed into the potatoes, or a generous amount of garlic powder and parmesan cheese․

Bacon & Cheddar Idahoan Potatoes are a crowd-pleaser – simply add cooked, crumbled bacon and shredded cheddar․ Explore further with additions like caramelized onions, sautéed mushrooms, or even a swirl of pesto․ Consider a spicy kick with jalapeños or a touch of hot sauce․ The possibilities are endless, allowing you to customize your Idahoan experience to suit any palate!

Cheesy Idahoan Potatoes

Transforming classic Idahoan instant potatoes into a cheesy delight is incredibly simple and satisfying․ Begin with your prepared potatoes, following the basic instructions for desired consistency․ While still warm, gradually incorporate shredded cheese – cheddar, Monterey Jack, Colby, or a flavorful blend work wonderfully․ Start with ½ cup of cheese per package of potatoes, adjusting to your preference․

For an extra layer of flavor, add a dash of garlic powder or onion powder alongside the cheese․ A swirl of sour cream or cream cheese can enhance the creaminess․ Consider a sprinkle of paprika for color and a subtle smoky note․ Stir gently until the cheese is fully melted and evenly distributed, creating a comforting and flavorful side dish perfect for any meal․

Garlic Idahoan Potatoes

Elevate your Idahoan instant potatoes with a robust garlic flavor – a simple addition that makes a significant difference․ After preparing the potatoes according to package directions, the key is incorporating garlic effectively․ You can use garlic powder, minced fresh garlic, or even roasted garlic for varying intensities․

For a quick and easy method, add 1-2 teaspoons of garlic powder directly to the hot potatoes and stir well․ If using fresh garlic, sauté 2-3 minced cloves in butter before adding the water for preparation, infusing the liquid with garlic flavor․ Roasted garlic, about 4-5 cloves mashed, provides a sweeter, more mellow taste․ Enhance the garlic with a sprinkle of parsley or chives for a fresh finish, creating a savory side dish․

Bacon & Cheddar Idahoan Potatoes

Transform your Idahoan instant potatoes into a decadent treat with the classic combination of bacon and cheddar cheese․ Begin by preparing the potatoes as directed on the package․ While the potatoes are still hot, it’s crucial to incorporate the bacon and cheddar for optimal melting and flavor distribution․

Crispy cooked bacon, crumbled into approximately 4-6 slices worth, should be generously mixed into the potatoes․ Follow this with 1 to 1․5 cups of shredded cheddar cheese – a sharp cheddar provides the most pronounced flavor․ Stir continuously until the cheese is fully melted and evenly distributed throughout the potatoes․ A dash of black pepper complements the smoky bacon and rich cheddar, completing this irresistible side dish․

Troubleshooting Common Issues

Even with simple instructions, occasional issues can arise when preparing Idahoan instant potatoes․ Lumps are a frequent concern, often stemming from insufficient stirring or adding too much potato flake at once․ To remedy this, gradually add the flakes while vigorously stirring, ensuring complete hydration․ If lumps persist, a quick whisk can help break them down․

Conversely, potatoes that are too thin require thickening․ Adding a tablespoon of instant potato flakes at a time, while stirring, will gradually increase the consistency․ Alternatively, a small amount of melted butter or cream cheese can contribute to a richer, thicker texture․ Remember to adjust seasoning after any additions․ Consistent stirring is key to avoiding both lumps and a watery consistency․

Lumpy Potatoes: Causes and Solutions

Lumps in your Idahoan instant potatoes are a common frustration, but easily addressed with a bit of know-how․ The primary cause is typically insufficient stirring during the rehydration process, leading to dry potato flakes clumping together․ Another culprit is adding too many flakes at once, overwhelming the liquid’s ability to fully incorporate them․

To prevent lumps, add the flakes gradually while continuously and vigorously stirring․ If lumps do form, don’t panic! A quick and thorough whisking action can often break them down․ For stubborn lumps, try adding a splash more warm liquid and continue whisking․ Avoid over-stirring once smooth, as this can result in gluey potatoes․ Patience and gradual addition are your allies against lumpiness!

Potatoes Too Thin: Thickening Techniques

If your Idahoan instant potatoes turn out thinner than desired, several techniques can restore a satisfying, fluffy consistency․ The most straightforward solution is to add a small amount of dry potato flakes, one tablespoon at a time, stirring well after each addition until the desired thickness is achieved․ Be cautious not to overdo it, as adding too many flakes can lead to a dry, pasty texture․

Alternatively, a teaspoon of cornstarch mixed with a tablespoon of cold water can be whisked into the potatoes and heated gently․ This creates a slurry that thickens as it cooks․ Another option is to incorporate a tablespoon of sour cream or cream cheese for added richness and body․ Remember to adjust seasoning after thickening!

Idahoan vs․ Other Instant Potato Brands

When comparing Idahoan instant potatoes to competitors like Big Y or Bells, key differences emerge in flavor, texture, and ease of preparation․ While some brands require extra effort to achieve palatable results, Idahoan consistently delivers a buttery, flavorful mashed potato experience straight from the package․ Reviews suggest Bells instant potatoes, though delicious, demand more user intervention for optimal taste․

Idahoan has seemingly perfected the balance between convenience and quality, offering a creamy consistency that rivals homemade mashed potatoes․ Other brands sometimes produce bland or powdery results, lacking the richness and satisfying mouthfeel of Idahoan․ This dedication to flavor and texture positions Idahoan as a preferred choice for many consumers seeking a quick, reliable side dish․

Nutritional Information and Ingredients

Idahoan instant potatoes primarily consist of dehydrated potatoes, providing a carbohydrate-rich base for a quick meal․ Additional ingredients typically include whey, buttermilk powder, salt, natural flavorings, and often, mono and diglycerides for enhanced texture and creaminess․ Some varieties also contain citric acid, and sodium acid pyrophosphate to maintain color and prevent clumping․

Nutritionally, a serving of Idahoan instant potatoes offers approximately 110-130 calories, with a moderate amount of potassium․ However, sodium content can be relatively high due to added salt․ Consumers should review specific product packaging for detailed nutritional information, as values vary between flavored options․ Understanding the ingredient list allows informed choices for dietary needs and preferences․

Storage and Shelf Life

Proper storage is crucial to maintain the quality and freshness of Idahoan instant potatoes․ Unopened packages should be stored in a cool, dry place, away from direct sunlight and moisture․ A pantry or cupboard is ideal, ensuring consistent temperature and minimal exposure to humidity․ Avoid storing near strong-smelling foods, as potatoes can absorb odors․

Idahoan instant potatoes boast a remarkably long shelf life, typically exceeding one to two years when stored correctly․ However, it’s essential to check the “best by” date printed on the package․ Once opened, transfer the remaining contents to an airtight container to prevent moisture absorption and maintain optimal flavor․ Discard any product exhibiting signs of spoilage, such as discoloration or an off-odor․

Creative Uses for Idahoan Instant Potatoes

Beyond classic mashed potatoes, Idahoan flakes unlock a world of culinary possibilities! Consider utilizing them as a fantastic topping for Shepherd’s Pie, creating a light and fluffy crust that complements the savory filling beautifully․ For a delightful breakfast or brunch option, whip up potato pancakes – simply combine the flakes with eggs, flour, and seasonings, then fry until golden brown and crispy․

These versatile flakes can also act as a thickening agent for soups and stews, adding body and a subtle potato flavor․ Experiment with incorporating them into bread dough for a softer texture, or even use them as a binder in meatloaf․ Don’t be afraid to get creative and explore how Idahoan instant potatoes can elevate your favorite recipes!

Shepherd’s Pie Topping

Transform your Shepherd’s Pie with a remarkably fluffy and flavorful topping made from Idahoan instant potatoes! Forget lengthy boiling and mashing – simply prepare the potatoes according to package directions, adjusting the liquid for desired consistency․ For an extra rich topping, incorporate a generous amount of butter and milk, or even a dollop of sour cream․

Spread the prepared Idahoan potatoes evenly over your savory meat and vegetable base․ A fork can create attractive peaks and valleys, encouraging browning during baking․ Bake until the topping is golden brown and bubbly, ensuring the pie is heated through․ This method delivers a comforting, classic texture without the fuss, making Shepherd’s Pie a weeknight winner!

Potato Pancakes

Idahoan instant potatoes offer a surprisingly effective shortcut to creating delicious, golden-brown potato pancakes! Begin by preparing the potatoes slightly thicker than usual – you want a consistency that holds its shape․ Once cooled, combine the potatoes with an egg, a tablespoon of flour, finely chopped onion, and your favorite seasonings like salt, pepper, and garlic powder․

Drop spoonfuls of the mixture into a hot, lightly oiled skillet․ Flatten slightly and cook for approximately 3-4 minutes per side, until crispy and golden․ Serve immediately with applesauce, sour cream, or your preferred toppings․ This method provides a quick and easy way to enjoy a comforting classic, perfect for breakfast, brunch, or a satisfying snack!

Tentative Plans & Idahoan: A Quick Side Dish

When plans are tentative, and time is short, Idahoan instant potatoes are a lifesaver! Their speed and ease of preparation make them ideal for those last-minute gatherings or when you’re unsure how many people you’ll be serving․ Forget lengthy peeling and boiling; simply add hot water, milk, and butter according to package directions․

Idahoan’s consistent quality ensures a reliably delicious side dish, even with minimal effort․ Season to taste – a simple sprinkle of salt and pepper works wonders, or get creative with herbs and spices․ This quick preparation allows you to focus on finalizing those tentative plans and enjoying the company of your guests, knowing a satisfying side is ready in minutes!

Finding Idahoan Products: Where to Buy

Locating Idahoan instant potatoes is remarkably easy, thanks to their widespread availability! Most major grocery store chains, including Kroger, Safeway, Albertsons, and Walmart, consistently stock a variety of Idahoan products․ You’ll typically find them in the aisle dedicated to potatoes, pasta, and rice – often near boxed meals and side dishes․

For added convenience, many retailers offer online ordering with options for in-store pickup or home delivery․ Check the store’s website or app to confirm availability․ Additionally, online marketplaces like Amazon carry a comprehensive selection of Idahoan instant potatoes, including unique flavors and bulk sizes․ Don’t forget to compare prices and shipping costs!

ninja hot and cold brewed system manual pdf

The Ninja system delivers tailored content, real-time updates, and entertainment, mirroring the MSN app’s functionality. Personalization and access to diverse information are key.

What is the Ninja Hot and Cold Brewed System?

The Ninja Hot and Cold Brewed System is a versatile appliance designed to deliver a customized beverage experience, much like the modern MSN app aims to personalize content. It provides access to both hot and cold brewing options, offering a wide range of possibilities from classic coffee to super concentrated cold brew.

Similar to MSN’s tailored feed, this system allows users to adjust settings for brew strength, temperature, and even utilize specialty brew modes for herbal teas. It’s about having information – or in this case, beverages – readily available and precisely to your liking. The system’s functionality echoes MSN’s goal of keeping users informed, productive, and entertained, but through the medium of expertly crafted drinks.

Why Use a Manual?

A manual for the Ninja Hot and Cold Brewed System, like accessing support for MSN, is crucial for unlocking the appliance’s full potential. While the system offers intuitive operation, a detailed guide ensures optimal performance and customization. It provides step-by-step instructions for everything from initial setup and cleaning to advanced feature utilization, mirroring the detailed information available on the MSN website.

Understanding the system’s components, troubleshooting common issues, and adhering to safety precautions – all detailed within the manual – guarantees a safe and satisfying brewing experience. Just as MSN’s help resources assist users, the manual empowers you to personalize your brewing process and maintain your Ninja system effectively, extending its lifespan and maximizing enjoyment.

System Components & Overview

Like MSN’s diverse content, the Ninja system features various parts working together to deliver tailored brewing experiences, from hot coffee to cold brew.

Included Parts List

Your Ninja Hot and Cold Brewed System arrives with several key components, much like the comprehensive features found within the MSN app. These include the Ninja Brewer itself, a glass carafe for enjoying your hot brews, and a dedicated Cold Brew basket for crafting smooth, concentrated cold coffee.

Additionally, you’ll find a reusable filter, eliminating the need for paper filters and promoting sustainability. A frother attachment is included for creating café-style specialty drinks. The system also comes with a water reservoir, a filter holder, and a cleaning brush for easy maintenance. Finally, a detailed instruction manual – similar to online guides for MSN – is provided to help you unlock the full potential of your new brewer.

System Diagram & Key Features

The Ninja Hot and Cold Brewed System boasts a streamlined design, akin to the user-friendly interface of MSN, prioritizing both functionality and ease of use. Key features include separate brewing pathways for hot and cold brews, ensuring optimal extraction for each.

The system’s intelligent thermal technology maintains precise brewing temperatures, while the Fold-Away Frother creates rich, creamy foam for specialty beverages. A programmable delay brew function allows for automated brewing, similar to scheduling updates on MSN. The intuitive control panel and clear display provide effortless operation. The removable parts are designed for easy cleaning, and the system’s compact footprint saves valuable counter space.

Setting Up Your Ninja System

Initial setup mirrors MSN’s personalization: configure settings to your preference, ensuring optimal performance and a tailored brewing experience from the start.

Initial Cleaning & Preparation

Before your first brew, a thorough cleaning process is essential, much like ensuring a fresh start with a new application like MSN. Remove all packaging materials and inspect the components for any shipping damage. Wash the carafe, brew basket, and any removable parts with warm, soapy water. Rinse completely and dry.

Run a full brewing cycle with water only – this helps to flush out any residual manufacturing residue. This initial cycle, similar to updating software, prepares the system for optimal performance. Discard the water after the cycle completes. Repeat this process one more time to guarantee a pristine brewing environment. Proper preparation ensures the purest flavor in every cup, mirroring MSN’s commitment to delivering clean, reliable information.

Water Reservoir & Filter Installation

The water reservoir is a key component, similar to how MSN provides a central hub for information. Carefully remove the reservoir from the system. Fill it with fresh, filtered water to the desired level, observing the maximum fill line. Installing the filter is crucial for optimal taste; insert the provided filter into the designated compartment within the reservoir.

Ensure the filter is securely seated before reattaching the reservoir to the base. A properly installed filter, like MSN’s tailored feed, enhances the overall experience. The system may require a brief initialization period after filter installation. Regularly replacing the filter, as recommended, maintains water quality and brew flavor, mirroring MSN’s continuous updates.

Powering On & Basic Operation

To power on your Ninja system, simply plug the unit into a grounded electrical outlet. The control panel will illuminate, displaying the available brew options – much like MSN’s diverse content categories. Use the intuitive buttons to navigate the menu and select your desired brew type.

Basic operation involves filling the reservoir, adding coffee grounds to the filter, and choosing a brew size. The system’s responsiveness mirrors the MSN app’s quick loading times. Press the start button to initiate the brewing process. The display will indicate the progress, and the system will automatically shut off upon completion, providing a seamless experience.

Hot Brew Functionality

Hot brew options offer diverse choices, similar to MSN’s varied news sections, including Classic, Rich, Over Ice, and Specialty brews for teas and more.

Classic Brew Mode

Classic Brew Mode delivers a rich, balanced flavor profile, ideal for everyday coffee enjoyment. This setting mirrors MSN’s core function – providing consistently reliable and familiar content. It’s the go-to option for a standard cup, utilizing a moderate brew time and temperature to extract optimal flavor from your favorite coffee grounds.

Similar to accessing headlines on MSN, Classic Brew is straightforward and user-friendly. Simply select the desired cup size, add your coffee, and initiate the brew cycle. The resulting coffee is smooth, aromatic, and perfect for starting your day or enjoying a midday pick-me-up. It’s a dependable choice, much like the consistent updates offered by Microsoft Start (formerly MSN).

Rich Brew Mode

Rich Brew Mode unlocks a bolder, more intense coffee experience, akin to diving deeper into specialized content on MSN. This setting employs a slower brewing process and slightly higher water temperature, maximizing flavor extraction from your coffee grounds. The result is a full-bodied, robust cup with pronounced notes – perfect for those who prefer a stronger, more assertive taste.

Like customizing your MSN feed, Rich Brew allows you to tailor your coffee to your preferences. It’s ideal for darker roasts or when you desire a particularly invigorating brew. This mode prioritizes flavor complexity, mirroring MSN’s ability to deliver detailed information on various topics. Enjoy a truly satisfying and flavorful cup with the Rich Brew setting.

Over Ice Brew Mode

Over Ice Brew Mode delivers a refreshingly cool coffee experience, similar to MSN’s real-time weather updates on a hot day. This innovative function brews a concentrated coffee directly over ice, preventing dilution and preserving the full flavor profile. The Ninja system intelligently adjusts brewing parameters – specifically, a smaller water volume and increased coffee-to-water ratio – to compensate for the melting ice.

This results in a perfectly balanced, chilled beverage without the watery taste often associated with iced coffee. Like the MSN app keeping you informed on the go, Over Ice Brew provides instant refreshment. It’s ideal for hot weather or anytime you crave a cool, invigorating pick-me-up. Enjoy a smooth, flavorful iced coffee with minimal effort!

Specialty Brew Modes (e.g., Herbal Tea)

Beyond coffee, the Ninja system, much like MSN’s diverse content feed, offers specialty brew modes for various beverages. These modes cater to different ingredient types, optimizing temperature and brew time for optimal extraction. For example, a dedicated Herbal Tea setting utilizes a lower temperature to prevent bitterness, preserving the delicate flavors of chamomile or peppermint.

This versatility mirrors MSN’s ability to provide tailored information. The system allows for experimentation with different teas, infusions, and even hot chocolate. Adjusting brew strength further enhances customization. Explore a world of flavorful possibilities beyond traditional coffee, enjoying perfectly brewed beverages with ease and convenience, just as MSN delivers entertainment and news.

Cold Brew Functionality

Like MSN’s constant updates, the Ninja system excels at cold brewing, offering a concentrated process for smooth, less acidic coffee, mirroring tailored content delivery.

Cold Brew Process Explained

The Ninja system’s cold brew functionality, much like MSN’s personalized feed, delivers a customized experience. It utilizes a prolonged steeping process, typically 10-12 hours, immersing coffee grounds in cold water. This contrasts sharply with hot brewing, extracting different flavor compounds.

The result is a super concentrated coffee base, similar to MSN’s focused news delivery. This concentrate can then be diluted with water or milk to your desired strength. The system’s design ensures minimal acidity and bitterness, offering a remarkably smooth and flavorful cold brew. It’s a process of patient extraction, mirroring the constant updates provided by MSN, ultimately yielding a superior coffee experience.

Super Concentrated Cold Brew

Ninja’s Super Concentrated Cold Brew setting, akin to MSN’s efficient information delivery, maximizes flavor extraction. This mode utilizes a higher coffee-to-water ratio and extended steeping time, resulting in an intensely flavorful concentrate. It’s designed for those who prefer a robust coffee experience, similar to customizing your MSN feed with preferred topics.

This concentrate offers exceptional versatility; dilute it with water for a standard cold brew, milk for a creamy beverage, or even incorporate it into coffee-based desserts. The concentrated nature also means less waste and a longer-lasting supply. Like MSN’s ability to track stocks, this feature provides a powerful and efficient coffee solution.

Cold Brew Recipes & Variations

Explore a world of cold brew possibilities with your Ninja system, mirroring MSN’s diverse content offerings. Beyond the basic cold brew, experiment with flavored syrups – vanilla, caramel, or hazelnut – for a personalized touch, much like customizing your MSN feed. Try adding a splash of milk (dairy or non-dairy) or a sprinkle of cinnamon for added warmth.

For a refreshing twist, blend cold brew with ice and fruit, creating a cold brew smoothie. Consider a mocha variation by adding chocolate syrup and a touch of whipped cream. The concentrated brew allows for creative experimentation, similar to exploring different sections within MSN. Discover your perfect cold brew recipe and enjoy!

Cleaning & Maintenance

Regular cleaning, like managing your Microsoft account, ensures optimal performance and longevity of your Ninja system. Consistent upkeep is vitally important.

Daily Cleaning Procedures

Maintaining your Ninja system daily is crucial for consistently fresh brews and optimal performance. After each use, promptly rinse the removable parts – the carafe, filter basket, and lid – with warm, soapy water. Ensure all components are thoroughly rinsed to remove any residue.

The MSN app’s focus on staying informed mirrors the need to keep your Ninja clean. Wipe down the exterior of the system with a damp cloth. Avoid abrasive cleaners, as they can damage the finish. Regularly check the water reservoir for any mineral buildup, and wipe clean as needed. Proper daily care extends the life of your brewer and guarantees delicious coffee every time, just like personalized content keeps you engaged.

Descaling the System

Regular descaling is vital to remove mineral buildup within your Ninja Hot and Cold Brewed System, ensuring optimal brewing performance and extending its lifespan. The frequency depends on water hardness, but every 3-6 months is generally recommended. Use a descaling solution specifically designed for coffee makers, or a mixture of white vinegar and water.

Follow the Ninja system’s descaling cycle instructions, typically involving running the solution through a brew cycle followed by several clear water rinse cycles. Much like MSN’s updates keep the platform running smoothly, descaling keeps your brewer functioning at its best. Ignoring this step can lead to reduced brew speed and altered coffee flavor, impacting your daily enjoyment.

Troubleshooting Common Issues

If your Ninja system isn’t powering on, check the power cord and outlet, mirroring the need for a stable connection like accessing MSN. For slow brewing, descaling is often the solution, removing mineral buildup. If the coffee tastes weak, ensure proper coffee-to-water ratios and consider using the ‘Rich Brew’ mode.

Leaks can indicate improper component assembly; re-check all parts. Error messages should be addressed by consulting the manual or Ninja’s support resources, similar to seeking help with Microsoft Start. A Bastion session error suggests revisiting the Azure Portal login. Regular maintenance and referencing the manual will resolve most issues, keeping your brewing experience seamless.

Advanced Features & Settings

Personalize your brewing experience with delay brew, temperature adjustments, and strength customization, much like tailoring your MSN feed for preferred content.

Programmable Delay Brew

The Ninja system’s Delay Brew feature allows you to schedule your coffee to be ready precisely when you want it, offering convenience similar to MSN’s tailored content delivery. This function enables pre-setting a brew time up to 24 hours in advance. Imagine waking up to freshly brewed coffee, or returning home to a pot ready to enjoy – all without lifting a finger at the desired moment.

To utilize this feature, simply navigate to the Delay Brew setting on your Ninja’s control panel. Set the desired brew time, select your preferred brew type (Classic, Rich, Over Ice, or Specialty), and the system will automatically initiate brewing at the programmed time. It’s a fantastic way to streamline your morning routine and enjoy a perfect cup, effortlessly, just like a personalized MSN feed.

Adjusting Brew Temperature

The Ninja Hot and Cold Brewed System offers adjustable brew temperature settings, allowing for optimal extraction based on your chosen coffee or tea type – mirroring MSN’s customizable content feed. This feature is crucial for achieving the best flavor profile from different blends. Lower temperatures are ideal for delicate teas and lighter roasts, preventing bitterness.

Higher temperatures are better suited for darker roasts and bolder flavors, ensuring a full-bodied brew. Access the temperature control through the system’s settings menu; Experimenting with different temperatures will unlock the full potential of your favorite beverages, similar to exploring diverse topics on MSN. Precise temperature control guarantees a consistently delicious cup, tailored to your preferences.

Customizing Brew Strength

The Ninja system allows users to customize brew strength, much like personalizing your MSN feed with preferred topics. This feature provides control over the coffee-to-water ratio, resulting in brews ranging from mild and balanced to bold and intense. Select from options like “Classic,” “Rich,” or “Over Ice” to adjust the strength automatically.

For a truly tailored experience, manually adjust the coffee grounds used per brew cycle. More grounds yield a stronger brew, while fewer grounds create a lighter flavor. This flexibility ensures you can consistently achieve your ideal coffee strength, mirroring the tailored experience offered by MSN. Experimentation is key to discovering your perfect brew, just as exploring MSN reveals relevant content.

Safety Precautions

Always initiate sessions from the Azure Portal, mirroring secure access to MSN services. Prioritize electrical safety and heed all warnings for optimal operation.

Important Safety Warnings

Before operating your Ninja system, carefully review all provided safety guidelines. Like accessing MSN services securely via the Azure Portal, proper setup is crucial. Never operate the appliance with a damaged cord or plug; this presents a significant electrical hazard. Avoid immersing the base in water or other liquids.

Hot surfaces can cause burns – exercise extreme caution during and after brewing. Keep the system out of reach of children. Do not use outdoors. Always unplug the system before cleaning or when not in use, mirroring responsible digital device management. Ensure the carafe is properly seated before brewing to prevent spills and potential injuries. Follow all instructions diligently for safe and enjoyable operation.

Electrical Safety Guidelines

To ensure safe operation, always verify your outlet voltage matches the system’s requirements, similar to ensuring a secure Bastion session initiation point. Never operate the Ninja system with a damaged power cord or plug – replace immediately. Avoid using extension cords; plug directly into a grounded outlet.

Do not handle the appliance with wet hands. Unplug the system before cleaning, and never immerse the base in water; If the system malfunctions or exhibits any electrical issues, discontinue use and contact Ninja customer support; Like managing your Microsoft account securely, prioritize electrical safety. Regular inspection of the cord for damage is vital. Proper grounding minimizes shock risk, ensuring a safe brewing experience.

Warranty Information & Support

Ninja provides warranty details and customer support, mirroring Microsoft’s account management resources. Access assistance for issues, similar to a Bastion session restart.

Ninja Warranty Details

Ninja’s commitment to quality is backed by a comprehensive warranty program, designed to ensure customer satisfaction with their Hot and Cold Brewed System. Similar to managing Microsoft accounts and security preferences, understanding your warranty coverage is crucial. The standard limited warranty typically covers defects in materials and workmanship for a specified period, often one year from the date of purchase.

This warranty doesn’t cover damage resulting from misuse, accidents, or unauthorized repairs. Proof of purchase is required for all warranty claims. Extended warranties may also be available for purchase, offering additional peace of mind. For detailed warranty information, including terms and conditions, please refer to the official Ninja website or the documentation included with your product. Retaining your purchase receipt is vital for a smooth warranty process.

Contacting Ninja Customer Support

Need assistance with your Ninja Hot and Cold Brewed System? Ninja offers multiple channels for customer support, mirroring the accessibility of MSN’s information resources. You can find helpful FAQs, troubleshooting guides, and instructional videos on the official Ninja website. For direct assistance, a dedicated customer support team is available via phone and email.

Response times may vary depending on the contact method and volume of inquiries. Online chat support is also frequently offered for immediate assistance. When contacting support, have your model number and purchase date readily available. Like accessing personalized news feeds on MSN, Ninja aims to provide a tailored and efficient support experience. Visit their website for the most up-to-date contact information.

the extra’s academy survival guide chapter 1

The Extras Academy Survival Guide Chapter 1: A Deep Dive

Chapter 1 of The Extras Academy Survival Guide immediately throws readers into a challenging scenario: Ed RothTaylor, a reincarnated villain,
is abruptly expelled and must quickly adapt to survive, utilizing his prior gaming knowledge for shelter and essential tools․

This initial chapter establishes the Extras Academy as a unique institution catering to non-player characters within the game’s world,
setting the stage for a compelling survival narrative․

The Extras Academy, as introduced in Chapter 1, is a remarkably specialized institution within the game world of The Extras Academy Survival Guide․ It’s not a place for heroes or central characters, but specifically designed for “Extras” – those NPCs often overlooked or treated as disposable within the game’s narrative․

This academy serves as a last resort, a chance for these characters to gain agency and potentially alter their predetermined fates․ The premise is intriguing: what happens when the background characters become aware of their roles and strive for survival? The initial chapter highlights the academy’s unique purpose, offering a haven – albeit a challenging one – for those deemed insignificant by the game’s system․

Ed RothTaylor’s arrival, already disadvantaged, immediately showcases the academy’s harsh realities and the uphill battle faced by its students․ It’s a world where knowledge of the game mechanics is paramount, and survival depends on resourcefulness and strategic thinking․

The Premise: Reincarnation as a Villain

The core premise of The Extras Academy Survival Guide revolves around the protagonist’s unusual reincarnation․ He finds himself inhabiting the body of Ed RothTaylor, a “third-rate extra villain” within his favorite game․ This isn’t a power fantasy; it’s a precarious situation, as Ed is immediately disowned and cast out, lacking ambitions beyond simply surviving․

Chapter 1 establishes the inherent disadvantage of this reincarnation․ Unlike a hero’s journey, Ed begins with limited resources, a negative reputation, and the knowledge that he’s essentially a disposable character․ His prior gaming experience becomes his most valuable asset, offering insight into the world’s mechanics and potential strategies․

The narrative cleverly subverts typical isekai tropes, focusing on the struggles of a character with no inherent power or destiny, forced to carve out a life for himself against the odds․ It’s a compelling starting point for a survival story․

Ed RothTaylor’s Disadvantageous Start

Chapter 1 immediately plunges Ed RothTaylor into a desperate situation․ Having been “kicked out of his dorm,” he’s left with virtually nothing – no resources, no allies, and a pre-established reputation as a villainous character․ This expulsion isn’t a dramatic confrontation, but a cold dismissal highlighting his low status within the Academy․

His disadvantage stems from being an “extra,” a non-essential character in the game’s original narrative; This means he lacks the inherent skills, plot armor, and support systems afforded to main characters․ Survival isn’t guaranteed; it requires ingenuity and a willingness to exploit his knowledge of the game’s world․

Ed’s initial focus, therefore, is purely pragmatic: securing shelter and acquiring basic tools․ This establishes a grounded, realistic tone, emphasizing the immediate challenges of his predicament and the necessity of resourcefulness․

Chapter 1: Initial Challenges — Shelter and Tools

Chapter 1 centers around Ed RothTaylor’s immediate struggle for survival following his expulsion․ Devoid of resources, his primary objective is constructing a rudimentary shelter – a critical first step against the elements and potential threats․ This isn’t a glamorous undertaking; it’s a gritty, practical effort focused on basic needs․

Leveraging his prior gaming experience, Ed understands the importance of tool creation․ He begins gathering materials, applying his in-game knowledge to craft essential implements for resource acquisition and defense․ This demonstrates his proactive approach and highlights the value of his unique perspective․

These initial challenges aren’t merely obstacles; they’re opportunities for Ed to establish a foundation and demonstrate his resourcefulness․ The chapter effectively conveys the harsh realities of his situation and the demanding nature of his survival․

Understanding the World of The Extras Academy

The Extras Academy exists within a game world where “Extras” – non-playable characters – hold significance, and the Academy uniquely prepares them for unforeseen circumstances․

The Significance of “Extras” in the Game World

Within the intricate game world of The Extras Academy Survival Guide, “Extras” represent the vast population of non-playable characters that populate the background, often overlooked by the main protagonists․

However, the narrative cleverly subverts expectations by focusing on these characters, revealing their potential for agency and survival․ Traditionally, Extras exist solely to facilitate the main storyline, lacking individual goals or development․

The Academy’s very existence acknowledges their inherent value and the possibility of their stories unfolding independently․ This concept challenges the conventional game structure, highlighting the often-ignored lives and struggles of those considered insignificant․

Ed RothTaylor’s reincarnation as an Extra villain underscores this shift in perspective, forcing a re-evaluation of their role and importance within the game’s ecosystem․ They are not merely props, but individuals capable of resilience and adaptation․

The Academy’s Unique Purpose and Curriculum

The Extras Academy distinguishes itself as a specialized institution designed specifically for characters classified as “Extras” within the game world, a concept rarely explored in typical gaming narratives․

Unlike academies focused on nurturing heroes or powerful individuals, this institution caters to those deemed expendable, offering them a chance at survival and self-improvement․ The curriculum isn’t geared towards mastering combat or magic, but rather towards practical skills essential for navigating a hostile environment;

This includes resource management, crafting, and strategic thinking – abilities crucial for an Extra attempting to carve out a life independent of the main storyline․

The Academy’s purpose isn’t to create powerful figures, but to equip its students with the tools necessary to simply exist and potentially thrive, defying their predetermined fate as background characters․

The Game Mechanics Influencing Survival

Survival in The Extras Academy is heavily influenced by the underlying game mechanics, which Ed RothTaylor leverages due to his prior experience as a player․

The world operates with a system of stats, skills, and resource gathering, familiar to anyone who has played the original game․ However, as an Extra, Ed begins with significantly disadvantageous stats and limited access to resources, creating a steep initial challenge․

Understanding these mechanics – crafting recipes, monster behaviors, and the value of different materials – is paramount to his survival․

The game’s logic dictates that Extras are often overlooked, allowing Ed to exploit loopholes and opportunities that wouldn’t be available to more prominent characters․ This knowledge is his greatest asset, allowing him to overcome his inherent weaknesses․

Key Elements of Chapter 1

Chapter 1 centers on Ed’s resourcefulness, utilizing game knowledge to secure shelter and tools after expulsion․
His immediate goals involve overcoming initial obstacles and establishing a basic foundation for survival․

This chapter highlights the core premise of leveraging past gaming experience in a harsh, new reality․

The Protagonist’s Knowledge Base: Leveraging Game Experience

Ed RothTaylor’s unique advantage stems from his prior life as a player of the game in which he is now a character․ This isn’t a typical reincarnation; he inhabits the body of a disowned, third-rate villain – an “Extra” – within the game world․

However, this prior experience isn’t a power fantasy․ He understands the game’s mechanics, resource locations, and potential dangers, but lacks the inherent skills or stats of a main character․ Chapter 1 demonstrates his immediate application of this knowledge, focusing on practical survival․

He doesn’t possess extraordinary abilities, but he knows where to find materials, how crafting systems work, and anticipates certain challenges․ This allows him to prioritize shelter and tool creation, giving him a crucial edge despite his disadvantageous starting position․ His gaming background is not a shortcut to power, but a vital tool for basic survival․

Building a Foundation: Early Resource Gathering

Chapter 1 heavily emphasizes the immediate need for resource acquisition following Ed RothTaylor’s expulsion․ Having been kicked out of his dorm, his initial focus isn’t on grand schemes, but on securing basic necessities – shelter, tools, and sustenance․

This involves scavenging for materials within the surrounding environment․ His prior gaming knowledge proves invaluable here, allowing him to identify locations where useful resources are likely to be found․ He understands the crafting systems, enabling him to convert raw materials into functional items․

The early stages are characterized by a relentless pursuit of wood, stone, and other fundamental components․ This isn’t glamorous work, but it’s essential for establishing a safe base and creating tools for more efficient gathering․ This foundation is critical for long-term survival․

Initial Obstacles and Immediate Goals

Ed RothTaylor’s immediate predicament in Chapter 1 is stark: homelessness and a lack of resources after being expelled from the Extras Academy․ This expulsion isn’t merely an inconvenience; it’s a life-threatening situation, forcing him into a desperate struggle for survival․

His primary, immediate goal is securing shelter․ Exposure to the elements and potential dangers of the surrounding area necessitate a safe haven․ Simultaneously, he needs tools – even rudimentary ones – to gather resources and defend himself․

Beyond these basic needs, a looming obstacle is his status as a disowned villain․ This carries social implications and potential hostility from others within the game world․ Overcoming these initial hurdles is paramount to establishing a foothold and charting a path forward․

Beyond Chapter 1: The Novel’s Scope

The Extras Academy Survival Guide currently spans 287 translated chapters, expanding far beyond the initial struggles of Chapter 1, with a popular Manhwa adaptation available․

Current Translation Status: Chapter 287

As of today, November 2nd, 2026, the novel The Extras Academy Survival Guide has an impressive 287 chapters translated and available for readers․ This substantial progress signifies a dedicated translation team consistently delivering content to the eager fanbase․ While Chapter 1 introduces the core premise – Ed RothTaylor’s desperate fight for survival after being expelled – the narrative expands dramatically across these 287 chapters․

Readers can consistently find the latest updates at platforms like Asura Scans, which diligently maintains a current listing of translated material․ The ongoing translation ensures that fans aren’t left waiting long to discover the continuing adventures of Ed and the intricacies of the Extras Academy․ The consistent release schedule demonstrates the novel’s enduring popularity and the commitment of those involved in bringing it to an English-speaking audience․

The Manhwa Adaptation and its Popularity

The popularity of The Extras Academy Survival Guide extends beyond the original novel, flourishing through a captivating manhwa adaptation․ This visual interpretation brings the story of Ed RothTaylor’s struggle to life, attracting a wider audience and further fueling the fanbase․ The manhwa faithfully adapts Chapter 1, vividly portraying his sudden expulsion and desperate need for shelter, resonating with readers who enjoy a dynamic visual experience․

The manhwa’s success is evident in its widespread readership and enthusiastic online discussions․ Fans appreciate the artwork and how it enhances the emotional impact of Ed’s journey․ The adaptation has introduced many new readers to the series, solidifying The Extras Academy Survival Guide as a prominent title within the fantasy and reincarnation genres․ It’s a testament to the story’s compelling premise and engaging characters․

Community Discussions and Fan Theories

Online communities dedicated to The Extras Academy Survival Guide are vibrant with discussion, particularly surrounding the events of Chapter 1․ Fans dissect Ed RothTaylor’s initial disadvantage, speculating on how his knowledge of the game will truly aid his survival against the odds․ A common topic is the extent of the Academy’s challenges and the true motives behind expelling a villain-character so early․

Fan theories abound regarding the larger game world and the significance of “Extras” like Ed․ Some believe his reincarnation isn’t random, while others predict a hidden purpose to the Academy’s curriculum․ Discussions also center on potential allies and enemies Ed might encounter, and how his actions in Chapter 1 will shape his future․ The community’s engagement demonstrates the story’s captivating nature and encourages deeper analysis․

Technical Aspects & Related Software (Based on Online Searches)

OMV-Extras installation presents challenges for some users, with troubleshooting often needed for plugins like Minidlna; ․deb packages are a common installation method․

OMV-Extras: Installation and Troubleshooting

Users attempting to install OMV-Extras have encountered various issues, particularly when aiming to integrate plugins like Minidlna․ The official omv-extras․org provides ․deb packages for installation, but the process isn’t always straightforward․ Some report difficulties executing the installation script, even with root privileges, requiring careful attention to permissions and dependencies․

Troubleshooting often involves verifying root access and ensuring the script is executable․ A common approach is to install directly from the command line as root, bypassing potential permission errors․ However, alternative methods exist for those preferring not to use root, though these may require more advanced configuration․

Reports from November 2024 and October 2022 highlight persistent installation problems, suggesting ongoing challenges with the package and its compatibility with different OpenMediaVault setups․ Detailed guides are available online, but successful installation often requires a methodical approach and careful adherence to instructions․

OMV-Extras and Plugin Compatibility (Minidlna)

A frequent use case for OMV-Extras is enabling the Minidlna plugin, facilitating media streaming․ However, compatibility isn’t always seamless․ Users often install OMV-Extras specifically to gain access to Minidlna’s functionality, but encounter issues during or after the installation process․

Successfully integrating Minidlna requires a correctly installed and functioning OMV-Extras environment․ Troubleshooting often centers around dependency conflicts or incorrect plugin configurations․ Ensuring OMV-Extras is updated to the latest version can sometimes resolve compatibility problems with Minidlna․

Online forums reveal that some users experience difficulties even after seemingly successful installation, requiring manual configuration or adjustments to Minidlna’s settings․ While The Extras Academy Survival Guide doesn’t directly relate to this, the persistence needed mirrors Ed RothTaylor’s survival efforts․

Installation Methods for OMV-Extras (․deb Packages)

OMV-Extras is commonly installed using ․deb packages, offering a straightforward method for OpenMediaVault users․ The official website, omv-extras;org, provides these packages for download․ Installation typically involves using the command line as root, navigating to the download directory, and executing the ‘dpkg -i’ command followed by the ․deb file name․

However, dependency issues can arise, requiring the use of ‘apt-get install -f’ to resolve missing packages․ Some users report challenges with permissions, emphasizing the necessity of running commands as root․ This meticulous process parallels Ed RothTaylor’s careful resource gathering in The Extras Academy Survival Guide․

Alternative methods include using ‘apt install ․/package_name․deb’ which automatically handles dependencies․ Successful installation unlocks access to various plugins, enhancing OMV’s functionality․